Here you can find the answers to frequently asked questions in your daily work with Inxmail Professional.
Advanced Template
Make sure the following main elements are included in all of your newsletters:
-
Settings
-
Header
-
Welcome
-
Footer
These main elements represent the outer frame of your newsletter. They vary little from newsletter to newsletter and, unlike other elements, they are used only once per newsletter. They are already inserted into your mailing template by default.
The "PLUS" behind the template name means that you have the option to create dynamic landing pages in addition to the other features of the Advanced Template.
On the landing page you can store more detailed information - e.g. concerning one of the articles in your mailing. You can edit dynamic web pages directly within the mailing editor without any prior knowledge of HTML and without having your own server. The contents of your landing page are displayed in the same style as your mailing, and are automatically linked to the related mailing article. By sending your mailing, you make the landing page go live.
Advantages of the Advanced Template
-
No prior knowledge of HTML required
-
Integration of external content
-
Flexible use, highly modular
-
Attention-grabbing elements like header graphic, skyscraper or graphic container
-
Mobile optimization for all devices
-
Integrated web tracking
Inxmail New Xperience Editor: The layout options in the Advanced Template are not enough for you? You would like to customize even more? You would like to centrally store your corporate design settings and edit your mailing via drag & drop?
Contact us by emailing Care-Consulting@inxmail.de or get an overview of the possibilities offered by Inxmail New Xperience.
You can find out what to look out for when copying and reusing an existing mailing in the article: Copy a template mailing.
Step by step
-
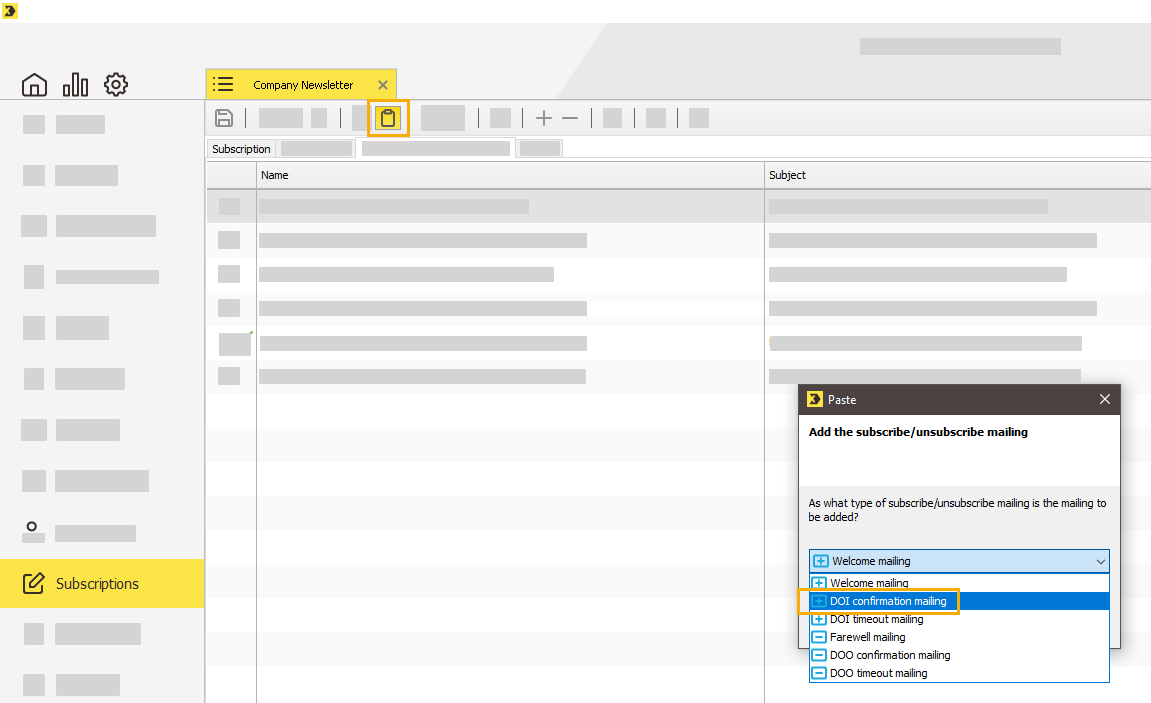
Copy and paste a mailing into the "Subscribe/unsubscribe mailings" tab of the "Subscriptions" agent. Use a mailing that you have already designed in your corporate design.
-
Insert the mailing as a "DOI confirmation mailing".
-
Customize mailing name, subject, auto preview, and mobile teaser.
-
Insert a DOI confirmation link. Instead of a plain text link, you can also use a (text) Button or a Button as an image.
Design the link or button according to your corporate design.
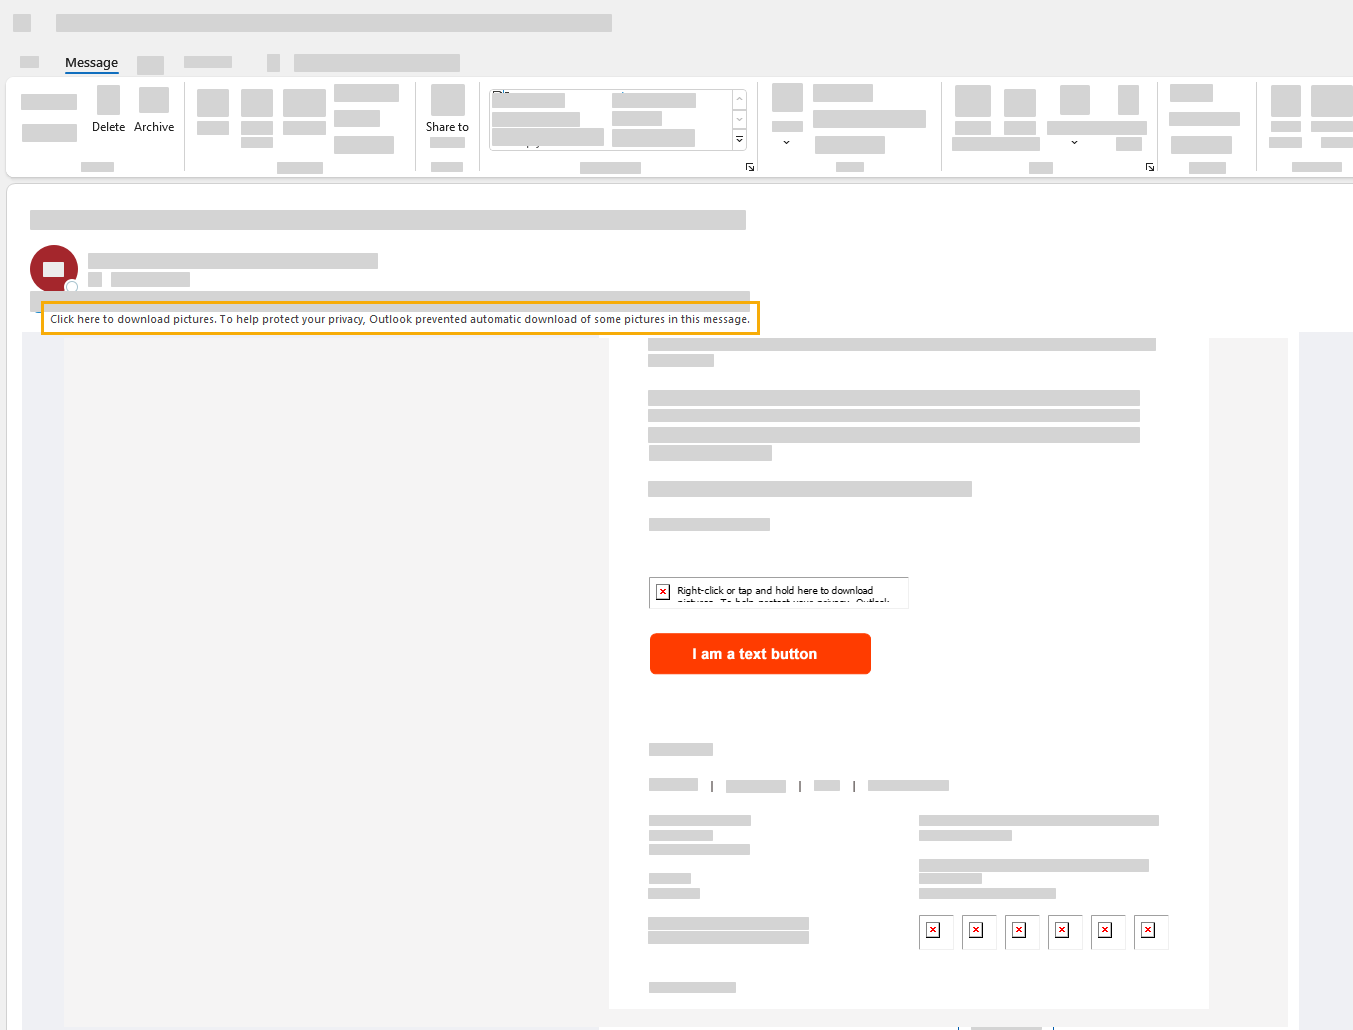
Recommendation: We recommend you to work with a (text)Button, because a Buttons as an image will not be displayed if your recipients have suppressed loading images.
See screenshot from an email client with suppressed images:
-
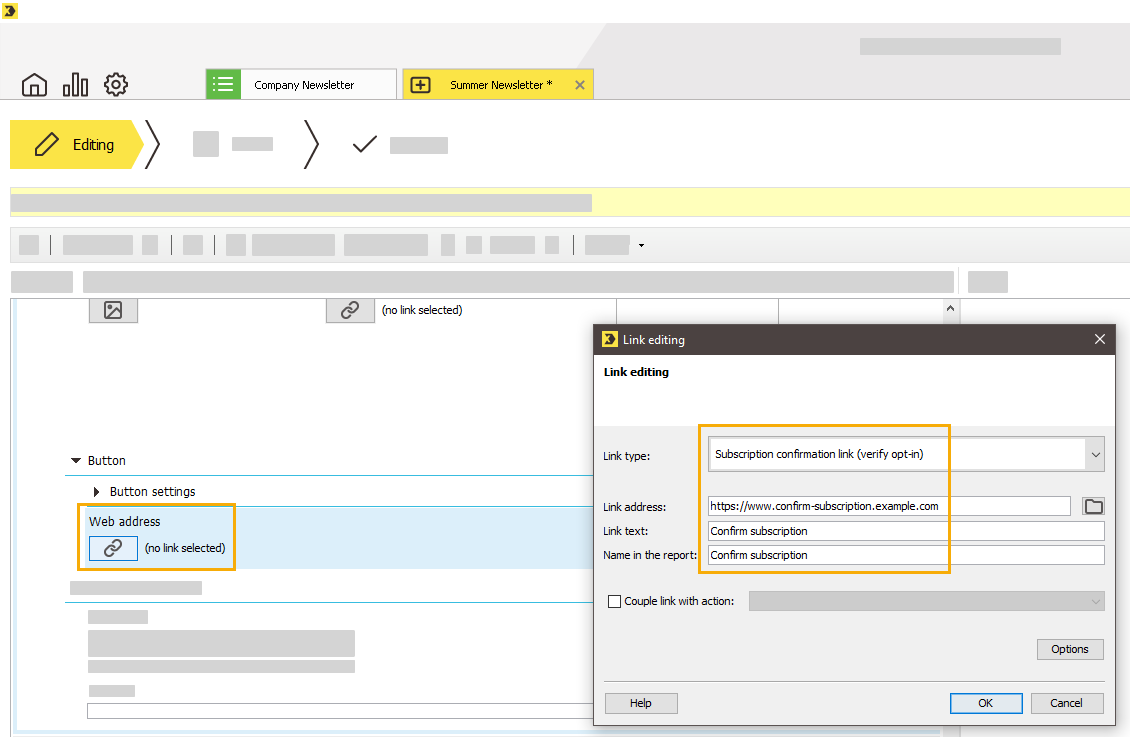
Link your button or link text per link type "Subscription confirmation (verify opt-in)".
-
You must specify a landing page as the link address. Create this new landing page in your CMS and enter the landing page in the "Link editing" dialogue.
-
You have created a DOI mailing in your corporate design.
For information on optimum image sizes, see the Smart Guide Image sizes in your mailing and the Image sizes in the Advanced Template section of the online help.
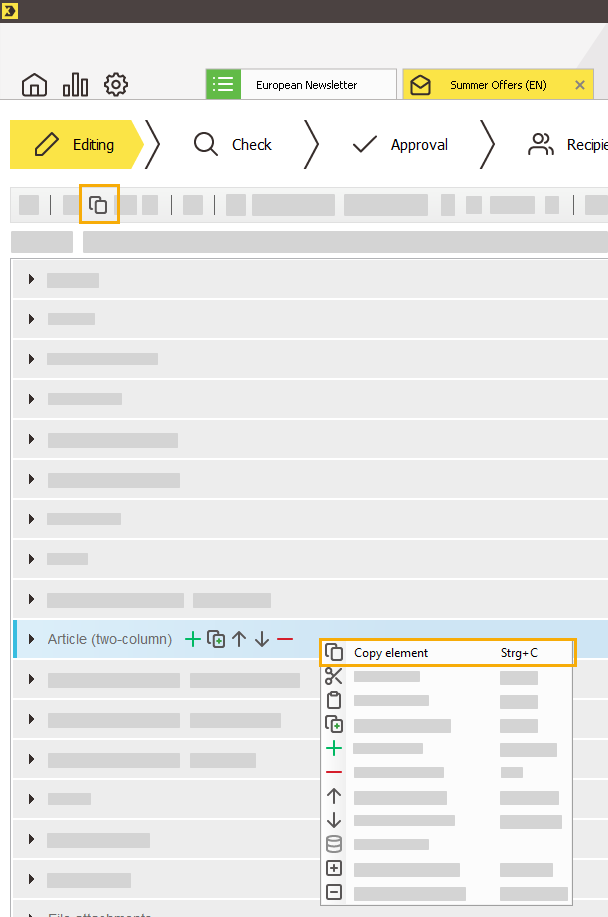
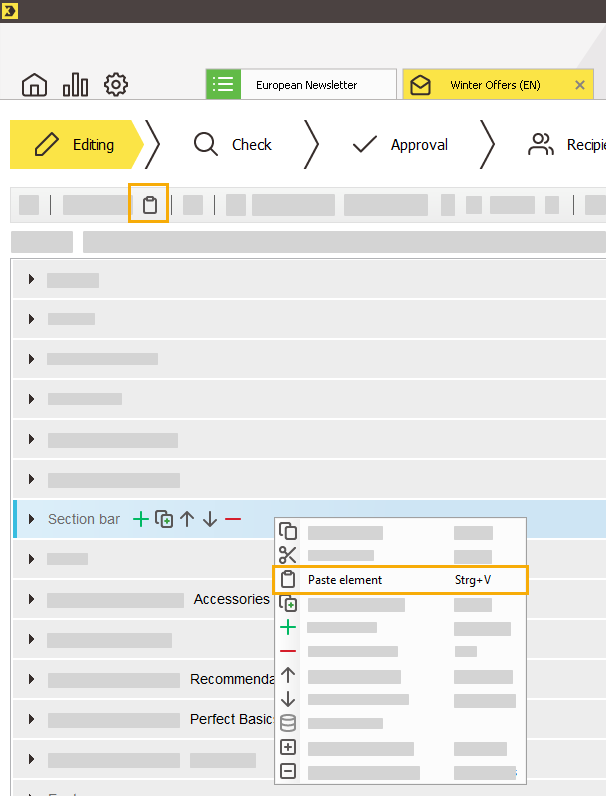
You can copy elements of the Advanced Template across mailings.
-
To do this, right-click the element you want to copy and then click "Copy element".
Another option is to select the element and click "Copy" in the toolbar.
-
In the target mailing, right-click an element and click "Paste element".
Another option is to select the element after which you want to paste the copied element and click "Paste" in the toolbar.
Import recipient data
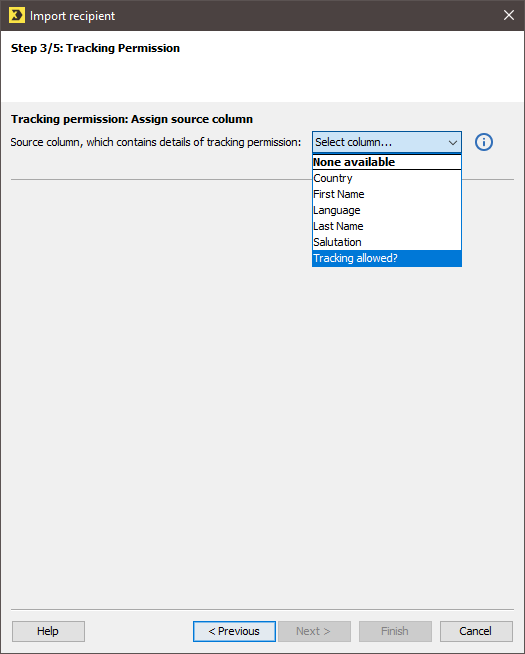
See the following link to learn what a Tracking Permission is.
If your source file does not contain a column with tracking permission information, select "None available" in step 3/5 of the data import. Only then can you click "Next".
Yes. You can unsubscribe recipients by importing them into to the "Unsubscribed" tab. Be sure to check the "Unsubscribe this recipient" checkbox in the last step of the data import.

Step by step
-
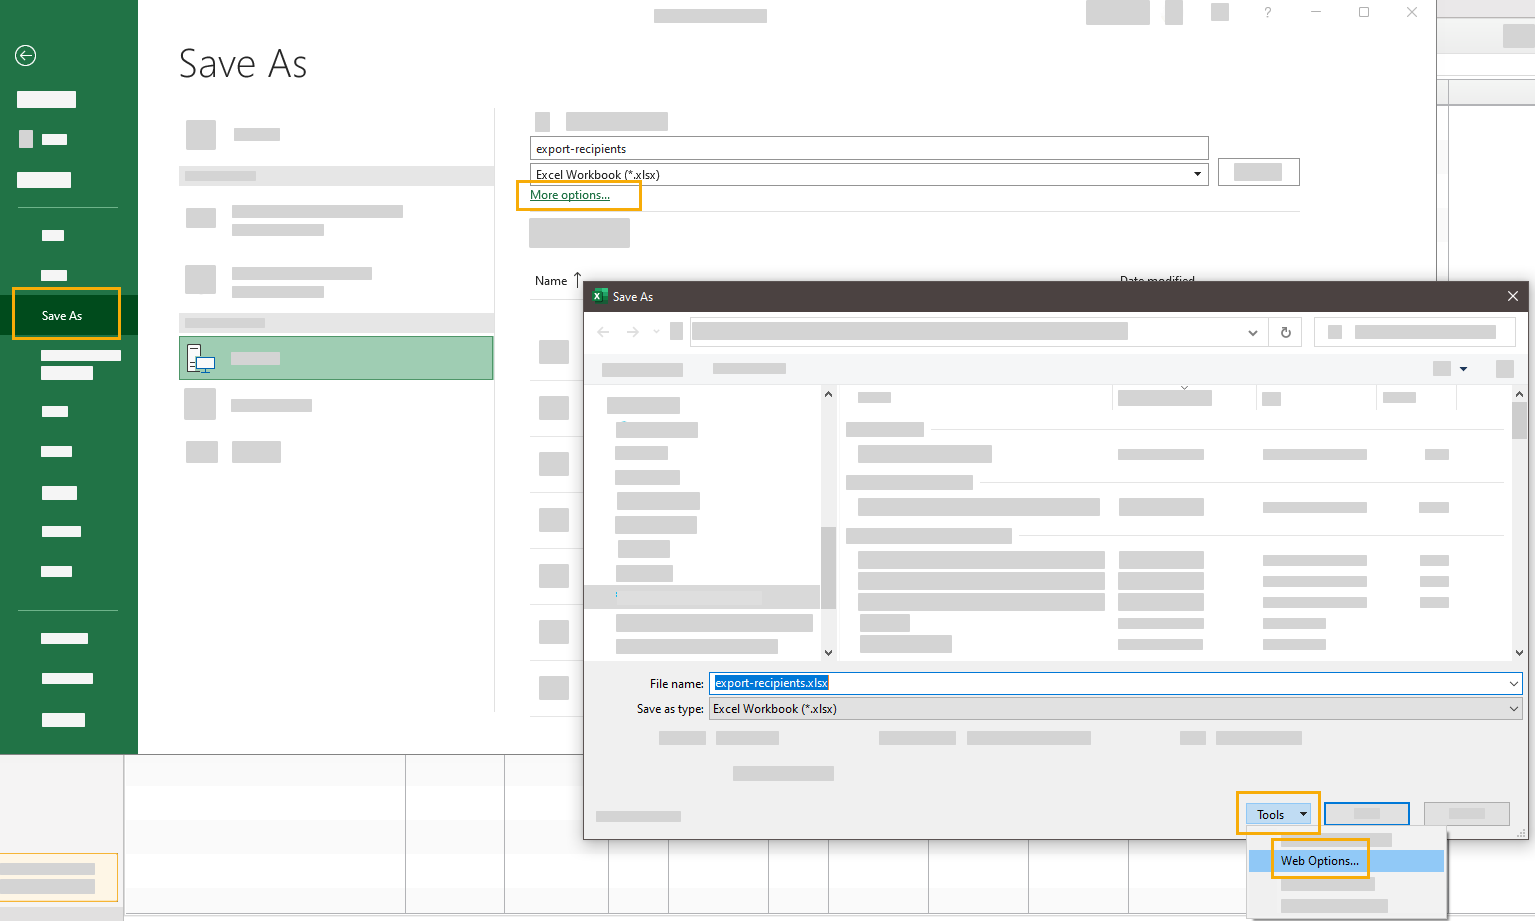
Export your recipients as an Excel file.
-
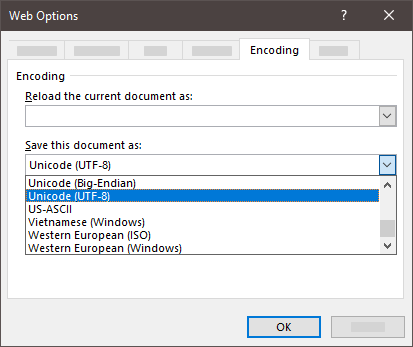
Open the exported file and save it with UTF-8 character set encoding.
-
Import the file.
-
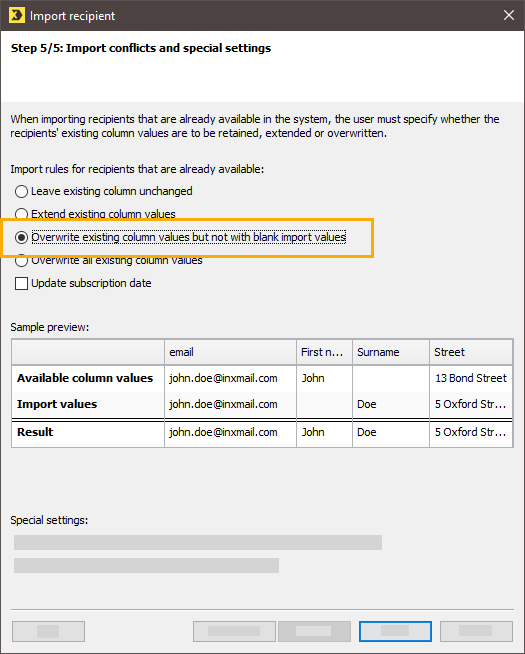
In the last step of the data import, select "Overwrite existing column values, but not with blank import values".
-
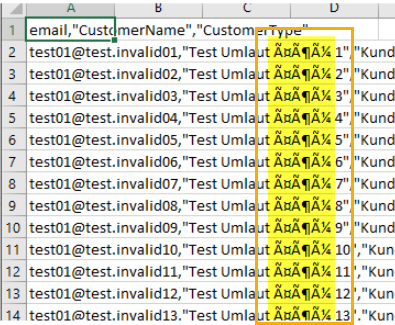
You have corrected recipients with incorrectly formatted umlauts.
Step by step
-
Export your recipients as a .csv file.
-
Do not open the exported file.
-
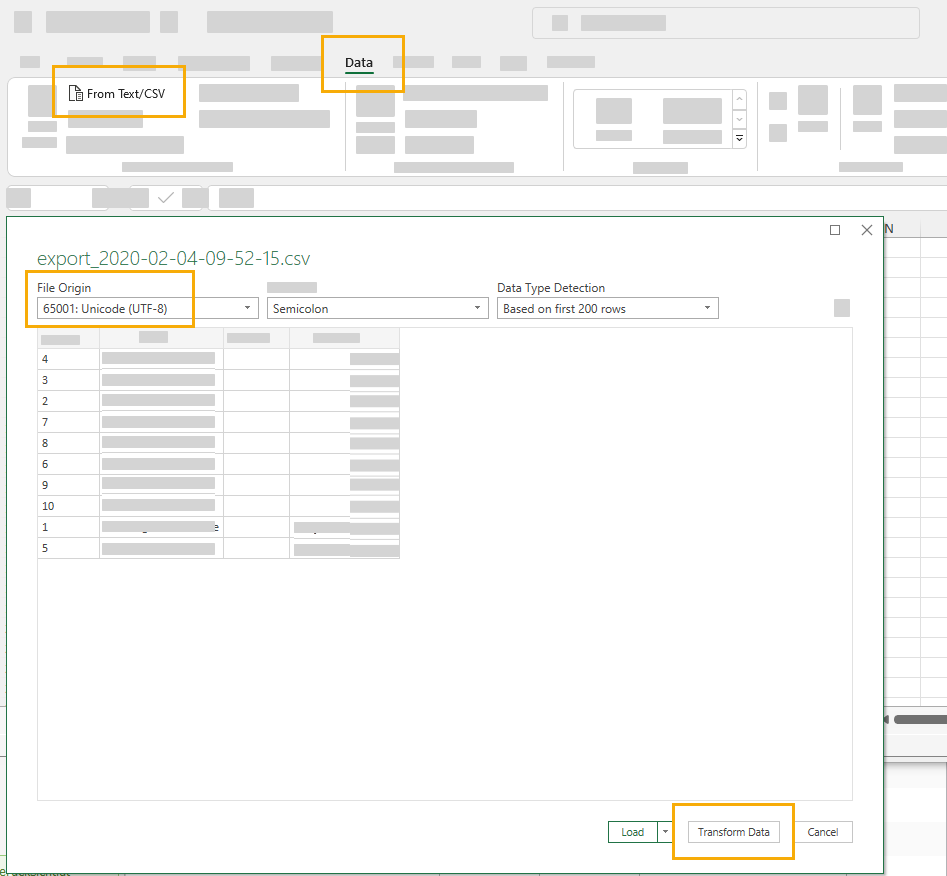
Instead, click "Data" > "From Text/CSV" in Excel.
-
Select the previously exported .csv file.
-
Select "65001: Unicode (UTF-8)" as "File Origin" and click "Transform Data".
-
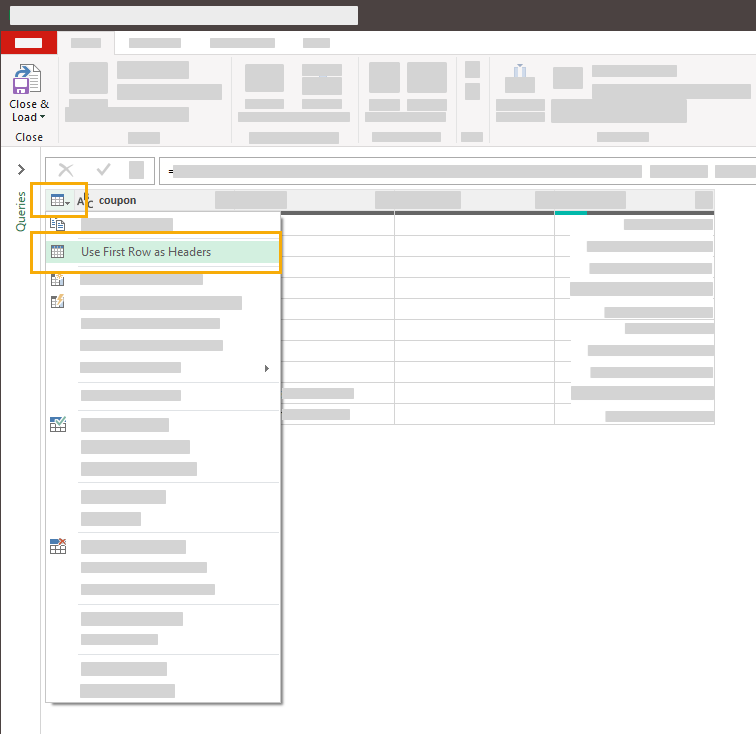
Click the table icon in the upper left corner and click "Use First Row as Headers".
-
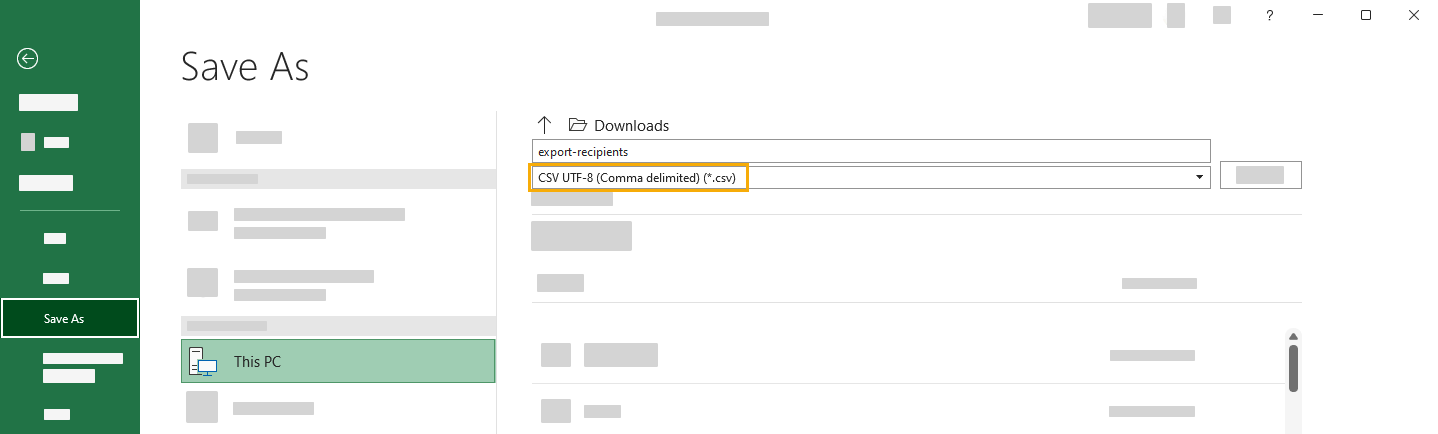
Click on "Close & Load".

-
Save the file via "Save As" as "CSV UTF-8 (Comma delimited) (*.csv)".
-
You have exported recipients and saved them with correctly formatted umlauts.
In the case of newly imported recipients, Inxmail Professional does not yet know whether these recipients can be reached. Only after the first mailing has been sent will Inxmail receive the information (via a hard bounce) that some recipients can no longer be reached (e.g. because their inbox no longer exists).
Depending on the email marketing tool you have been using, hard bounces may not have been handled the same way. This way, hard bounces may have been contacted over and over again. This means that, for example, only 90% of recipients will receive your first Inxmail professional mailing, and the remaining 10% will be hard bounces (the exact number depends on the quality of your address database).
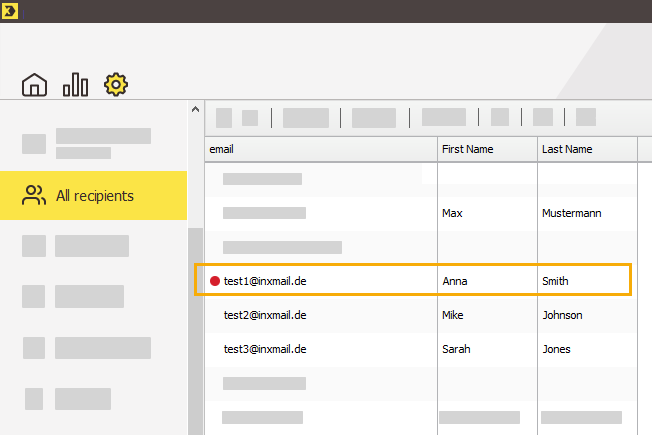
In future mailings created with Inxmail Professional, these hard bounces will no longer be contacted. Bouncing behavior will normalize and you'll have a delivery rate of almost 100% again. By the way, you can recognize hard bounces by the red dot in the recipient table.
Background: The strict handling of hard bounces in Inxmail Professional ensures the excellent reputation of our dispatch servers. In addition, as a customer you do save costs because you do not repeatedly contact recipients who are not reachable anyway.
