Create your transactional emails quickly, intuitively and flexibly - in the new mailing editor of the Inxmail platform.
Have you noticed that the different Inxmail products are becoming more and more integrated? They are increasingly forming a single Inxmail platform in which you can manage your entire email marketing.
The new platform mailing editor was previously only available for newsletters and campaigns – now, as a platform customer, you can finally also create your transactional mails with it.
What's new?
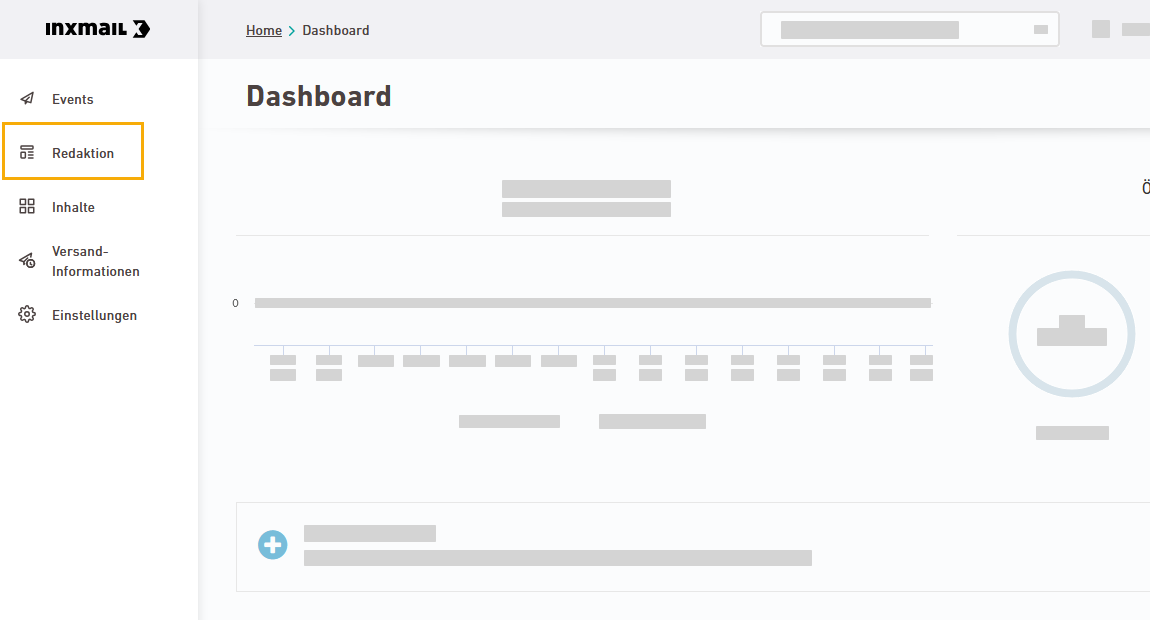
As a platform customer, you will soon see a new ![]() "Editing" section in your Transactional space with the following navigation items:
"Editing" section in your Transactional space with the following navigation items:
-
 Mailings: This is where you create your transactional mails - easily and intuitively in the new platform mailing editor.
 -
 Containers: Containers are like layout templates for your mailing articles. Inxmail provides you with a set of standard containers ready to use. If this is not sufficient, you can create layout containers with custom layouts in the container editor.
 -
 Style sets: You store your corporate design in a style set. You then link the style set to your mailings. This allows you to define and update your colors and fonts across mailings.
 -
 Media: The Media navigation item is where you store all the images, PDFs, and ICS files for your mailings.
Special features for transactional mails
Transactional mails are naturally somewhat more complex than a simple newsletter. To meet these requirements, we have adapted several functions of the mailing editor specifically for Transactional mails and also adjusted the approval process to the event-based setting.
When you create a mailing, you specify the following settings:
-
Event: Select the event that should trigger your mailing. You can choose from all events in your Transactional space.
-
Name: Enter the internal name for your mailing.
-
Subject: Enter the subject line for your mailing, as it will appear to your recipients in their inbox.
-
Pre-header: Enter the pre-header (a short excerpt of your mail), as it will appear as preview text in your recipients’ inbox.
-
Style set: Select a style set to define colors and fonts for your mailing.
Additional mailing settings, such as the sender address or the List-Help header, are specified at the very end, when you approve your mailing.
You have two options to create your transactional email in the new mailing editor:
Editing > Mailings
Create your mailing in the new ![]() "Editing" >
"Editing" > ![]() "Mailings" navigation item.
"Mailings" navigation item.
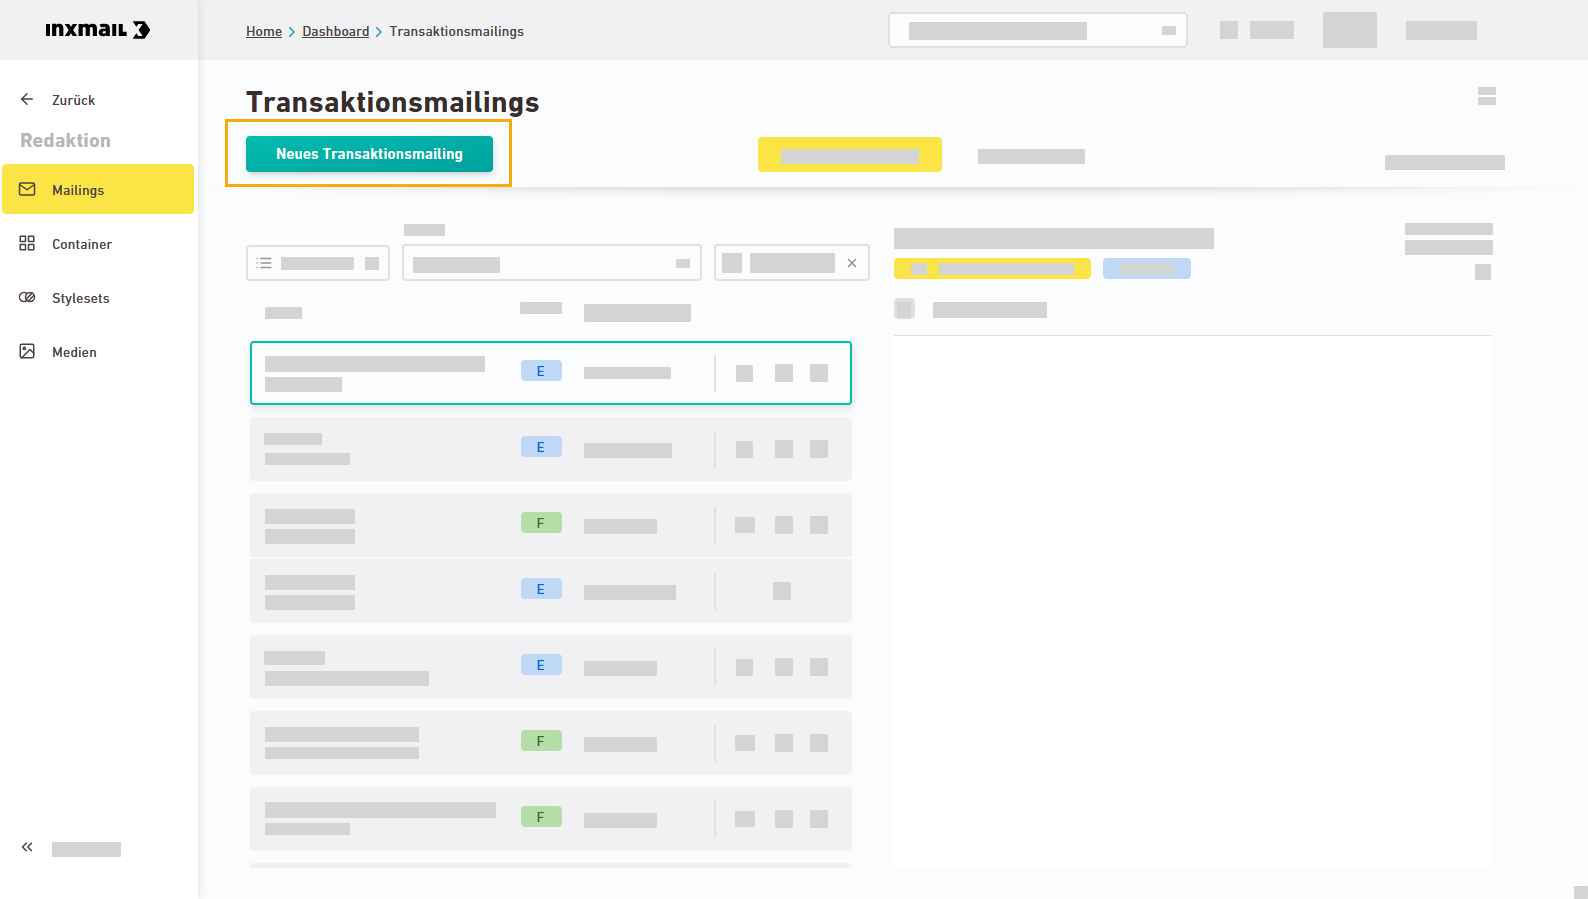
Select your event in the next step. You can choose from all events in your Transactional space.
Event
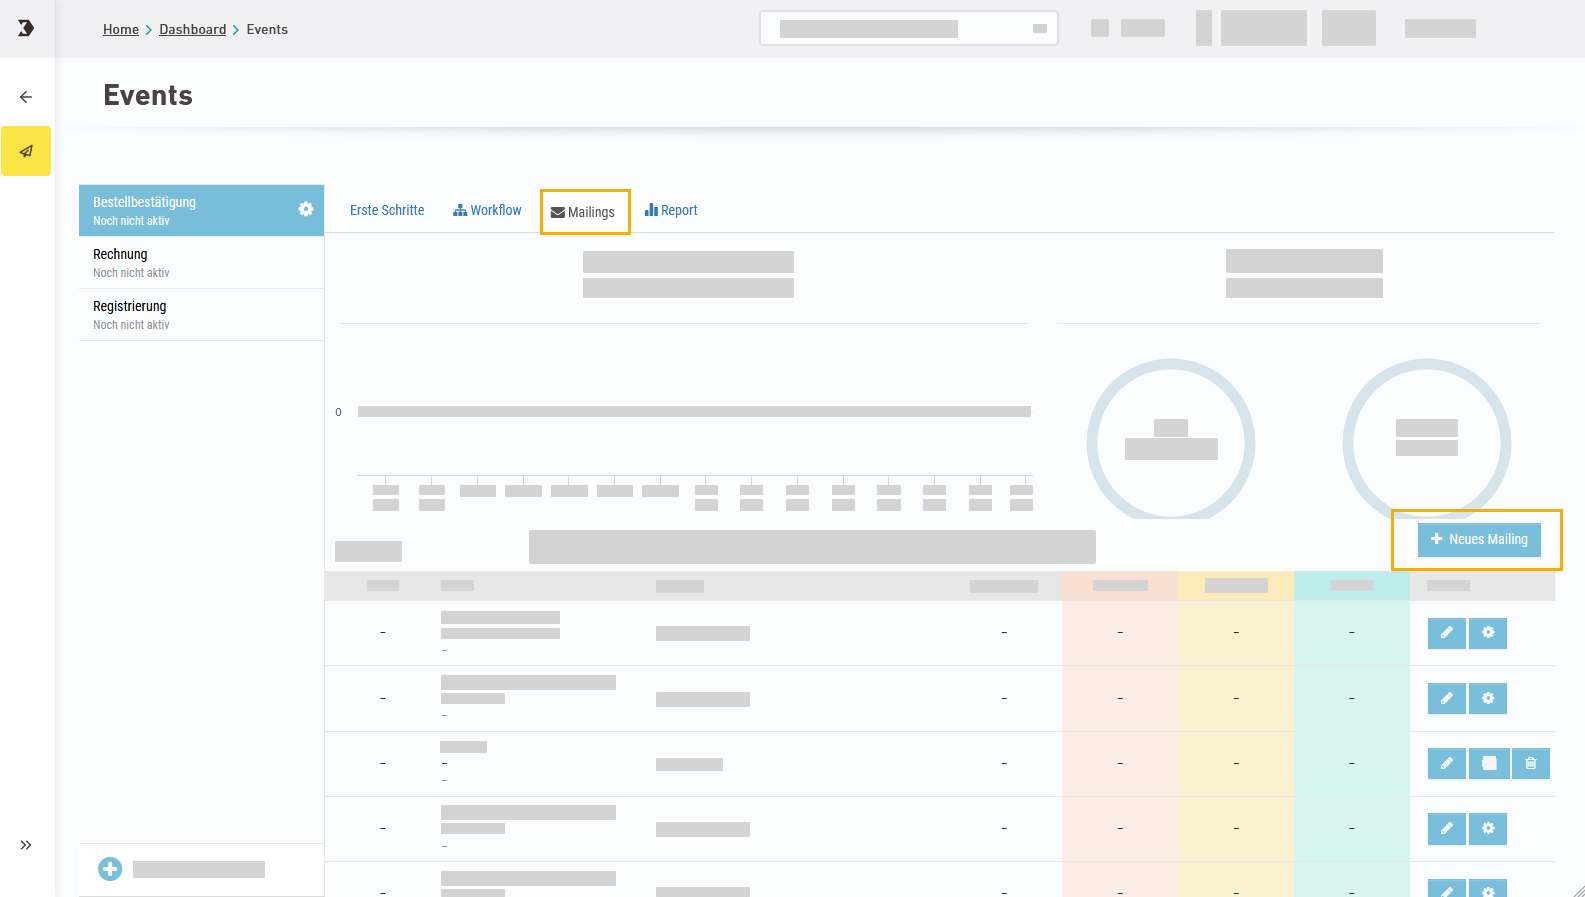
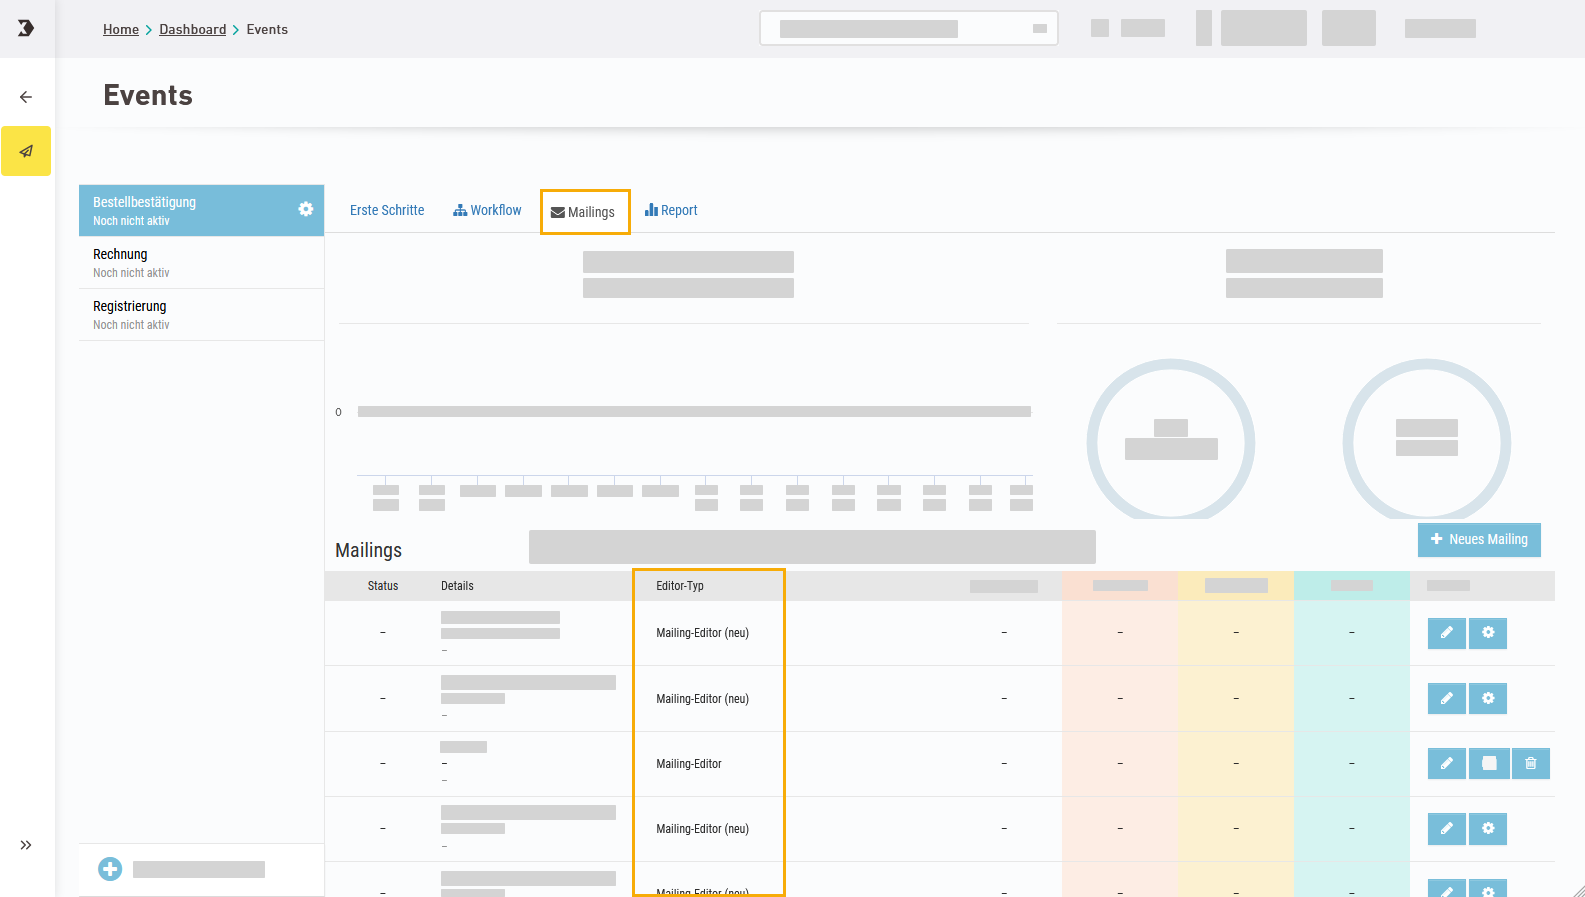
Create your mailing in your event as usual via the "Events" navigation item > "Mailings" tab.
You can open existing mailings from the same two places:
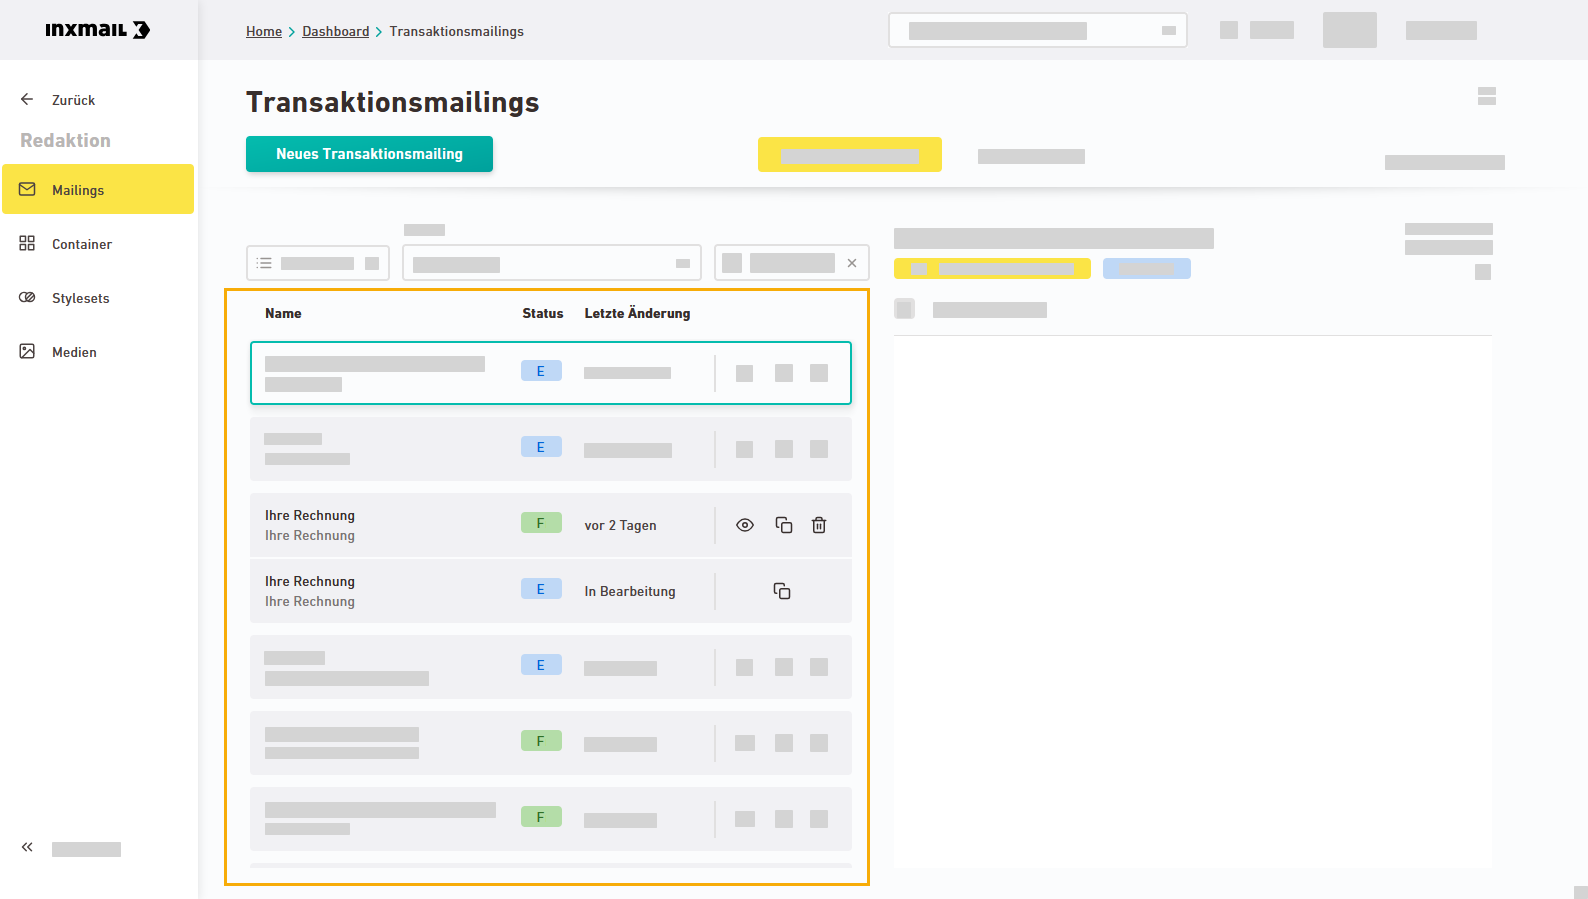
Editing > Mailings
Go to the mailing overview in the new ![]() "Editing" >
"Editing" > ![]() "Mailings" navigation item.
"Mailings" navigation item.
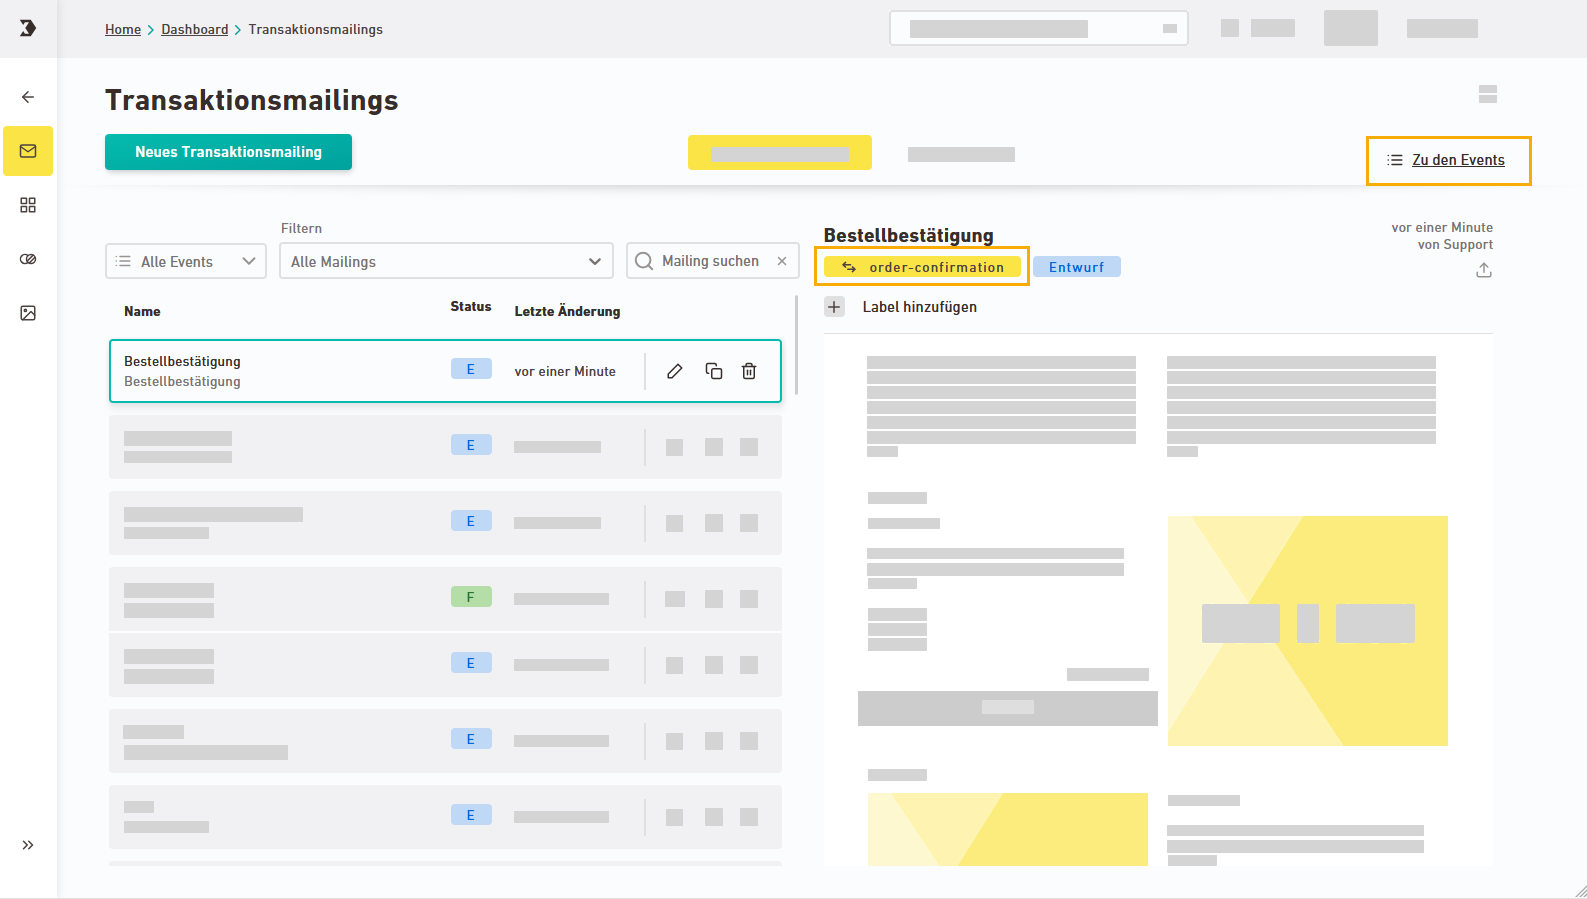
Open the mailing by clicking the ![]() "Edit" or
"Edit" or ![]() eye icon (depending on whether your mailing is in progress or approved )
eye icon (depending on whether your mailing is in progress or approved )
Event
Go to the mailing overview of your event: "Events" navigation item > "Mailings" tab. Open the mailing by clicking the ![]() "Edit" icon.
"Edit" icon.
Good to know: Mailings from the new mailing editor will only appear here once they are approved. Mailings in "Draft" status will not be displayed here.
The "Editor type" column shows you in which editor your mailings have been created:
-
Mailing editor (new): the platform editor described here
-
Mailing Editor: previously known as "Mail Builder"
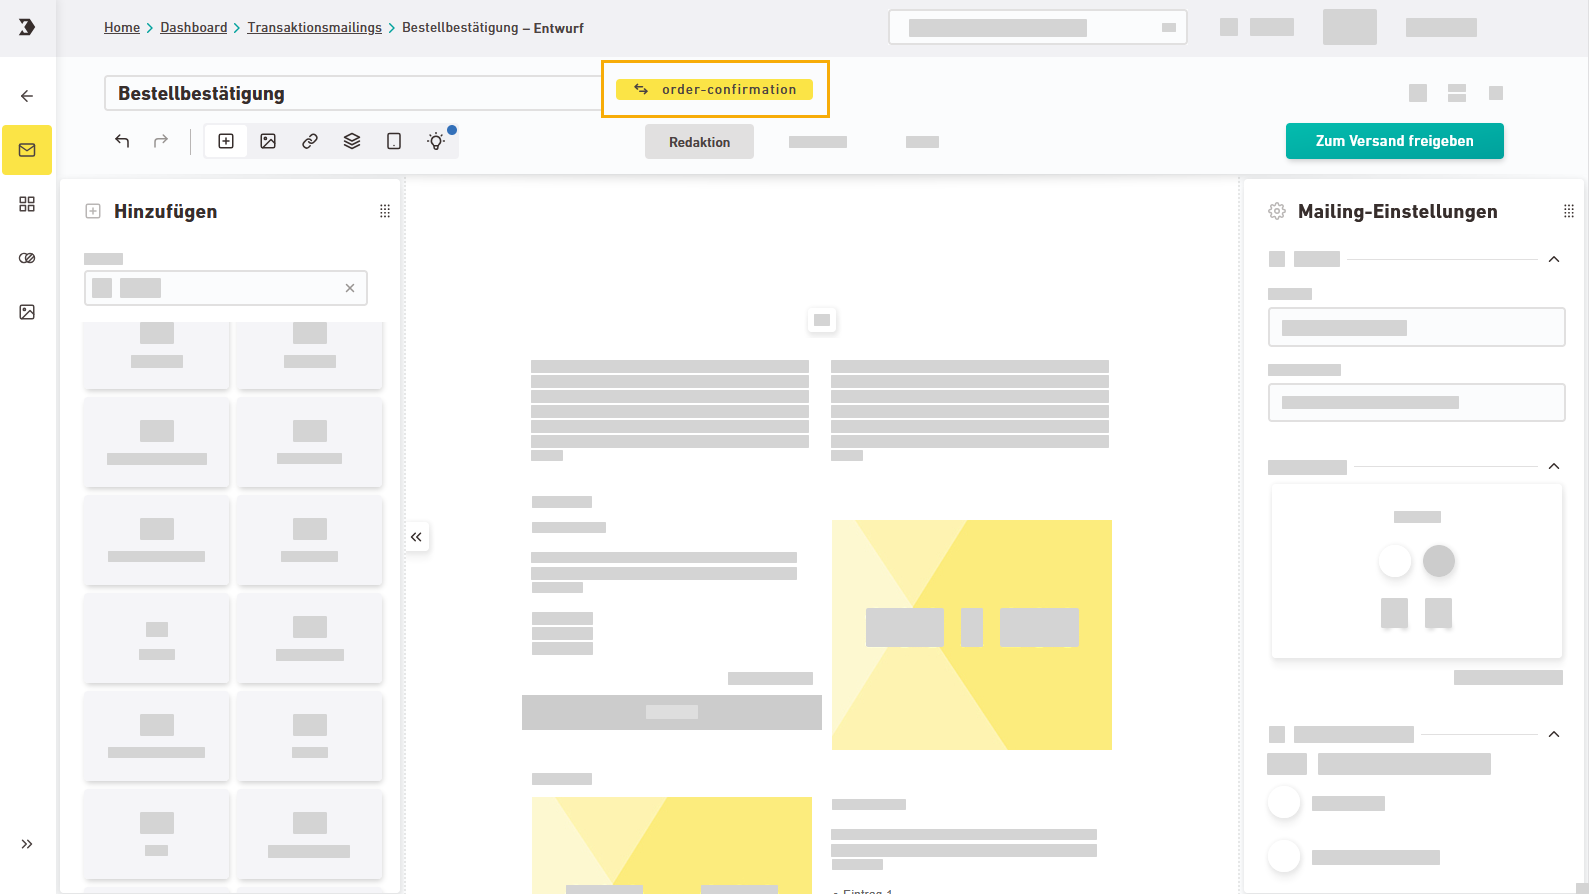
In the ![]() "Editing" >
"Editing" > ![]() "Mailings" navigation item you can view existing event links in the following places:
"Mailings" navigation item you can view existing event links in the following places:
-
In the mailing preview of the mailing overview. Here you can also click to switch to the event overview.
-
In the (editing or preview) view of your current mailing.
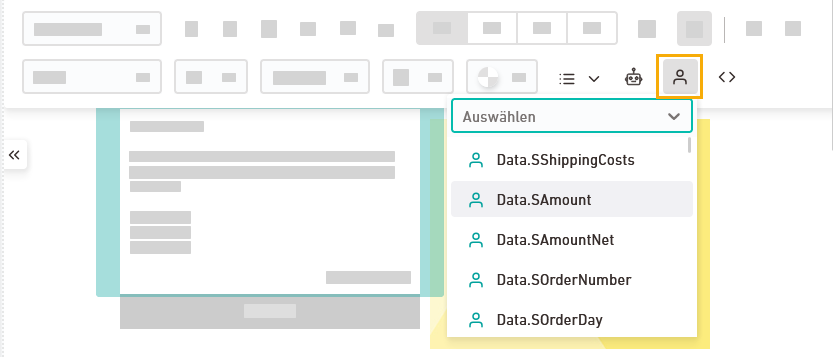
Insert placeholders from your event XML using the text tools. To do this, click into a text field and then on the ![]() "Event placeholders" icon.
"Event placeholders" icon.
You can use event placeholders anywhere you can use other personalizations:
-
In the text tools:
-
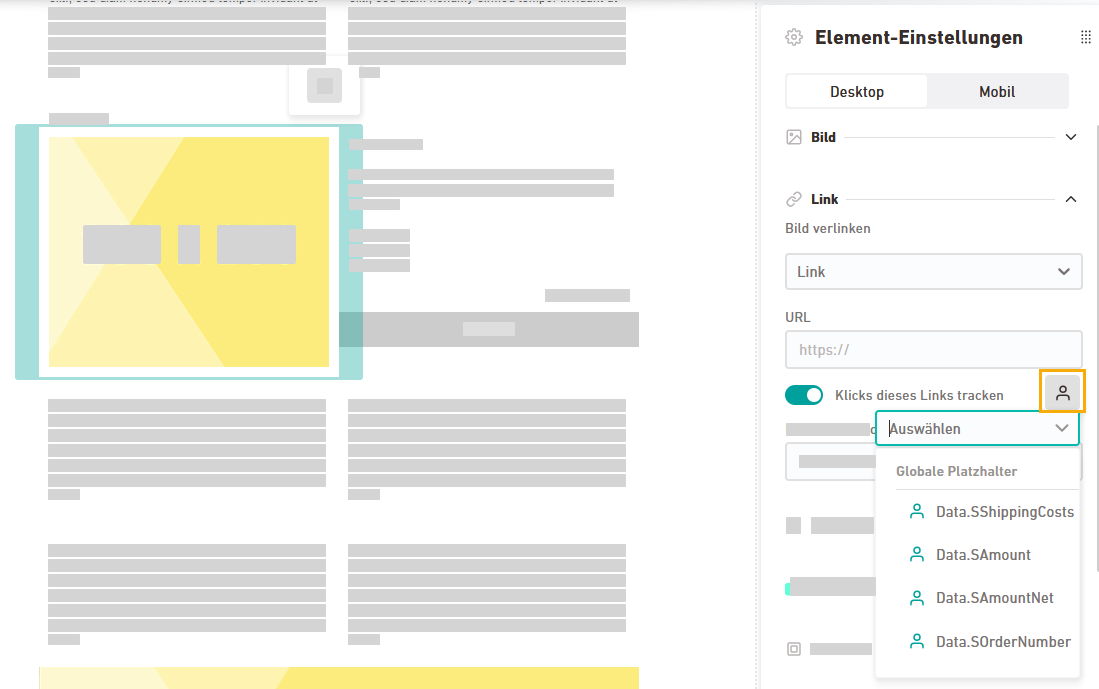
In the Element settings panel:
(Image or embedded image)
(Image link)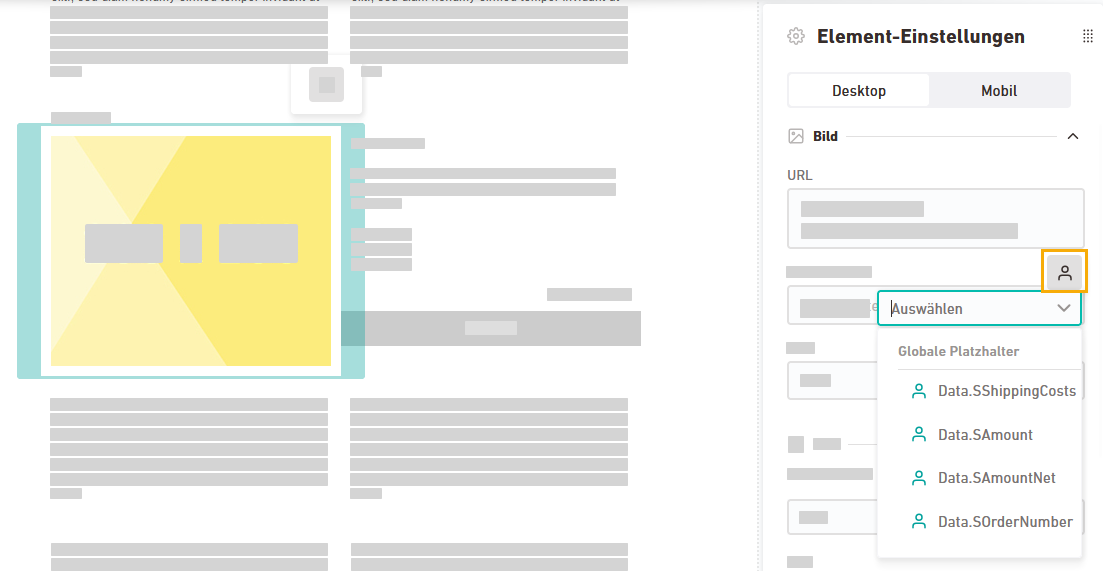
-
In the link dialog:
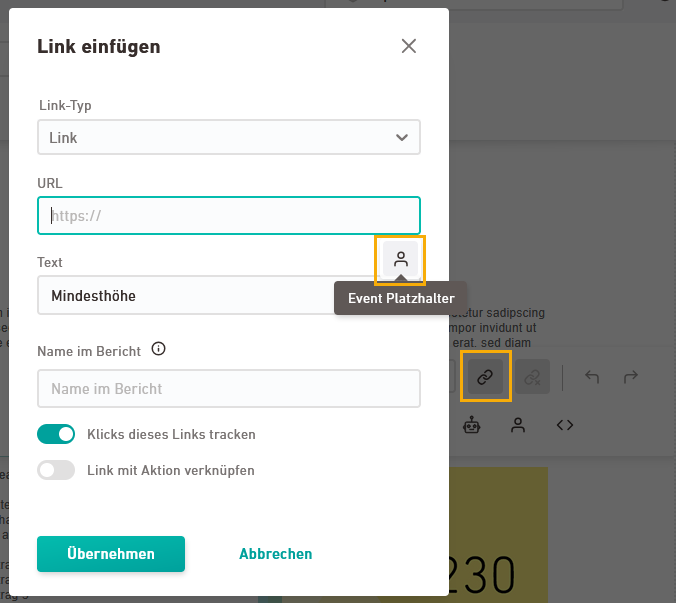
(The logic for inserting them is the same as for your recipient attributes from Newsletters & campaigns.)
Insert Freemarker syntax using the text tools. To do this, click into a text field and then on the ![]() "Freemarker syntax" icon.
"Freemarker syntax" icon.
Unlike in Newsletters & campaigns you define target groups for your transactional mails directly in the editor.
Step by step
-
Select your container and click
 "Add target group" in the container settings panel.
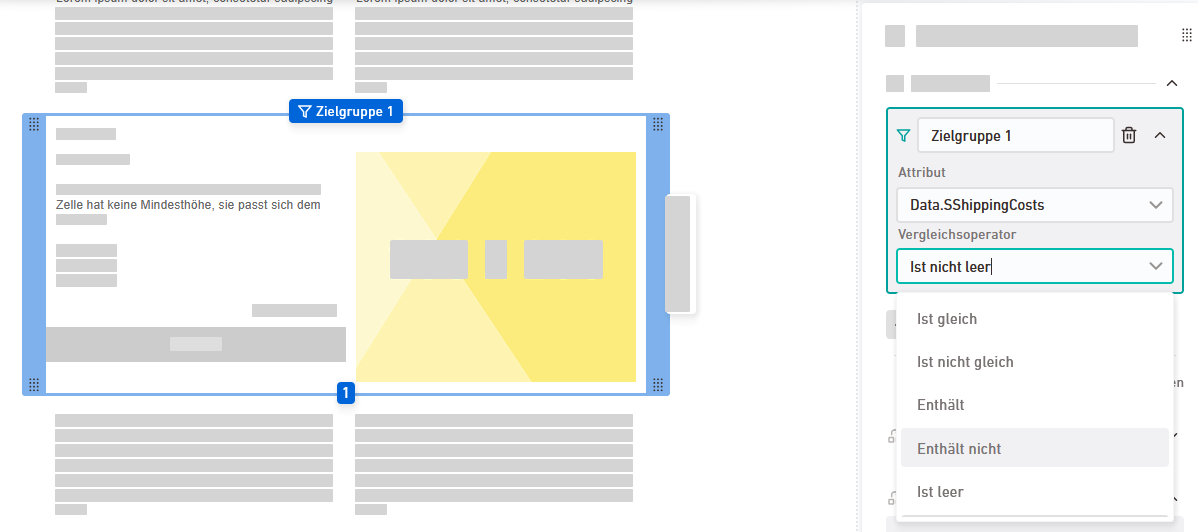
-
Select an event placeholder under "Attribute" and define a target group condition. Depending on your data type (e.g. text / number / boolean), the following conditions are available to you:
-
is (not) equal to
-
contains / does not contain
-
is (not) empty
-
greater than / greater than or equal to
-
less than / less than or equal to
-
is true
-
is false
Enter a comparison value if needed.
-
- You have defined a target group via container settings.
Depending on your target groups, you can now display different content variants across multiple containers.
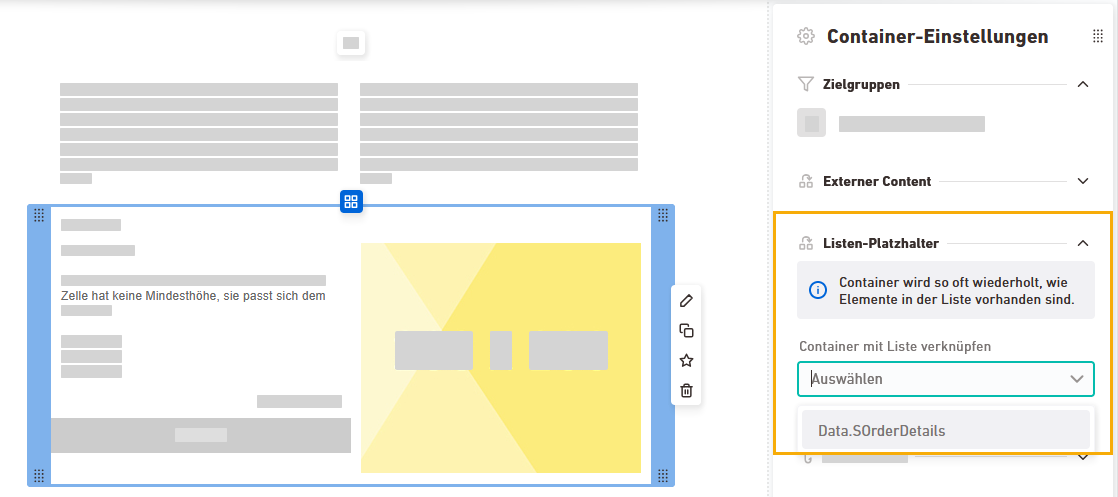
List placeholders help you to automatically repeat a container with different content in your mailing. For example, in an order confirmation you can output all ordered products including image and short text one after another. order confirmation .
Step by step
-
Select your container and choose your list placeholders in the container settings panel.
-
Now select your placeholders using the text tools.
-
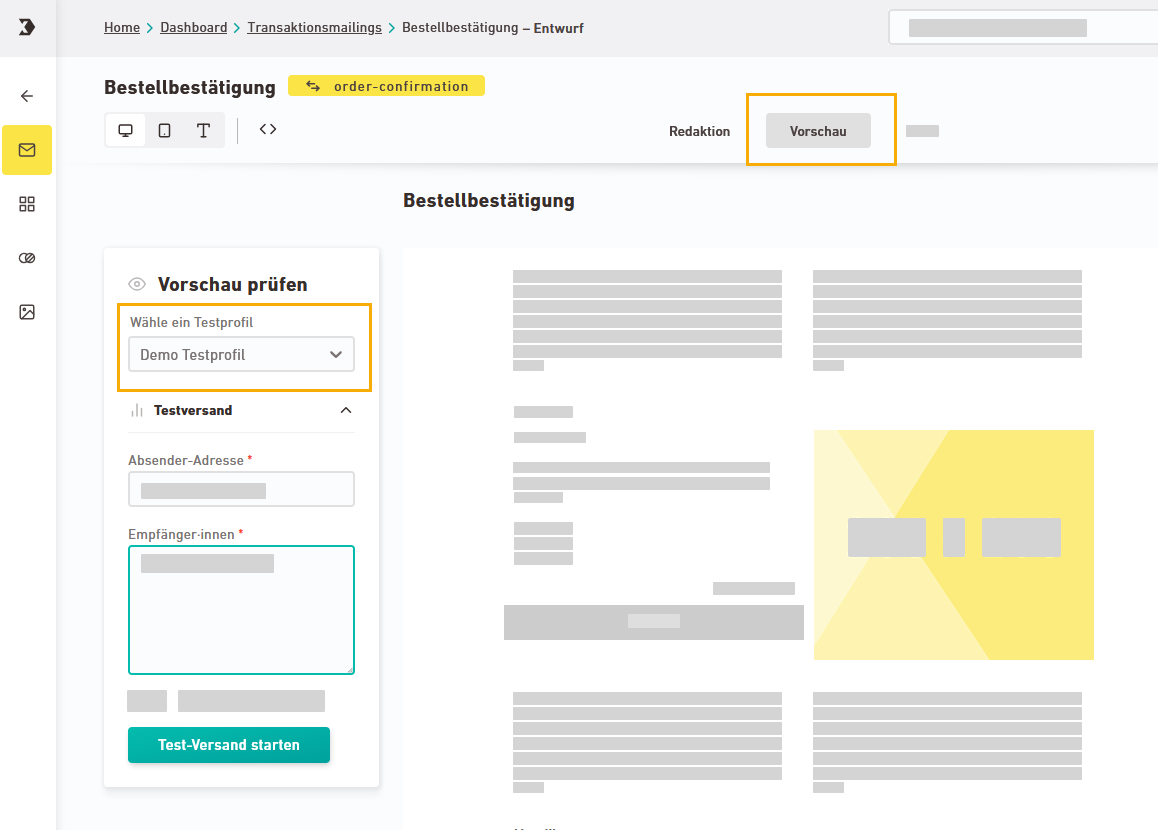
Go to the "Preview" tab and check your output. Based on your test profile, your container should now be displayed multiple times.
- You have added your list placeholders via container settings.
View your mailing in the "Preview" tab. Use the test profiles from your event settings and send yourself a test email.
Unlike the previous mailing editor for transactional mails, you specify mailing settings such as the sender address or the List-Unsubscribe header only during approval, as this information becomes relevant only when the mailing goes live.
Step by step
-
In your open mailing, click in the
"Mailings" navigation item as soon as you have completed your transactional mailing. -
Enter the mailing settings required for dispatch.
 Sender and reply address
Name
Description
Sender
Email
Enter the sender's email address. You may only use email addresses from a domain that you have successfully authenticated as a sending domain for your current Transactional space.
Name
Enter the name that should be displayed as the sender.
Reply-to address
Email
Enter the address to which replies to your mailing should be sent. Your recipients will see this address when they reply to your mailing.
Name
Enter the name to which replies to your mailing should be addressed.
Unsubscribe information (List-Help header & List-Unsubscribe header)
For your transactional mails, you must provide either a List-Unsubscribe header or a List-Help header as an unsubscribe option.
-
Transactional mails: For pure transactional mails, you can provide either a List-Unsubscribe header or a List-Help header.
-
Mailings with promotional content: For mailings that include promotional content, you must provide a List-Unsubscribe header.
Learn more
More settings
Ignore block list
Normally, your block list is taken into account. Enable the "Ignore block list" switch if you want to send certain emails even to recipients on the blocklist.
Mailing language
Enter the country settings for your mailing if you want to override the default setting of your space. This mainly affects date and number formats.
Example:
-
Switzerland: 1'000.00
-
Germany: 1.00000
If you keep the default setting, the country setting you specified when you created your space will be used.
Where can I change my other mailing settings later ?
You have already specified most of the following settings when creating the mailing.
Here is how you can change them afterwards:
-
Internal name: Double-click the mailing name
-
Subject: In the mailing settings panel
-
Description: You cannot enter a mailing description in the new mailing editor. Instead, use the (internal) mailing name for internal details on mailing usage.
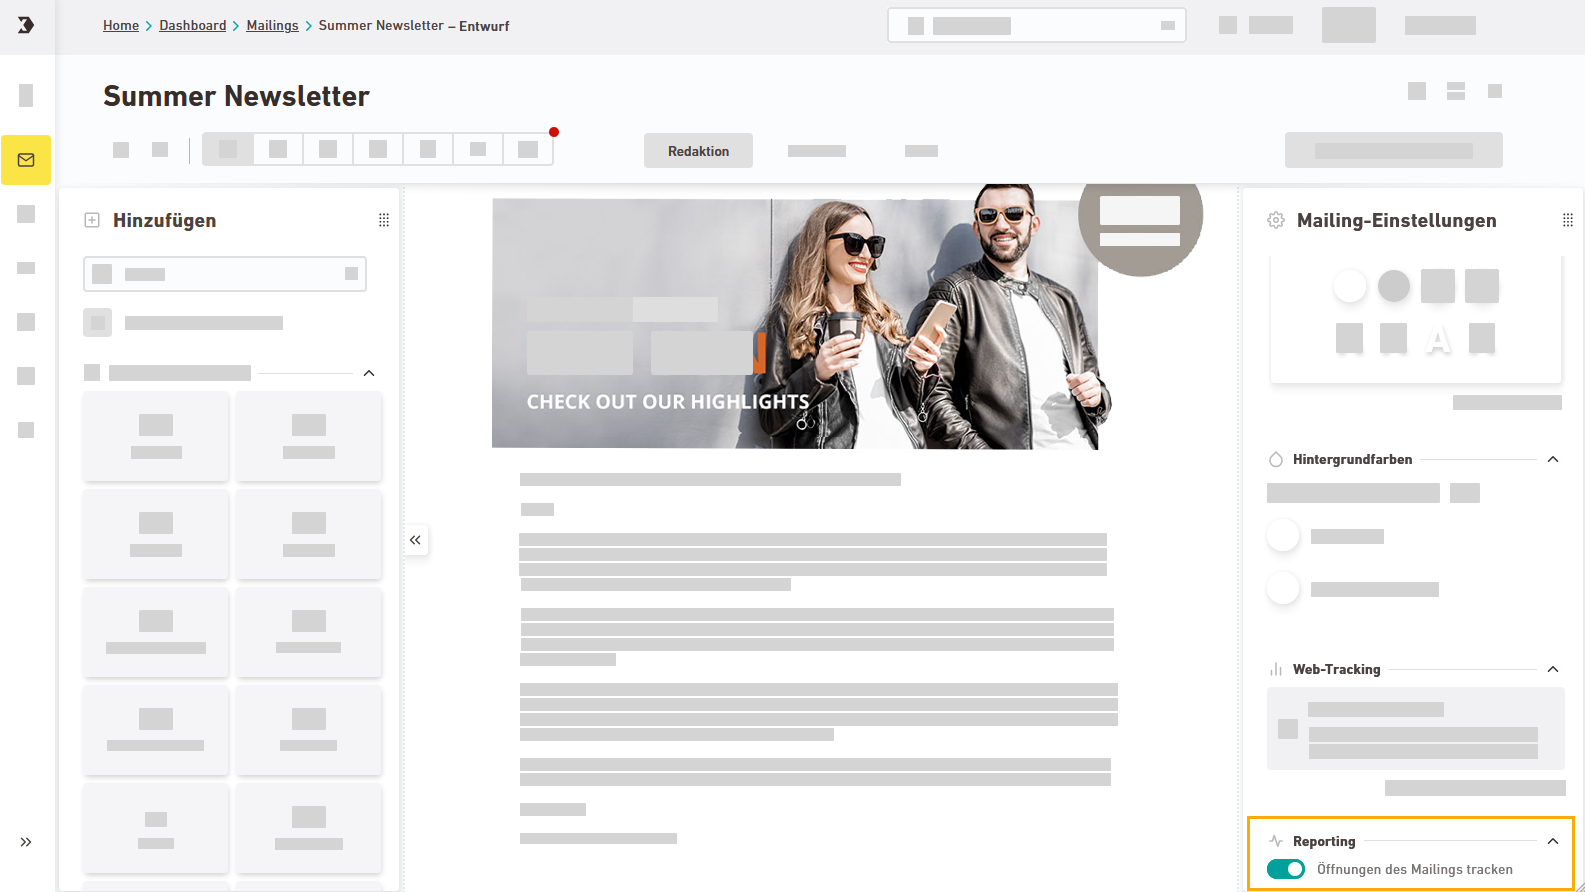
Track openings
In the mailing settings panel, set whether you want to track openings or not.
Apple Mail Privacy Protection: If your recipients have Apple Mail Privacy Protection enabled, the email client will automatically download all the images contained in your mailing (including tracking pixels) after they receive it. Since openings in email marketing can only be recorded indirectly through the mailing images being downloaded, manual openings cannot be recorded if they are opened at a later date.
-
-
Click .
- You have specified the mailing settings required for dispatch and approved your mailing.

