Learn how to insert different link types and (de)activate tracking.
Step by step
-
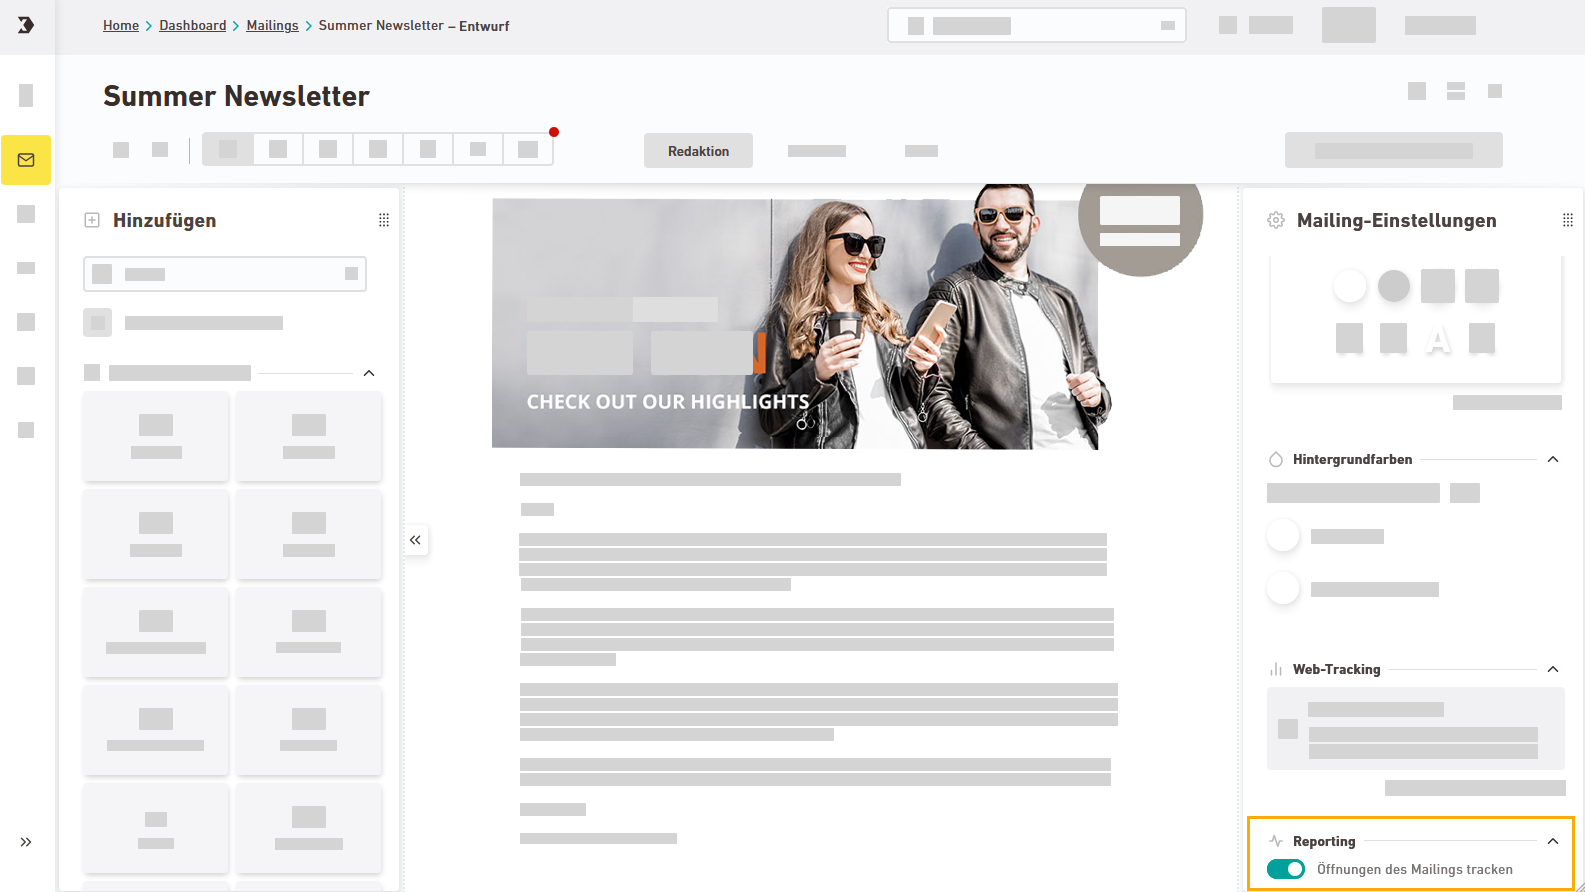
Open your mailing in the
 "Mailings" navigation item.
 -
Inserting links
You can put links on the following mailing elements to make them clickable:
 Texts and buttons
Insert text and button links: Select your text or button and click the
 "Insert link" icon in the text editing tools.
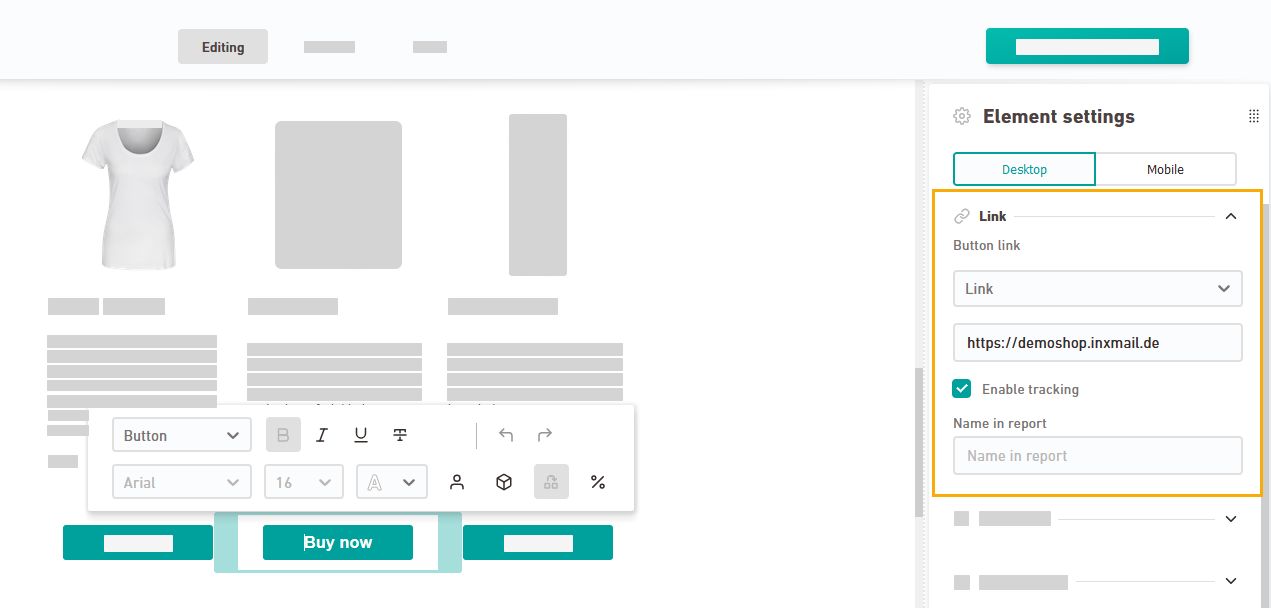 Images
Insert image links: Select an image and click the
"Insert link" icon above the image.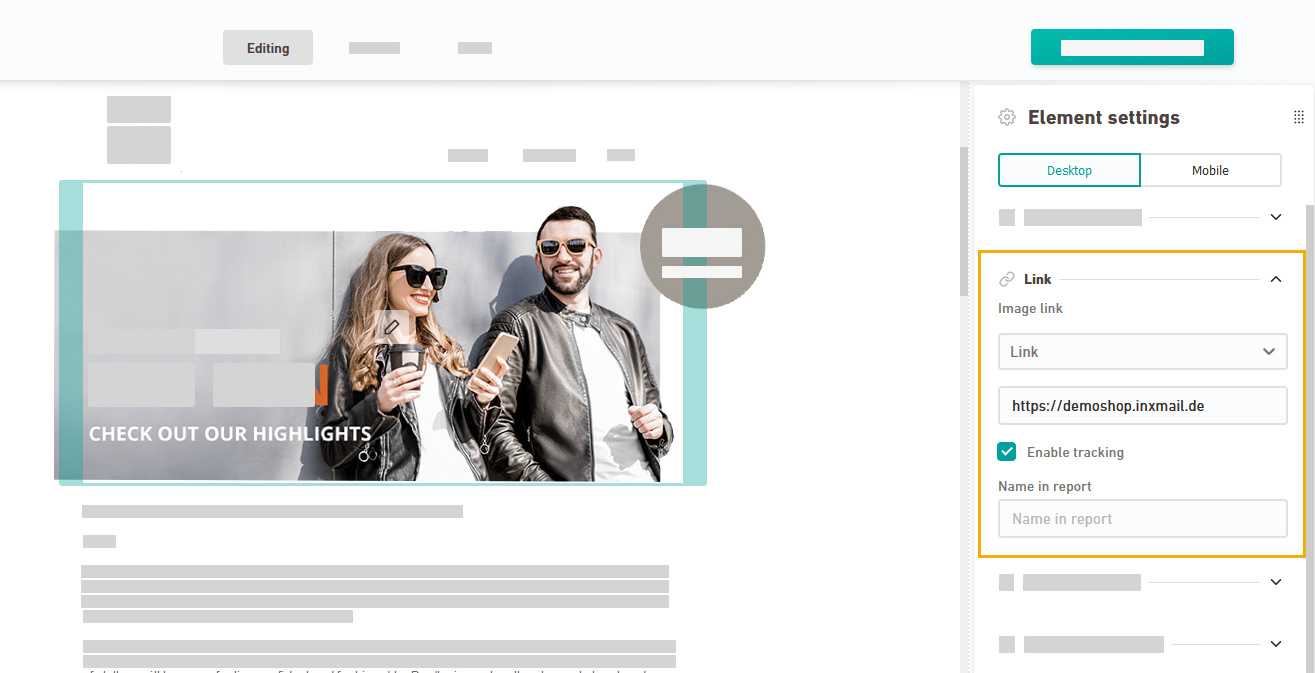
Mobile: If you use a different image on mobile, you can also define a separate mobile link as needed.
-
Enable the “Use a different image on mobile” switch in the element settings.
-
Disable the “Use desktop image link” switch to open the link dialog and enter your URL.

-
-
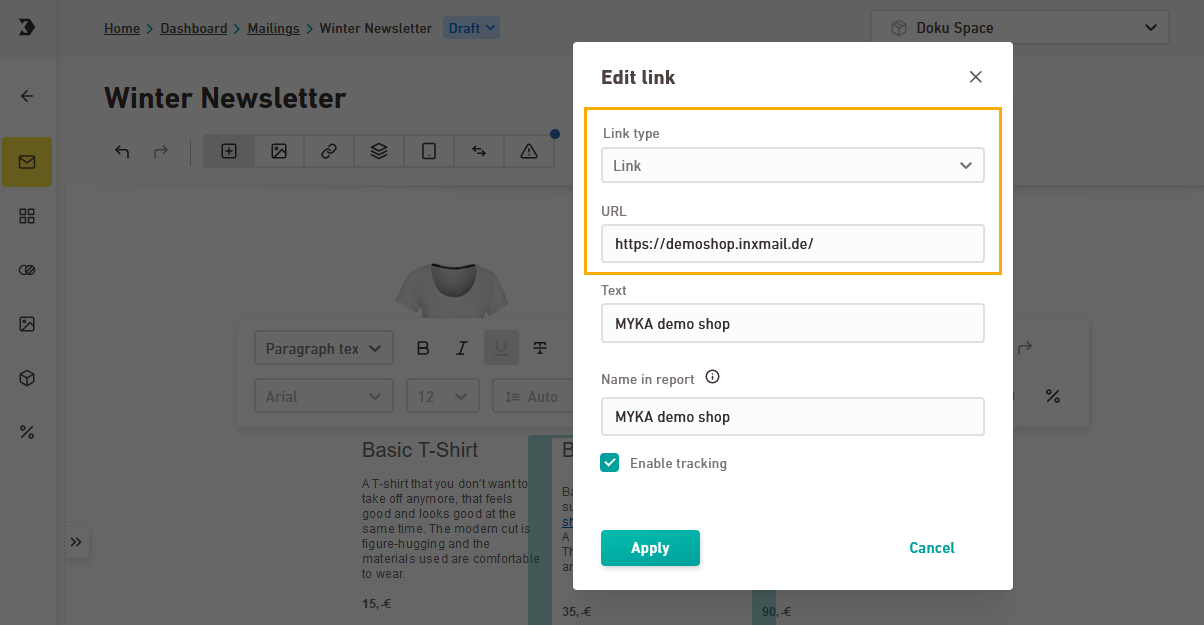
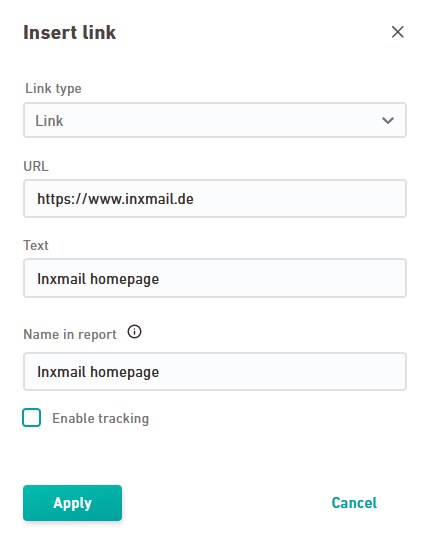
Insert standard link
Select a link type and enter your URL. If you like, you can also enter a name in the report or (for text links) change the link text.
Note: If you add a link using a module, the stored web tracking parameters will not be applied. Add them manually in the module.
-
Insert special link types
In addition to the standard link, you can also choose from the following special link types:
Subscription and unsubscription
Subscription confirmation link
Use this type of link to confirm the email address in the double opt-in procedure (DOI). You include the subscription confirmation link in your double opt-in email, where your recipient confirms that their email address is correct.
You do not have to take care of the technical aspects of subscription. As soon as your recipient clicks the link, their email address is confirmed and the subscription process is complete.
Unsubscribe link
Enter the URL of a landing page for the "Unsubscribe link". Write a success message on the landing page such as You have successfully unsubscribed.
You do not have to worry about the technical unsubscription process. Your recipients will automatically be unsubscribed, once they click the unsubscribe link.
Does not work before live dispatch: In test mails, clicking on the unsubscription link does not trigger an unsubscription, but redirects to your landing page (without actually unsubscribing).
Unsubscription confirmation link
Use this type of link to confirm the email address in the double opt-out procedure (DOO). You include the subscription confirmation link in your double opt-out email, where your recipient confirms that their email address is correct.
The "Unsubscription confirmation" link type is only available in unsubscription confirmation (DOO) mailings.
You do not have to worry about the technical unsubscription process. As soon as your recipient clicks the link, their email address is confirmed and the unsubscription process is complete.
Warning: We advise you not to use the "Double opt-out" unsubscription process. The more complicated your unsubscribe process is, the more likely recipients are to mark your emails as spam - which means you risk deliverability problems. It is better to work with “Single opt-out”.
Unsubscribe link with unsubscription form
Provide an unsubscribe link and combine it with an unsubscription form on your landing page. The unsubscription will not be executed when the link is clicked, but only after your recipient has completed and sent the unsubscription form.
You yourself are responsible for adding the unsubscribe functionality to your form. To do so, you can use dynamic web pages in Inxmail Professional, for example.
As an alternative, you can order the setup of the unsubscription form as an Inxmail service. Contact your Inxmail contact person or Care-Consulting@inxmail.de for more information.
Tracking Permission
Grant tracking permission
Enter the URL of a landing page for the link type "Grant tracking permission". Place a success message on the landing page like Thank you! You have granted your tracking permission. This way, you help us optimize your mailing experience and better tailor content to you.
You do not have to worry about the technical management of the tracking permission. Tracking permission will be automatically granted, when someone in your mailing list clicks on the "Grant tracking permission" link.
Withdraw tracking permission
Enter the URL of a landing page for the link type "Withdraw tracking permission". Place a success message on the landing page such as Your user behavior will no longer be tracked.
You do not have to worry about the technical management of the tracking permission. Tracking permission will be automatically withdrawn, when someone in your mailing list clicks on the "Withdraw tracking permission" link.
Other link types
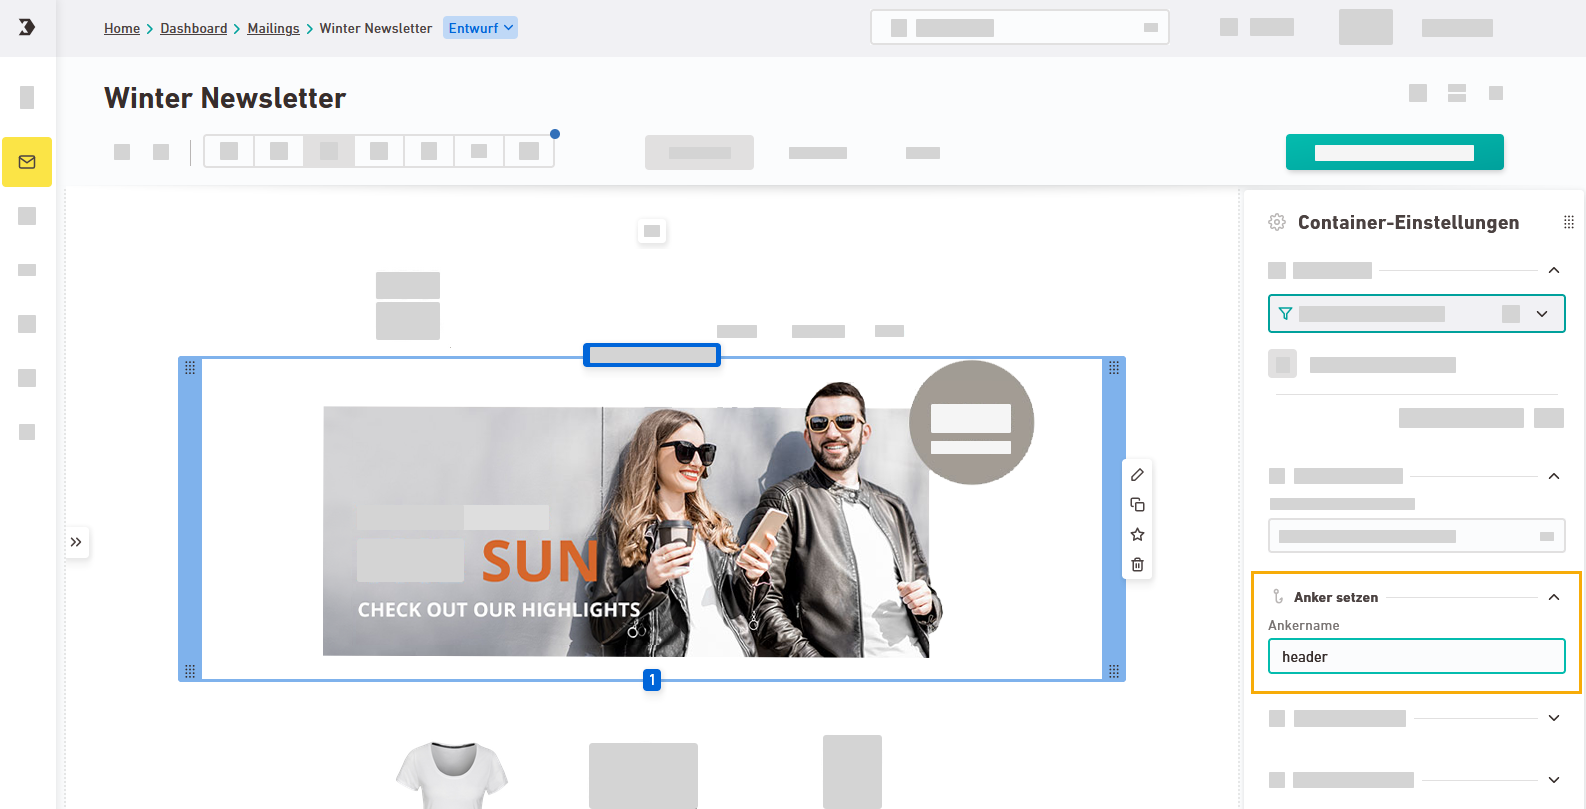
Anchor link
Use the anchor link to link to a specific container in your mailing with a jump mark. This way you can create a table of contents, for example.
All anchors that you have previously defined in the container settings are available to you.
How do I set an anchor link in my container settings?
Step by step
-
Select a container so that it is highlighted in blue.
-
Go to "Set anchor" and enter an anchor name.
Only alphanumeric characters are allowed: Do not use any special characters in your anchor name.
- You have created an anchor.
You can now insert your anchor as an anchor link somewhere else in your mailing and thus link to your current container with a jump mark.
Link to browser view
You do not have to enter a URL for the "Link to browser view". We automatically generate the URL for you when you send your mailing. Simply enter the link text you want your recipients to see in the mailing.
Go to the Preview tab and click the link so you can check how your mailing will look in browser view before you send it.
Tip: Colleagues without access to Inxmail can also use the browser view link to review your mailing and provide feedback.
Mailto link
Specify the "Mailto link" by entering an email address to which an email should be sent. Enter a predefined email text. Subject is optional.
-
-
Name in report
You can specify a "Name in report" for your link. This will make it easier for you to identify it in Inxmail Professional reporting.
-
(De)activate tracking
Tracking of openings: By default, tracking of mailing openings is enabled. You can change this default setting in the mailing settings and disable tracking of openings.
Tracking of links: Link tracking is enabled by default. As long as you do not change the default settings, all your links will be tracked.
If there are specific links that you do not want to track, you can disable the"Track clicks on this link" switch for these links.
Tracking = Unique count tracking: Tracking in Newsletters & campaigns is always unique count tracking. Whether or not personal data is transferred during unique-count tracking depends on the tracking permission of the recipients in your mailing list. You can manage the tracking permission in the "Tracking Permission" column in XPRO.
-
Combine link with action
You can combine your link with an
 action. You can choose from all actions with the trigger "Click a specific link".
 -
When you are done, click .
- You have inserted a link into your mailing. Tracking is enabled by default.
Remove link: Remove your link by clicking the ![]() "Remove link" icon.
"Remove link" icon.
Next step

