Here’s how to design and configure your custom subscription form.
Looking for a quicker solution? Use the quick subscription form to get started faster with a predesigned layout.
Step by step
-
Open the
 "Forms" navigation item.
 -
Click .

-
Click "Use form editor".
-
Give your form a meaningful name.
-
Enter the width and height of your form in pixels.
-
Select a style set.
-
Click .
-
Structure
Build the structure of your form. The functionality is the same as in the container editor.
-
Move your cursor from the left or right over the container area to set a vertical cut.
-
Move your cursor from the top or bottom over the container area to set a horizontal cut.
 Switch tool
When working with splits, you have four tools available.

Switch between tools to move or delete splits, or set partial splits that do not span the full width or height of the layout.
-
 Set splitSet split is the default and most important tool. Use it to create a split that spans the entire width or entire height of the layout.
 -
 Set partial split
You cannot split a full-width or full-height split after it has been set. So make sure to choose the correct tool before adding the split.
- Click the Set partial split tool to add a split that only applies to the current column or row (1)
-
Click the
Set split tool to add a full-width or full-height split (2)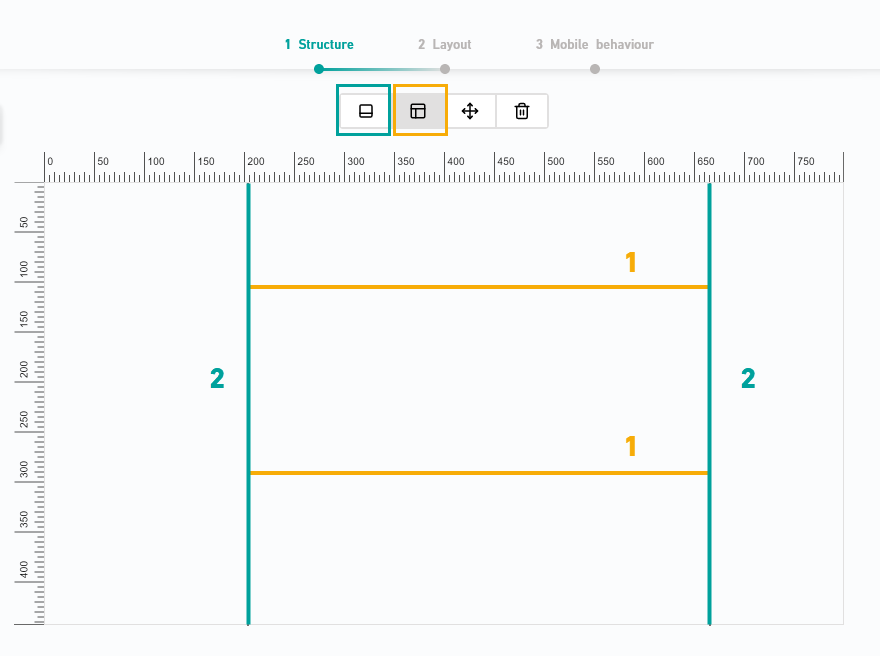
- Click the
-
 Move split
Switch to the Move
tool to subsequently move a split.Work pixel perfect
If you want to specify a pixel-perfect split position, you can enter the exact value in the
Move tool.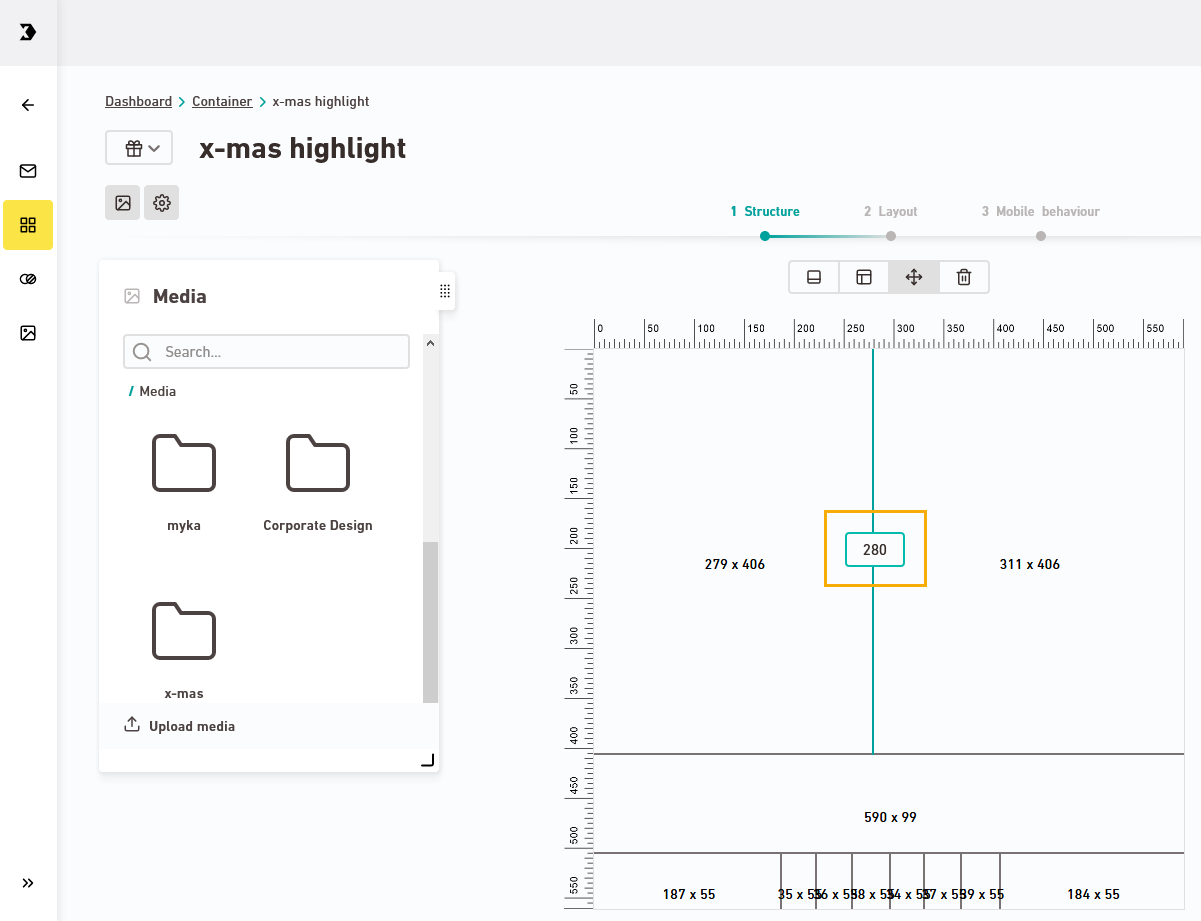
-
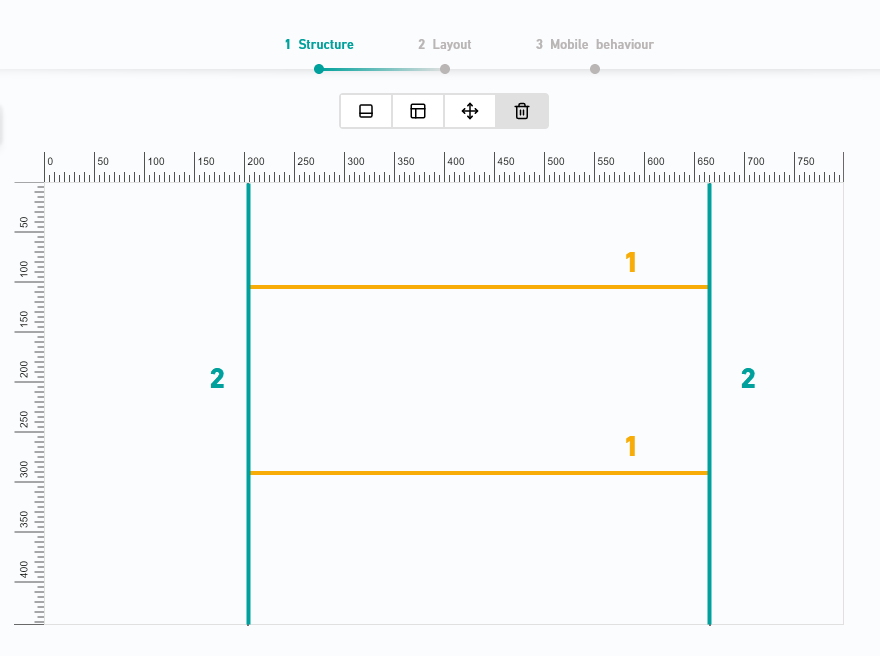
 Delete split
Switch to the Delete
tool to delete a split.Delete sectional splits first
-
First delete all sectional splits which are subordinate to another split
-
You can now delete the splits that served as boundaries for the sectional splits (2).
-
Is your editor not working as it should? Are you suddenly unable to set any further splits? Or is the editor not working like it normally does? In most cases, that's because you are using the wrong tool.
-
-
Layout
In this step, you define where each form element should be placed. The available form elements and their functions are explained in the next step: Content.
Content & function come later: In the "Layout" workflow step, you're only defining the structure. In the next step, Content, you’ll add texts and define field functions (e.g. the checkbox for Tracking Permission).
-
Content
In the Content workflow step, you enter the texts for your form and define the functions of checkboxes and input fields.
Which form fields are available?
You can use the following form elements:
Field
Description
Text Add one or more free text elements to your form.
-
Text formatting: Click into the text field and apply text styles from your style set.
-
Hyperlinks: Insert links using the text tools, e.g. to your privacy policy.
-
Design: Make sure the correct form element is highlighted in turquoise, then go to the element settings. The most relevant areas here are "Spacing & borders" and "Styling" (for buttons).
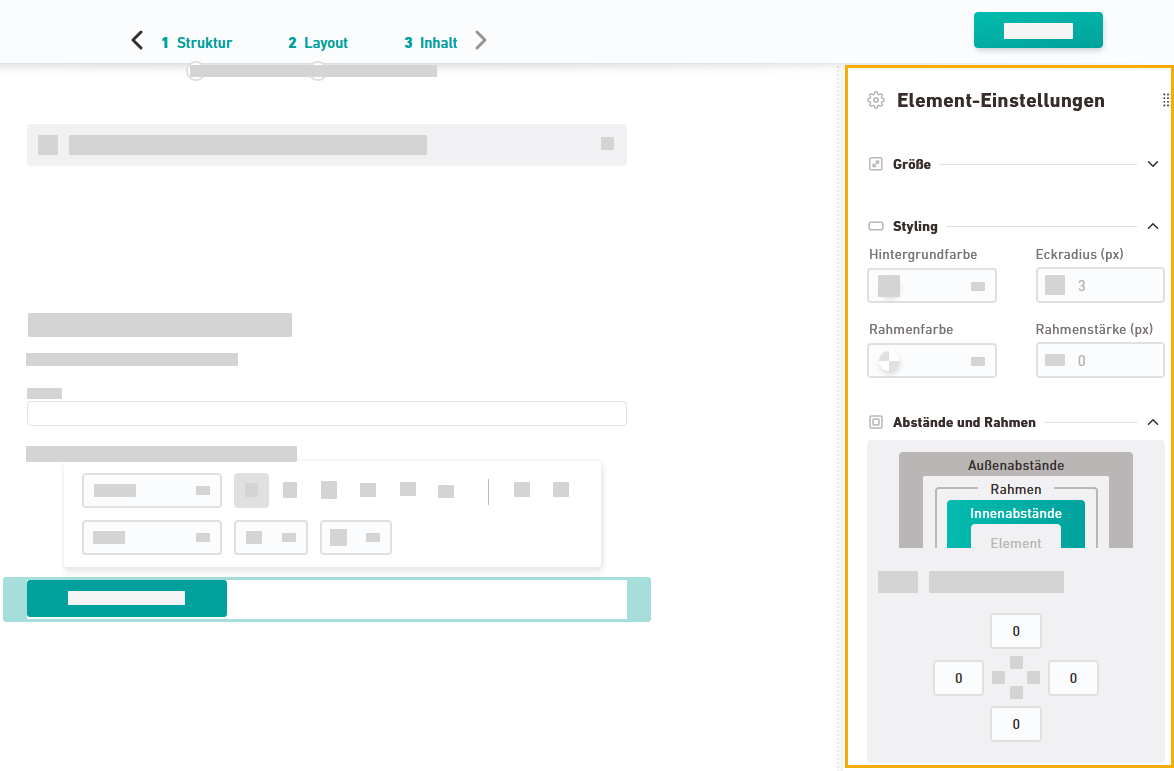
Image Drag & drop images from the  Media panel into your form.
Input field Use the input field to collect any attributes in your subscription form. Make sure to always collect the email address.
Further options
You can find all options (except for the label text) in the Element settings panel in the "Content" workflow step.
-
Single-line / multi-line
-
Required field
-
Label: Edit the label directly in the text element. Show or hide your label in the Element settings panel.
-
Prefill: Prefill your input field with text. The prefilled text is visible when the form opens and will be stored as the attribute value if your recipient leaves it unchanged.
-
Placeholder text: The placeholder text appears if you have not added any pre-filled text — or as soon as your recipient deletes the pre-filled text.
Use the preview: In the form editor, you cannot fully simulate the interaction between pre-fill and placeholder text. Use the browser preview to make sure everything works as intended.
Checkbox With checkboxes, your recipients can select multiple options.
Use checkboxes for:
Any attributes
Use checkboxes with single or multiple selection to collect attribute values, e.g. to ask about interests.
Example: I’m interested in:
-
Adventure travel
-
Language travel
-
Independent travel
Subscription confirmation
This checkbox is mandatory. Recipients must check it to activate the Subscribe button.
Add a suitable confirmation text, e.g.: "I agree to receive the newsletter."
Tracking permission
If enabled, recipients consent to personalized tracking.
Add a suitable text, e.g.: "I consent to the personalized tracking of my clicks and openings."
What does this mean?
-
Recipients who check the box give consent personalized tracking
Tracking Permission =
 Yes
Yes -
Recipients who do not check the box reject personalized tracking
Tracking Permission =
 No
No
§ GDPR You may only analyze clicks and openings on a personalized basis if the recipient has given explicit consent to personalized tracking.
Further options:
-
Required
-
Pre-selected
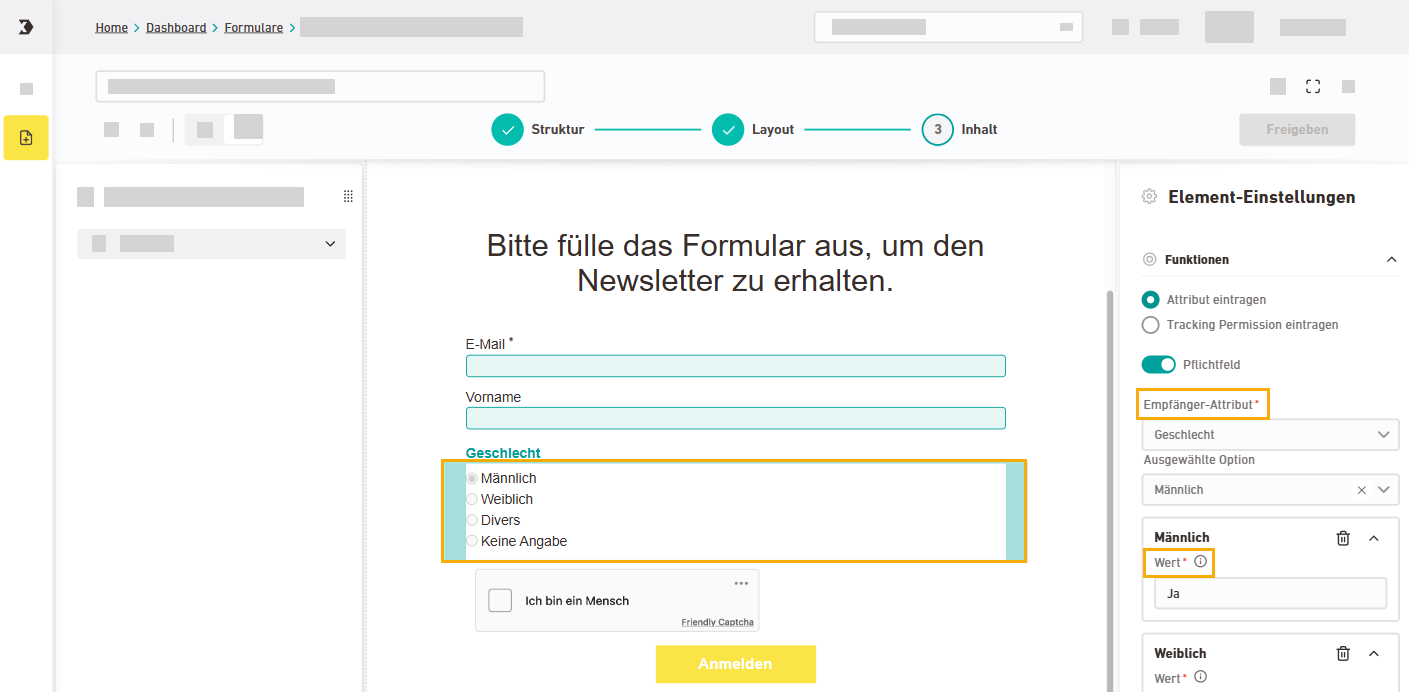
Radio button With radio buttons, your recipients can select exactly one option.
Use radio buttons for:
Any attributes
Select attribute:
Select one of your recipient attributes, e.g. gender.
Define options:
-
Enter a name for the option directly in the form, e.g. "Male".
- Specify which value is saved when recipients select this option, e.g. "Yes".
You can create as many options as you like.
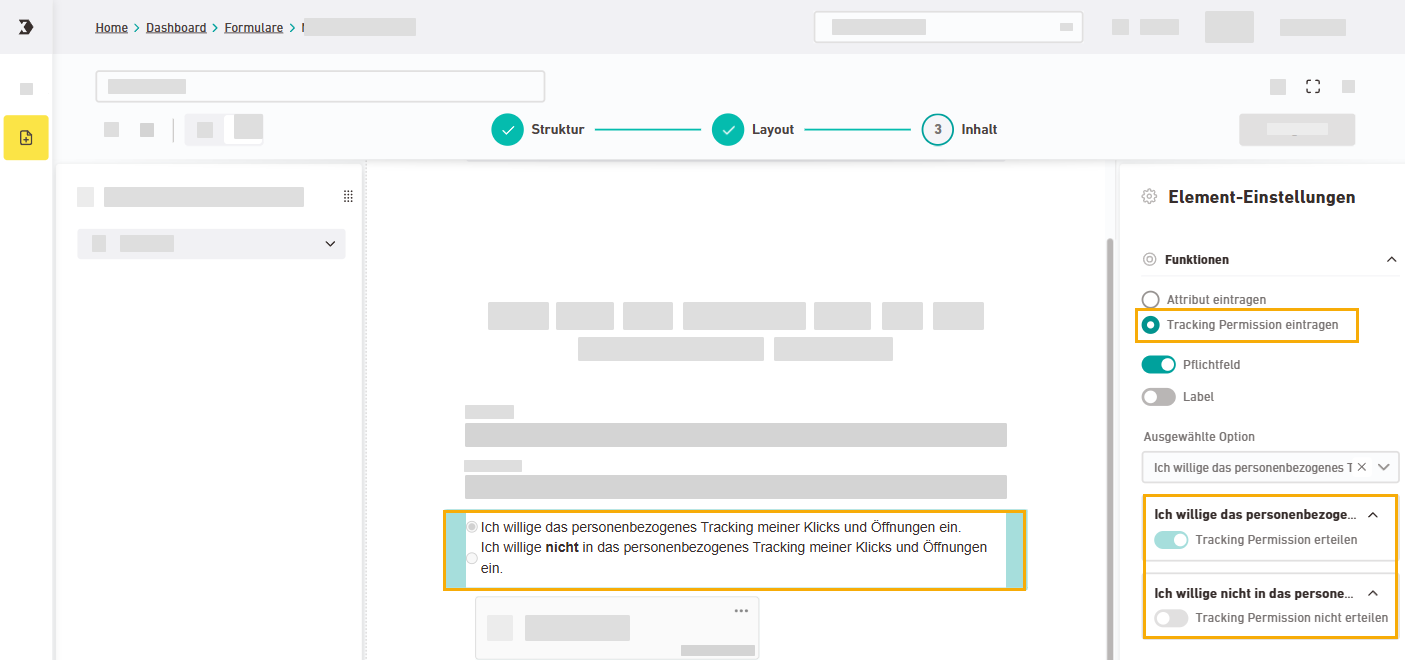
 Tracking Permission
Note: You can add the tracking permission to your form as a checkbox or radio button.
If you add the tracking permission as a radio button to your form, the system will automatically create these two options:
-
Grant tracking permission
-
Do not grant tracking permission
Specify your labels directly in the form, for example: “I consent to the person-based tracking of my clicks and openings” (for “Grant tracking permission”).
Go to the element settings to make sure the value is assigned correctly.
 What does this mean?
-
Recipients who check the box give consent personalized tracking
Tracking Permission =
Yes -
Recipients who do not check the box reject personalized tracking
Tracking Permission =
No
§ GDPR You may only analyze clicks and openings on a personalized basis if the recipient has given explicit consent to personalized tracking.
Further options:
-
Required
-
Selected option
Friendly Captcha Use Friendly Captcha or Google reCAPTCHA to protect your form from bot activity.
-
Add Friendly Captcha as a form element.
-
Or configure Google ReCaptcha in the form settings. To do this, first remove the "Friendly Captcha" element from your form.
Approval required: If you wish to use Google reCAPTCHA, we require your company’s approval to include Google Ireland Limited as a subprocessor. You can send us the completed
Background: Unlike Friendly Captcha, Google reCAPTCHA does not have a visible form element.
Subscribe button Clicking the "Subscribe button" submits the subscription request. Separator Use the divider as a visual separator. Adjust its design in the Element settings panel. Clear content Drag the "Clear content" element onto an existing form element to empty that section. The form elements "Subscribe button" and "Friendly Captcha" can each be added only once per form.
-
-
All set? Click .
-
Configure the embed settings, then click .
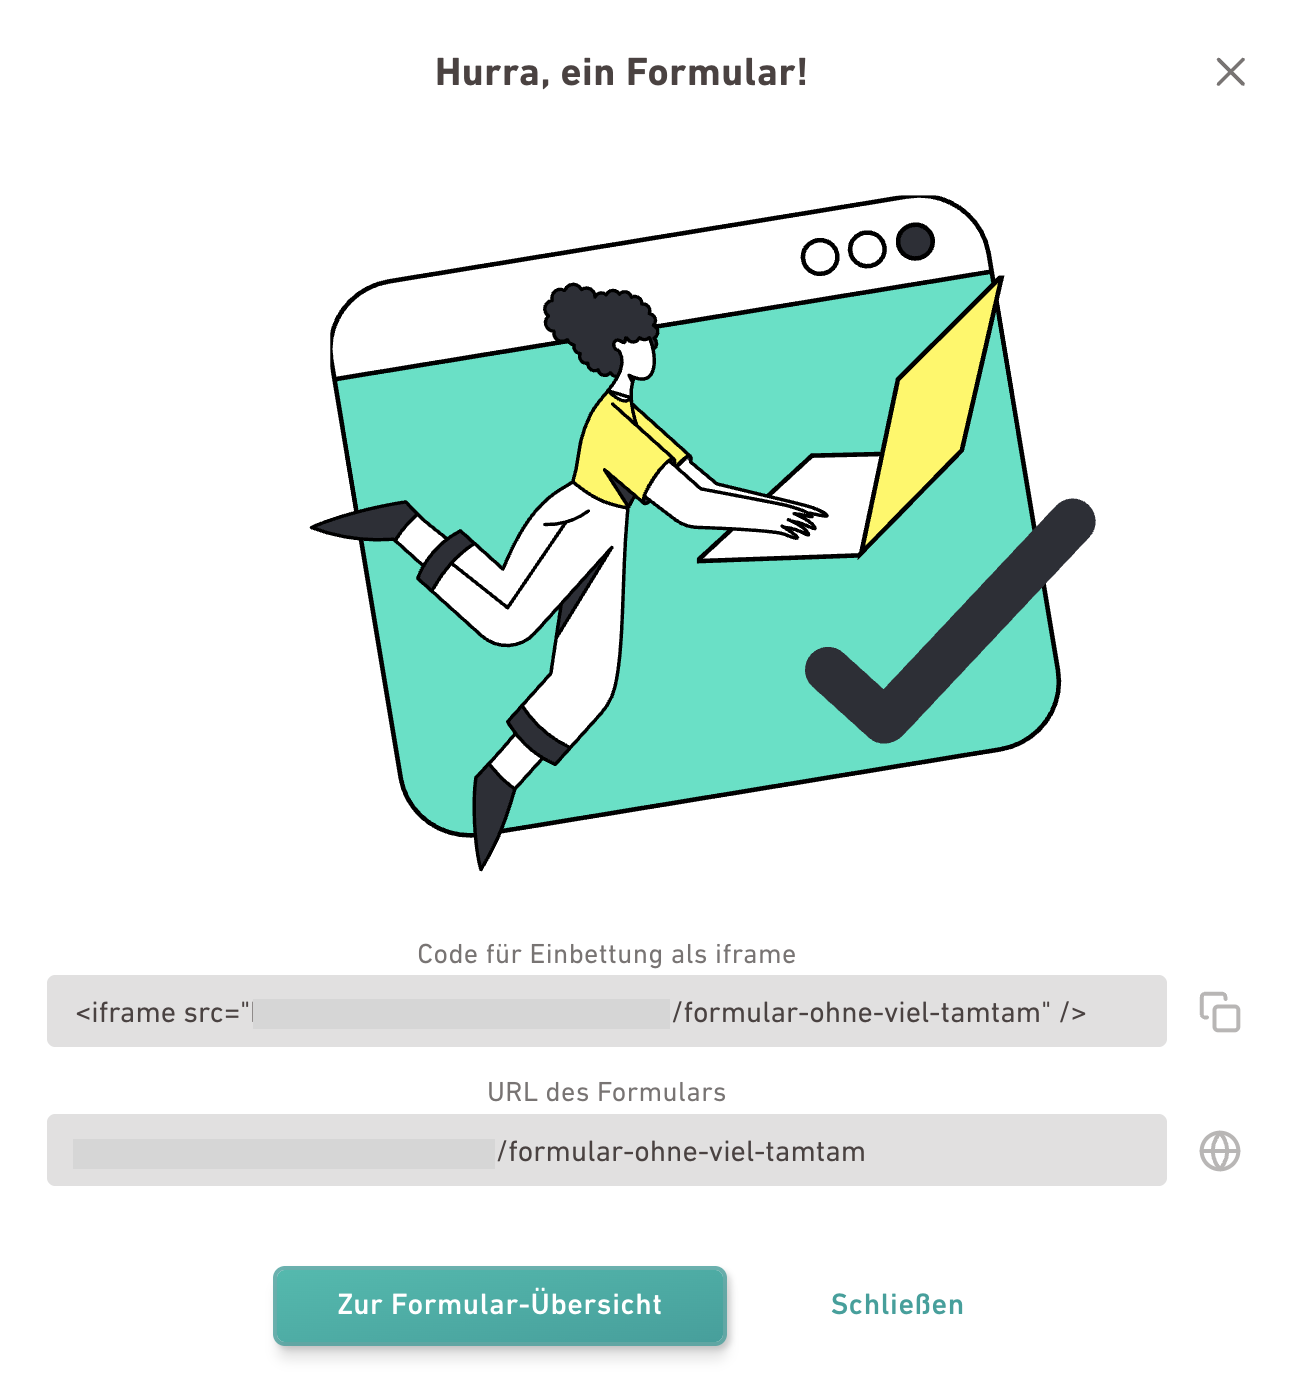
-
You have created and published your subscription form.
Your recipients can view and complete the subscription form online as soon as you embed it into your website via iframe.
Next steps
-
Prepare your form for embedding: Preview the form, define the form path, and specify the domains that are allowed to access it.
-
Set up your subscription and unsubscription process.
-
Then switch to your content management system and embed the subscription form into your website via iframe.
Did you not find what you were looking for?
-
Send us your feedback.
