Step by step
-
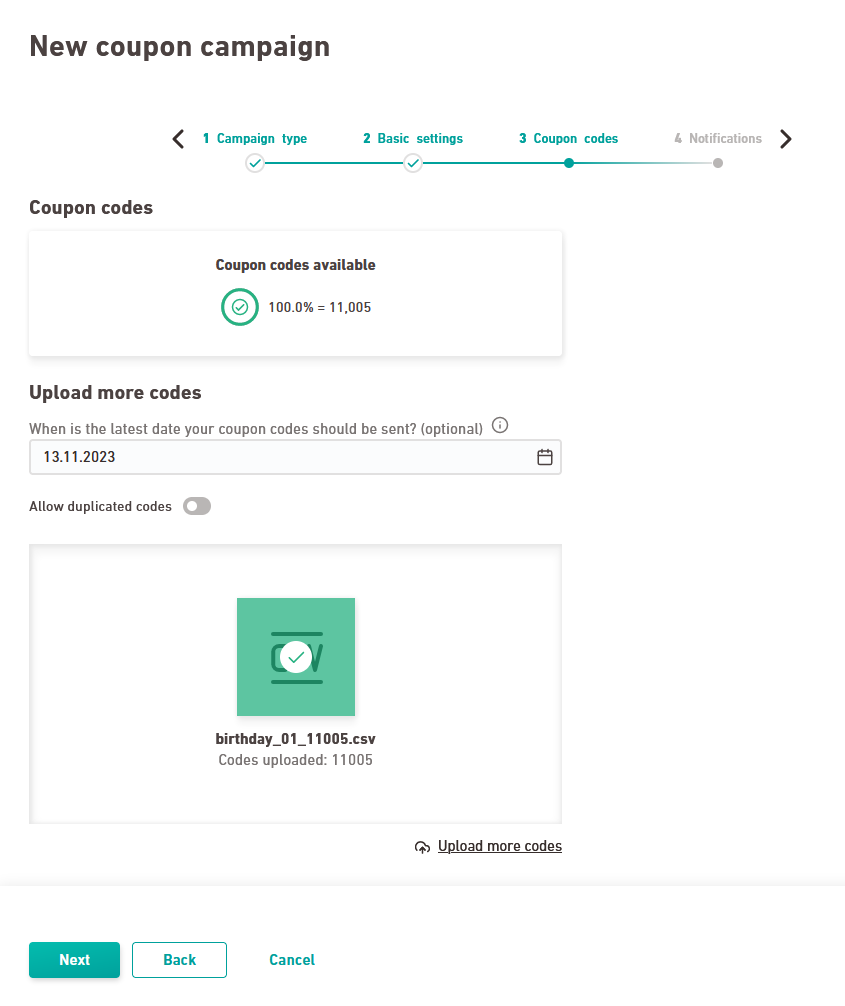
Coupon codes
Set your coupon code preferences.
 Coupon code settings
Field
Description
Latest dispatch date Specify up to which date your coupon codes can be sent (optional).
Changes to the dispatch date do not apply to coupons that have already been uploaded: If you subsequently change the latest dispatch date of a campaign, this change will only affect coupons that you upload after this change. The change does not apply to coupons that you have already uploaded before.
Learn more about campaign duration, expiration date, and dispatch date below.
Allow duplicated codes Specify whether or not code duplicates should be uploaded. Our default for all campaign types is that we do not accept duplicate codes, i.e.:
We will check your CSV file for duplicates as compared to already uploaded coupon codes when uploading and we will only upload new codes.
You can change this setting at any time in case you'll want to upload and send duplicate codes without verification.
Campaign duration, expiration date, dispatch date – what's the difference?
Field
Description
Coupon expiration date We do not take the expiration date of your coupons into account. You are responsible for documenting it in your own system, independently from Inxmail. It is only relevant for your settings in the "Coupons" navigation item in the sense that you define your latest dispatch date depending on the expiration date of your coupons. Latest dispatch date Define the latest dispatch date depending on:
-
The expiration date of your coupons
-
The maximum validity of your coupons after receipt
Inxmail cannot know these two parameters. Therefore, you have to define the latest dispatch date yourself and make sure you comply with the legal requirements.
You can set the latest dispatch date in the Coupon codes workflow step.
Latest dispatch date depending on campaign type
We have set "90 days" as default for the following campaign types to prevent you from unintentionally sending very old coupons that might no longer be valid at the time of dispatch:
-
Welcome mailing
-
Birthday mailing
-
Customer loyalty campaign
You can overwrite this preset at any time and adjust it to fit your needs.
Changes to the dispatch date do not apply to coupons that have already been uploaded: If you subsequently change the latest dispatch date of a campaign, this change will only affect coupons that you upload after this change. The change does not apply to coupons that you have already uploaded before.
Campaign duration and end of campaign You can define the duration and end date of your campaign independently from the validity period of your coupons. If you work with many campaigns, it can be helpful to define a campaign end.
This way, your campaign overview is always tidy without you having to manually delete or disable campaigns that are no longer relevant.
Disabling after two years: We will automatically deactivate your campaign if you have not used it for any mailing dispatch for two years.
You yourself are responsible for the validity of your coupons: You are responsible for making sure your coupons have sufficient validity left at the time of dispatch.
-
-
Add coupon file
Drag your coupon file to the drag & drop area:
What should my CSV file look like?
Make sure your CSV file meets the following specifications:
-
The file extension is .csv.
-
There is only one column in the CSV file. This column contains the coupon codes.
-
The CSV file has no headers. It starts directly with a coupon code in the first line.
-
The CSV file is UTF-8 encoded.
-
The CSV file does not contain any separators such as commas, semicolons or tabs.
-
The CSV file only contains alphanumeric characters, and the characters "-'#+_()"
Wait for the coupon file to upload completely. You can close the overlay in the meantime (make sure to save your changes) and continue working on something else. The upload continues in the background. You can view the upload status any time by re-opening your campaign in the "Coupon codes" workflow step.
-
-
Upload more coupon codes
You can upload more coupon codes now or at a later time. You have two options:
-
You want to keep the existing codes ( codes)
-
You want to delete the existing codes and replace them with the new ones ( codes)
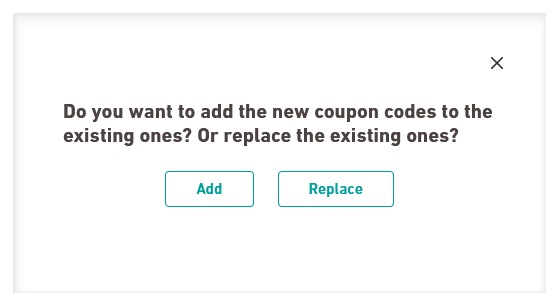
"Replace" deletes all uploaded, unused codes: Use the "Replace" function also if you've suffered problems with your file upload and you want to make sure that none of the existing codes are left.
Upload history: You can view your upload history later in the "Upload history" tab in the Campaign status workflow step.
-
-
Click .
-
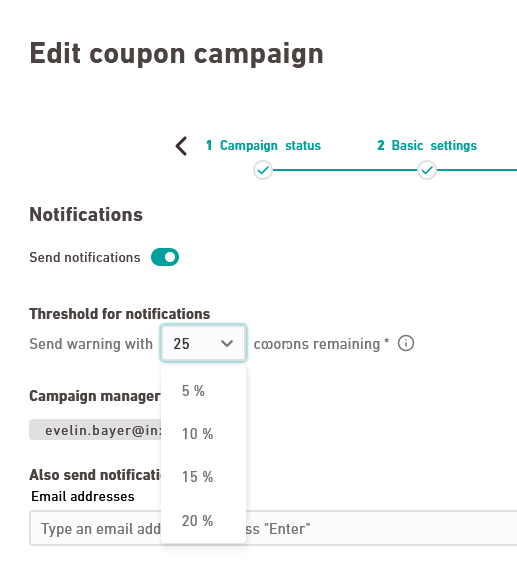
Notifications
Send notifications
Specify whether Inxmail should notify you by email:
-
when your campaign is about to be disabled or
-
once your coupon codes fall below a certain percentage.
Notifications settings
Field
Description
Threshold for notifications Select or type the percentage of remaining coupons for which you want to receive a notification.
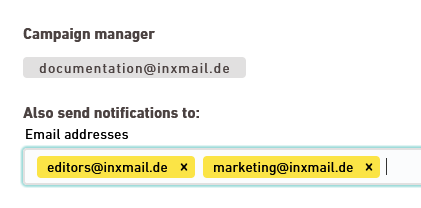
Also send notifications to: What notifications will be sent?
Your campaign manager and all registered email addresses will receive the following notifications:
-
Campaign with end date: 14, days, 7 days and one day before your campaign will be disabled (depending on its end date)
-
Campaign without end date: Once your campaign has been disabled.
Background: We will automatically disable your campaign if you have not used it for any mailing dispatch for 2 years.
-
Automatically deleted coupons: 14 days, 7 days and one day before coupons will be deleted for which a "last dispatch date" has been defined - if the threshold is crossed due to this deletion.
-
When the number of coupons available drops below the threshold.
-
By default, Inxmail sends the notifications to the person who created the campaign (your "Campaign manager").
-
Enter additional e-mail addresses to be notified as necessary and confirm by pressing "Enter".
Our recommendation: Enter an e-mail account that is not personal. This way you make sure the right colleagues are always up to date, even in the event of personnel changes.
Fallback coupon code
Store fallback codes that will be sent once all your coupon codes have been used up (optional).
No dispatch if there are no coupon codes and no fallback code: Once all coupons in your campaign have been used up and no fallback coupon code has been stored, your mailing will not be sent.
-
-
Click .
- You have uploaded your coupon file and set your notifications.
Next step
Did you not find what you were looking for?
-
Send us your feedback.
