Activating the sending of mailings
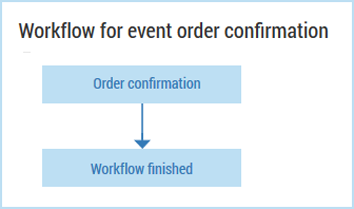
Mailings must be integrated into a workflow before they can be sent by Inxmail Commerce. There is a separate workflow for each event. The start and end points of the workflow already exist after an event has been created and are displayed on the Workflow tab. The start point is the identifier of the event; the end point is always the Workflow finished element. The start and end points of a workflow for the ‘Order confirmation’ event appear as follows:
Workflow elements
Besides the start and end points, workflows contain mailings and, if required, control elements. Control elements allow you to define how Inxmail Commerce should proceed with mailings. The control elements are as follows:
- Wait
You can use the Wait control element to define a relative sending time. For example, you can define that the primary transactional mailing for an event is to be sent five minutes after the event has occurred. Similarly, you can define that a mailing requesting feedback is to be sent seven days after the dispatch confirmation mailing.
The sending time is therefore defined in relation to the event and/or to other mailings.
Detailed information on defining a sending time can be found in the section Controlling the sending time.
- Applying a filter
You can use the Apply filter control element to send mailings to particular target groups. You can select the event data of the event XML as a condition for the creation of the target group.
In this way, you can send English-language mailings to English-speaking recipients and French mailings to French-speaking recipients, for example.
Detailed information on defining target groups can be found in the section Defining target groups on the basis of event data.
- Mailing opened?
You can use the Mailing opened? control element to configure a workflow in such a way that recipients who have opened a specific email pass through another branch of the workflow from those recipients who have not opened the email.
For example, you can resend an email with an attached invoice to a recipient who has not opened the email within a specified time period.
Detailed information on the Mailing opened? control element can be found in the section Inserting the ‘Mailing opened’ target group.
- Perform A/B test
You can use the Perform A/B test control element to create and perform a split test.
Detailed information on creating a split test can be found in the section Performing a split test.
Workflow status
The status of a workflow can be either active, deactivated or draft.
A workflow is created and edited in the workflow editor. Here, you can add mailings and control elements to the workflow. There is no restriction on the number of mailings and control elements you can add. You can combine the control elements as desired.
The workflow will have the draft status during its creation. When you have finished creating the workflow, you can save it in a first step. After saving, the workflow will still have the draft status.
For the workflow to actually control the sending of mailings, you must activate it.
You can deactivate the workflow at any time. No mailings will then be sent via the corresponding event.
The active workflow is displayed on the Workflow tab as soon as you have selected an event in the selection bar.
Related topics
Did you not find what you were looking for?
-
Send us your feedback.
