
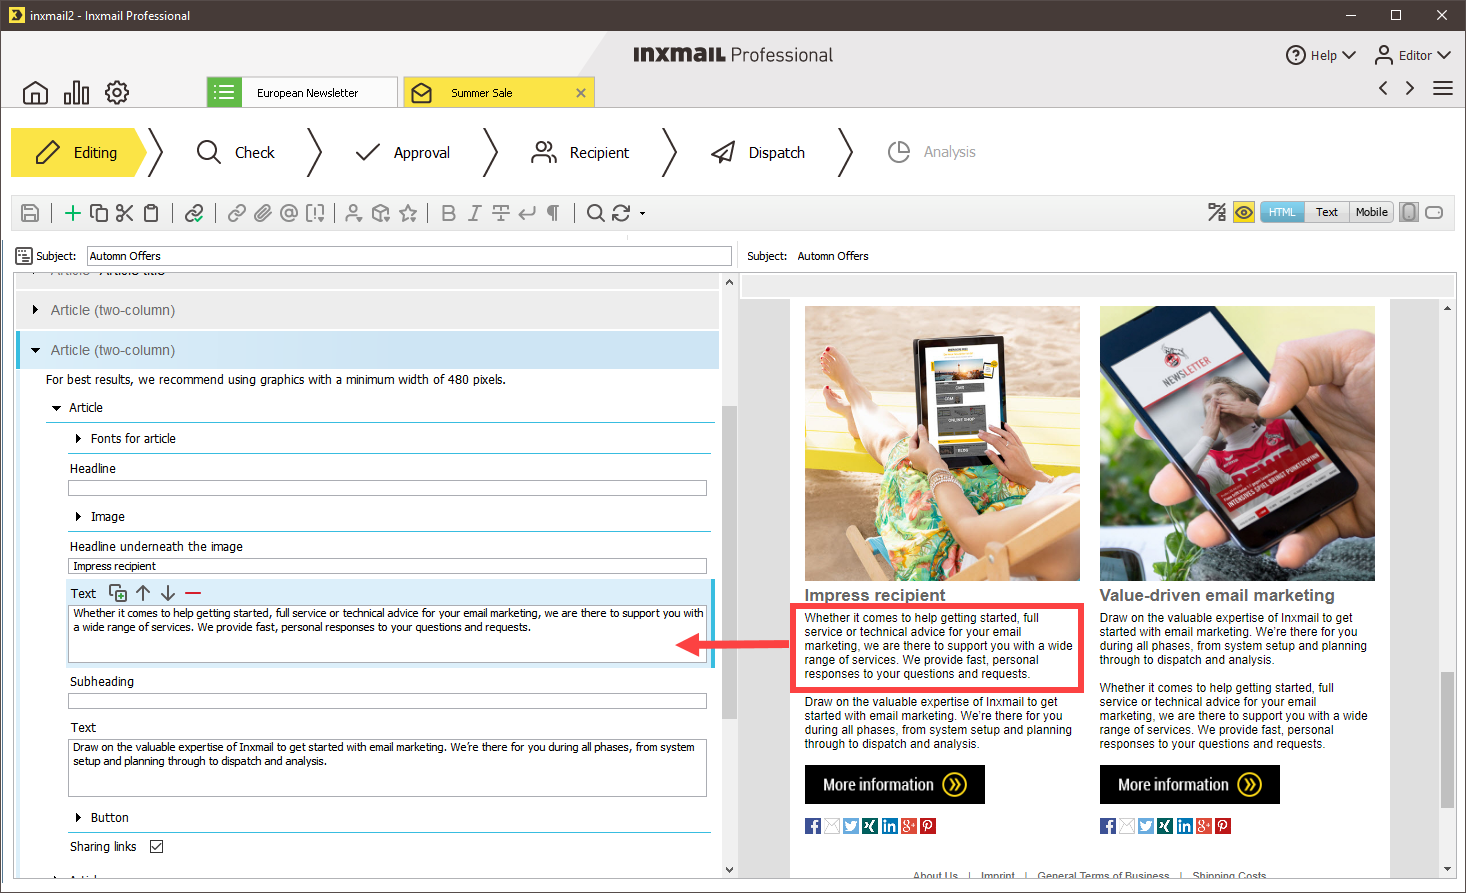
You can edit your mailing in the ![]() Editing workflow step. The toolbar provides different options to add content to your mailing, e.g. icons, personalization, links and images.
Editing workflow step. The toolbar provides different options to add content to your mailing, e.g. icons, personalization, links and images.
Remember to modify the subject (and also the auto preview) of your mailing, since Inxmail Professional automatically sets the name of the mailing as placeholder for the subject field. Icons in the subject line also often help increase the open rate.
Icons can be added to every text field. Select the position in the text field where you intend to place the icon. In the toolbar, click the ![]() (Insert symbols) button, open the desired category and click on your preferred icon.
(Insert symbols) button, open the desired category and click on your preferred icon.
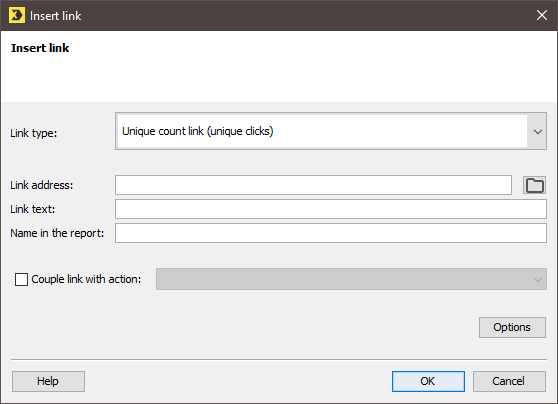
You require a special type of link in your mailing in order to activate link tracking (so that all visited links are counted). When inserting a new link, select one of the following tracking link types in the Insert link dialog box: Unique count link (unique clicks) or Total count link (all clicks). No tracking will take place if you choose the No count link (no counting) option. In this case, only the link functionality available.
If your mailing is based on a template, you can fill the elements of the mailing with contents. You can add new main elements (articles) or article elements (paragraphs, images, links, and so on) using the ![]() (Add element) button.
(Add element) button.
In order to achieve best results when displaying images, you should think about the image sizes in advance and test the two possible variants.
Variant 1: Standard image sizes | from 72 ppi
72 ppi is the minimum lower limit for screen points on a monitor. Here we count in ppi (pixels per inch). You can define the image sizes in the Inxmail Advanced Template yourself. Depending on the picture element, the graphics are scaled proportionally to the required width, the picture height is always flexible. The header graphic is stored, for example, in a minimum width of 600 pixels. In the mobile version, articles are displayed one below the other (more details: Mobile Optimization of the Advanced Template) and are therefore output accordingly enlarged (e.g. for 2 or 3 articles). If an image is stored too small, it will be displayed as a pixel. Therefore, the images, especially for articles, must be created with a minimum width of 480 pixels.
Variant 2: High-resolution graphics (retina-optimized) from 220 ppi
Which width you use depends on your individual consideration of an optimal image display on mobile devices vs. a shorter and therefore faster loading time for smaller images. The topic of “retina optimization” also plays a role here. This is the name given to displays that have a high pixel density. This starts at 220 pixels per inch (ppi). If you want to optimize your newsletter for Retina, you have to create the desired images in double width to ensure that they do not pixelate. For a header graphic, which is usually 600 pixels wide, this would mean a width of 1,200 pixels. For article images, which are usually 480 pixels wide, there are 960 pixels.
Our recommendation is to store button, icon and header graphics retina-optimized, i.e. in double image size - here is an example:
|
Normal |
Retina optimized |
|---|---|
Always test the quality of the images used directly on the screen. The higher the zoom in the program in which you are currently reading this document, the clearer the difference between the above mentioned graphics.
You can delete or move certain elements. Whenever you can delete or move elements, the ![]() (Remove element) button or the
(Remove element) button or the ![]() (Move element up) and
(Move element up) and ![]() (Move element down) buttons will appear in the editing area directly next to the selected element.
(Move element down) buttons will appear in the editing area directly next to the selected element.
You also have access to personalisation options in every text element. To use these, click the position in the text element where you want to integrate the personalisation. In the toolbar, click the ![]() (Insert recipient data for personalisation) button and specify which column contains the value for personalisation.
(Insert recipient data for personalisation) button and specify which column contains the value for personalisation.
In order to address your recipients individually, you can dynamically personalize the salutation in your mailing using a module. For further information, please see Creating a new salutation module.
While creating your mailing, you can check its appearance using the quick preview. To do this, click the ![]() (Show/hide quick preview) button or refresh the quick preview by clicking the
(Show/hide quick preview) button or refresh the quick preview by clicking the ![]() (Refresh) button. The mailing will be displayed in HTML format, text format or mobile optimised.
(Refresh) button. The mailing will be displayed in HTML format, text format or mobile optimised.
You can also navigate from the HTML preview section directly to the corresponding (main) element in the editing area. To do so, click the (main) element you would like to edit in the HTML preview section. Inxmail Professional then positions the cursor at the beginning of the corresponding (main) element in the editing area. At the same time, the (main) element is highlighted in blue and displayed in the visible area of the editing area.
You can use Link Management to check whether all links in your mailing are active. To open Link Management, click the ![]() (Link Management: Test whether links are active and check tracking) button in the
(Link Management: Test whether links are active and check tracking) button in the ![]() Editing workflow step. If all links are displayed as
Editing workflow step. If all links are displayed as ![]() (active), you can close Link Management. If there is an
(active), you can close Link Management. If there is an ![]() (inactive link) in the list, you can select (highlight) the link and click the
(inactive link) in the list, you can select (highlight) the link and click the ![]() (Link editing) button to correct it.
(Link editing) button to correct it.

Test the link again to make sure that it is now active. To do this, click the ![]() Start check button. To save the changes, close Link Management by clicking the OK button. The links you have edited are then automatically corrected in the mailing.
Start check button. To save the changes, close Link Management by clicking the OK button. The links you have edited are then automatically corrected in the mailing.
Related topics
Inxmail Professional:
2 possible use cases
Depending on your contract, you might use Inxmail Professional in different ways:
-
As part of the Inxmail platform: You use newsletters & campaigns as your main tool for creating and sending newsletters. Inxmail Professional only serves as a recipient database and configuration tool in the background.
We are constantly expanding the functionality of “Newsletters & Campaigns”. Check out newsletters & campaigns section to find out if the feature you are looking for might already be available there.
-
Full scope: You use the legacy tool Inxmail Professional as your main tool for creating and sending newsletters.
Did you not find what you were looking for?
-
Send us your feedback.
