Step by step
To set up a new PDF data source and personalise the associated PDF document, proceed as follows:
- Click the
 (Global settings) tab.
 - Click the
 Content agent.
 -
Click
 (Create new content source).
The Create new content sources dialog box is displayed.
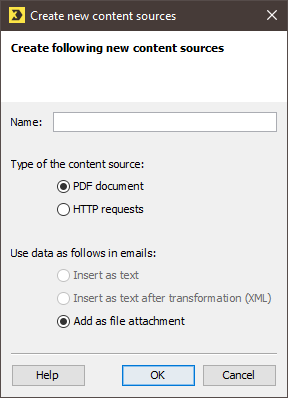
 Field descriptions for ‘Create new content sources’ dialog box
Name
Description
Name
Enter a unique name for the PDF data source here. The PDF data source will be integrated into the mailings as external content under this name and the (personalised) PDF file attachment will be generated automatically.
Note: Please be aware that changing the name at a later point may cause problems if this content has already been integrated into a mailing.
Type of the content source
PDF document
Select this option if you would like to insert a personalised PDF document as an attachment to a mailing.
This might be a coupon, invitations or tickets, for example, in which recipient data is integrated.
HTTP requests
This field is not relevant for creating a PDF data source.
For information on this field, please see the section Setting up send time content.
Use data as follows in emails
Insert as text
This field is not relevant for creating a PDF data source.
For information on this field, please see the section Setting up send time content.
Insert as text after transformation
This field is not relevant for creating a PDF data source.
For information on this field, please see Setting up send time content.
Add as file attachment
This option is enabled automatically if you previously selected the PDF document option.
- Specify your settings in the fields.
-
Confirm the dialog box by clicking Add + Close.
You will be directed to the page for entering the (PDF) data source settings (Data sources tab).
-
Click
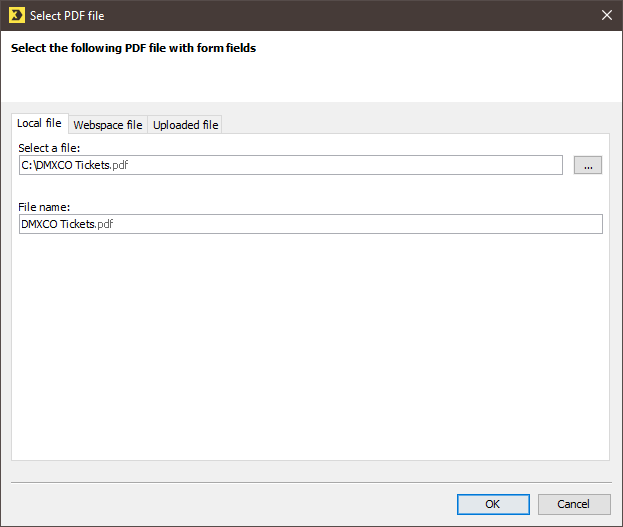
 (Upload file attachment) next to the Name of the file attachment field.
The Select PDF file dialog box is displayed.
-
Select the PDF file you require or upload it.
You will be directed back to the page for entering the (PDF) data source settings (Data sources tab).
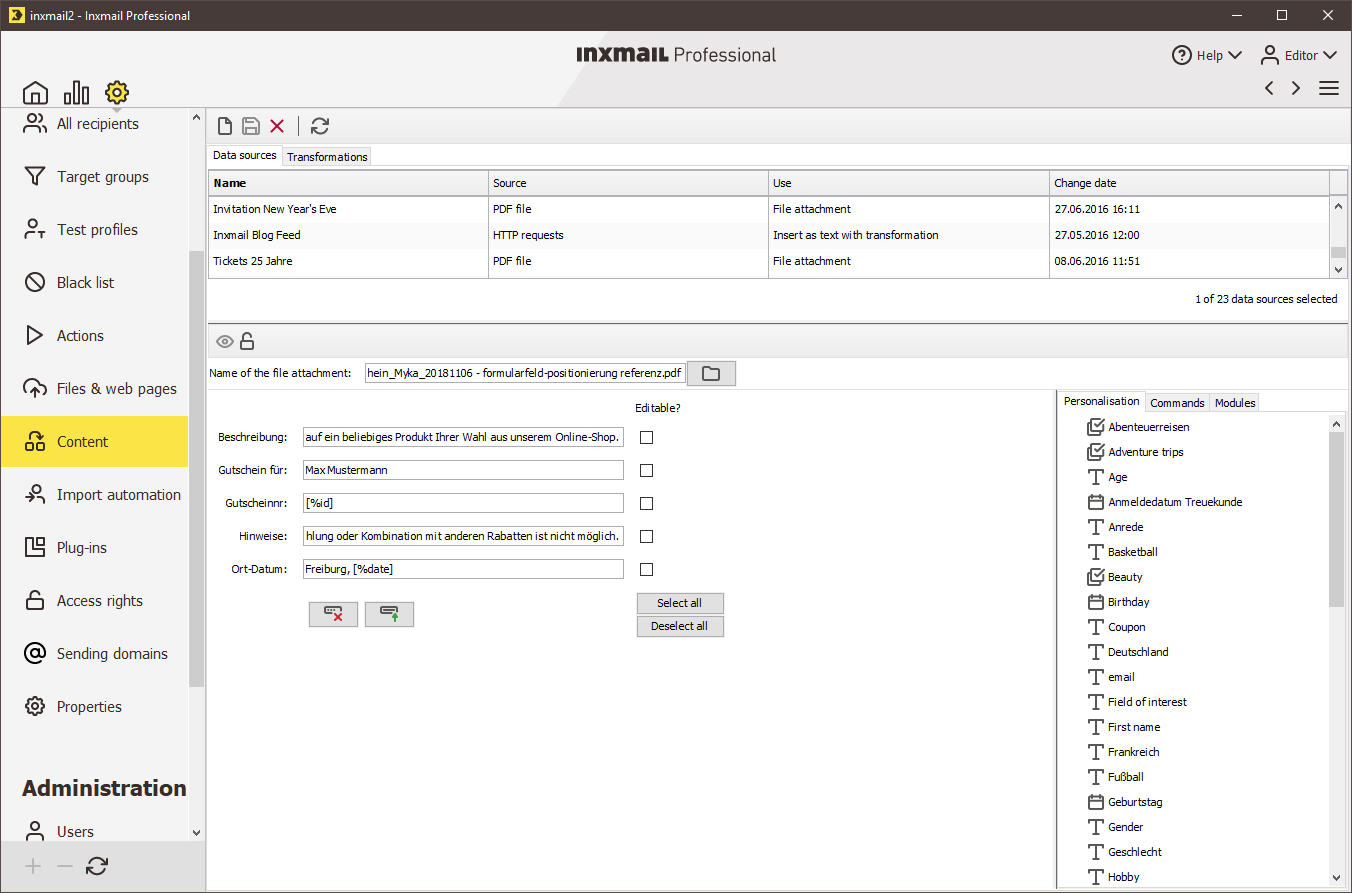
- You can edit the content of the input fields. The following options are available:
-
You can insert personalised text on the Personalisation tab (Insert personalised text). To do so, double-click the corresponding recipient table column in this tab.
If the name of the input fields largely corresponds with the recipient table columns you have created, you can also click the
 (Automatically fill all field contents). This will automatically assign the corresponding recipient tables to the input fields.
Already added content will not be overwritten.
- You can use the Commands tab to insert system data, links or personalised text. (Insert system data / commands , Inserting a link and Creating personalised texts (for target groups) ). To do so, double-click the corresponding command in this tab.
-
You can insert modules on the Modules tab (Inserting modules). To do so, double-click the corresponding module in this tab.
Note: Do not use any HTML or multipart modules, as HTML is not supported by PDF form fields. HTML tags will not be replaced and will therefore remain in the created text.
- The
 (Clear all field contents) button allows you to delete the content from the text fields.
 -
a user password, so only authorised users can open the document
You can either enter the password as text (so all users must use the same password) or select a column from the recipients table containing the password. If, for example, users should login with their birthday, select the column from the recipients table that contains the recipients' date of birth.
-
a master password
The master password allows you to open all target documents. This will deactivate all security settings made in this dialog box.
If the password fields are left empty, no password request will appear when opening the target document.
- specify the rights that all recipients have after opening the document (for example, the ‘Select text/graphic’ right)
- selection of the functions for which the user password is required
- You can activate write protection for individual fields in the PDF document to prevent the recipients from editing form fields in the PDF document. To do so, select the corresponding check box in the Editable? column.
-
To configure rights and passwords for use of the PDF document, click the
 (Define PDF security settings) button.
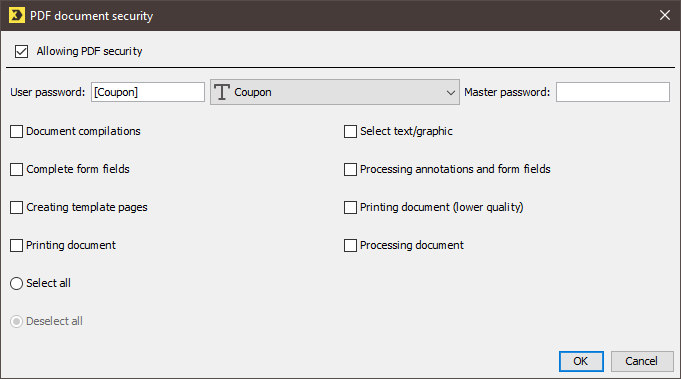
- If the Allowing PDF security check box is activated, you may specify the following in the dialog box:
-
a user password, so only authorised users can open the document
You can either enter the password as text (so all users must use the same password) or select a column from the recipients table containing the password. If, for example, users should login with their birthday, select the column from the recipients table that contains the recipients' date of birth.
-
a master password
The master password allows you to open all target documents. This will deactivate all security settings made in this dialog box.
If the password fields are left empty, no password request will appear when opening the target document.
- specify the rights that all recipients have after opening the document (for example, the ‘Select text/graphic’ right)
- selection of the functions for which the user password is required
- Confirm the dialog box by clicking OK.
- Save your entries.
To use a personalised file name to make a differently named document available to each recipient, enter the following in the Name of the file attachment field:
offer-[$customerno].pdf- You have created a new PDF data source and personalised the associated PDF document.
Inxmail Professional:
2 possible use cases
Depending on your contract, you might use Inxmail Professional in different ways:
-
As part of the Inxmail platform: You use newsletters & campaigns as your main tool for creating and sending newsletters. Inxmail Professional only serves as a recipient database and configuration tool in the background.
We are constantly expanding the functionality of “Newsletters & Campaigns”. Check out newsletters & campaigns section to find out if the feature you are looking for might already be available there.
-
Full scope: You use the legacy tool Inxmail Professional as your main tool for creating and sending newsletters.
Did you not find what you were looking for?
-
Send us your feedback.
