Set up a single sign-on integration to log in to Inxmail via Salesforce or another system using OpenID Connect.
Step by step
-
Open the
 "SSO integrations" navigation item.
 -
Click .
-
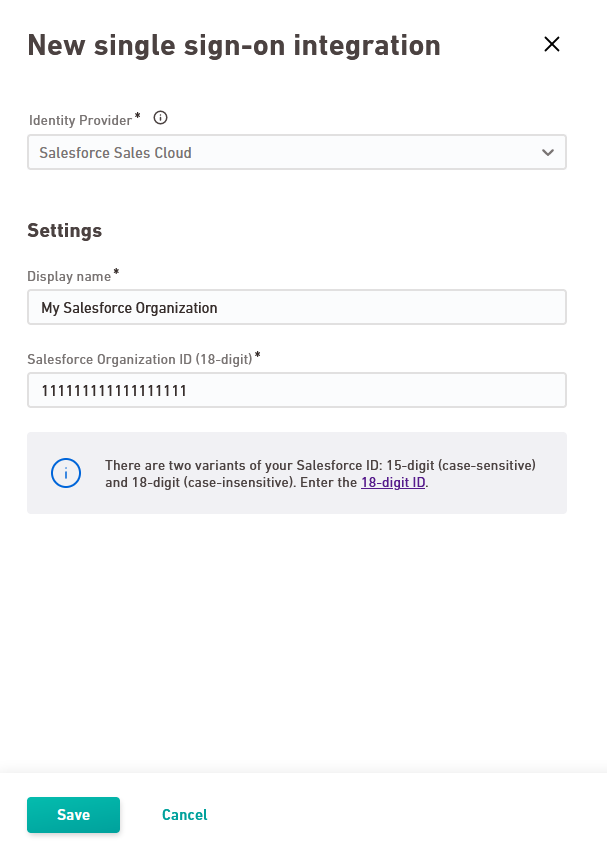
Select your Identity Provider from the drop-down list.
 Salesforce Sales Cloud
Enter a display name and the 18-digit ID for the Salesforce organization you want your account to be linked to.
Enter the 18-digit ID: Your Salesforce organization has two IDs: 15-digit (case-sensitive) and 18-digit (case-insensitive). Enter the 18-digit ID that you will have to retrieve using the Developer Console.
Click .
OpenID Connect (OIDC)
Below you'll find a brief description of the information we need from you so you can create an SSO integration via OpenID Connect.
Want to know more? You can find more technical information at: How does single sign-on via OpenID Connect work in Inxmail? - or go directly to the OpenID Connect documentation.
Enter the following data:
Field Description Display name Enter the name of your SSO integration for the overview table.
URLs OpenID Connect Discovery URL Enter an OpenID Connect Discovery URL to automatically complete the following fields:
-
Authorization URL
-
Token URL
-
Issuer
-
JWK URL
Note: Depending on your identity provider, the OpenID Connect Discovery URL may also have a different name, such as for Entra / Azure AD ("OpenID Connect metadata document") or for Keycloack ("OpenID Endpoint Configuration").
As an alternative: Enter URLs manually Enter the following URLs manually if you do not have an OpenID Connect Discovery URL:
Authorization URL URL of the OAuth 2.0 authorization endpoint Token URL URL of the OAuth 2.0 token endpoint Issuer Name of the issuer of the OpenID Connect tokens JWK URL URL of the JSON Web Key Set (JWK) of your identity provider. The key set contains one or more signature keys that Inxmail will use to validate your identity provider's signatures. Authentication Client authentication Specify which method Inxmail will use for sending client ID and secret to authenticate with your identity provider.
-
HTTP Basic Authentication
-
Post Request
Cliend ID Enter the client ID that Inxmail will use to authenticate with your identity provider. Secret Enter the secret that Inxmail will use to authenticate with your identity provider. Advanced configuration Clock skew Define the permitted timing skew (in seconds) between Inxmail and your identity provider. Automatic redirect to identity provider Automatic redirect enabled Activate this option if you want all users of a specific domain to be automatically forwarded to your identity provider.
DNS entry required: For the redirect to work, you must store the DNS TXT entry displayed here for the domains concerned.
Domains Enter one or more domains, separated by commas. Email addresses for these domains will be automatically forwarded to your identity provider when you log in.
Click .
-
- You have set up a single sign-on integration.
Further information
Can’t see your current navigation item?
Check your profile to see the rights you have or get in touch with your account manager.
Did you not find what you were looking for?
-
Send us your feedback.
