First create your sending domain in Inxmail. This ensures the domain is already registered in Inxmail before you add the related DNS records with your domain host.
Important: Always create your domain in Inxmail first. Add the DNS records only afterwards.
Step by step
-
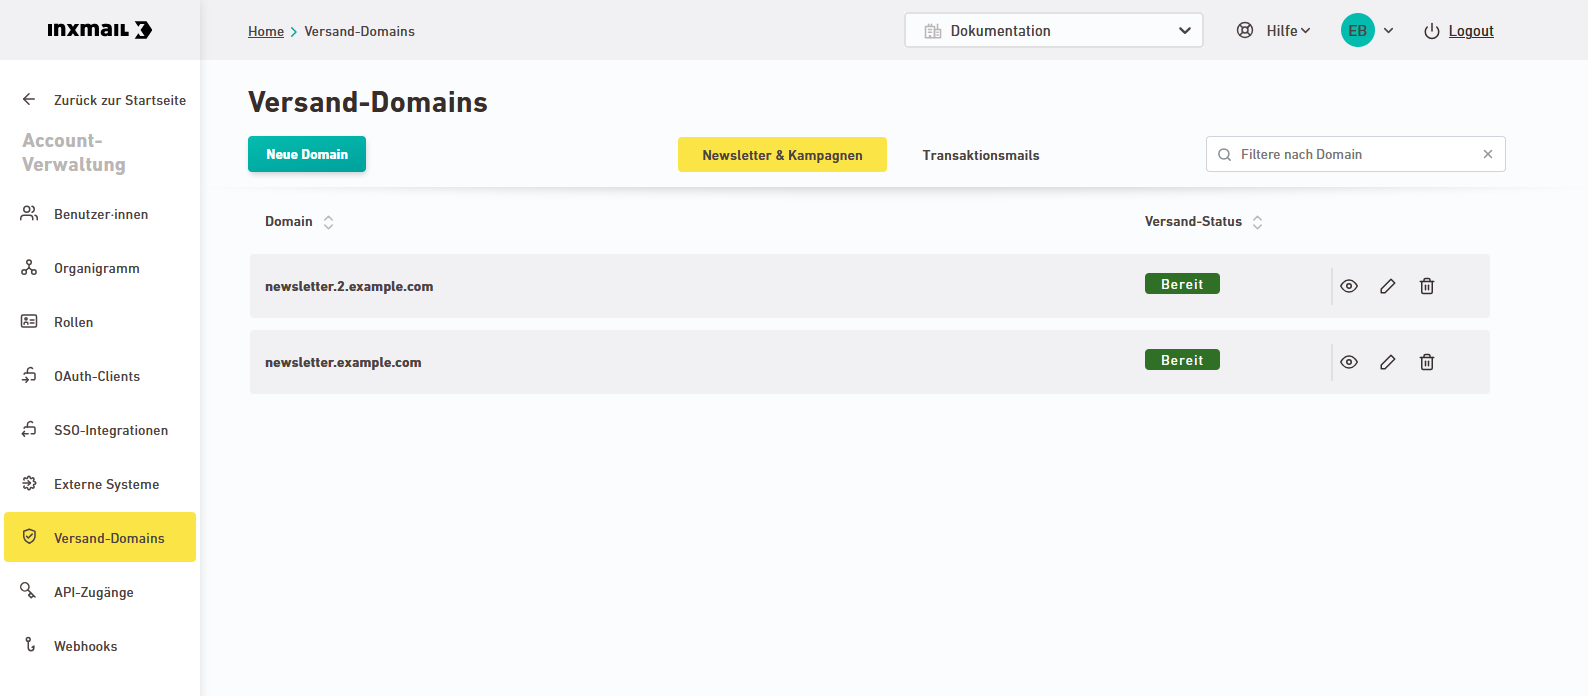
Open the
 "Sending domains" navigation item.
 Where can I find the navigation item?
Depending on your Inxmail product, you can find the
"Sending domains" navigation item in different places.-
Platform or Newsletters & campaigns: Go to "Account management" > "Sending domains"
-
Transactional mails: Go to "Settings" > "Sending domains"
-
Inxmail Professional: Go to the "Global settings" main tab > "Sending domains"

-
-
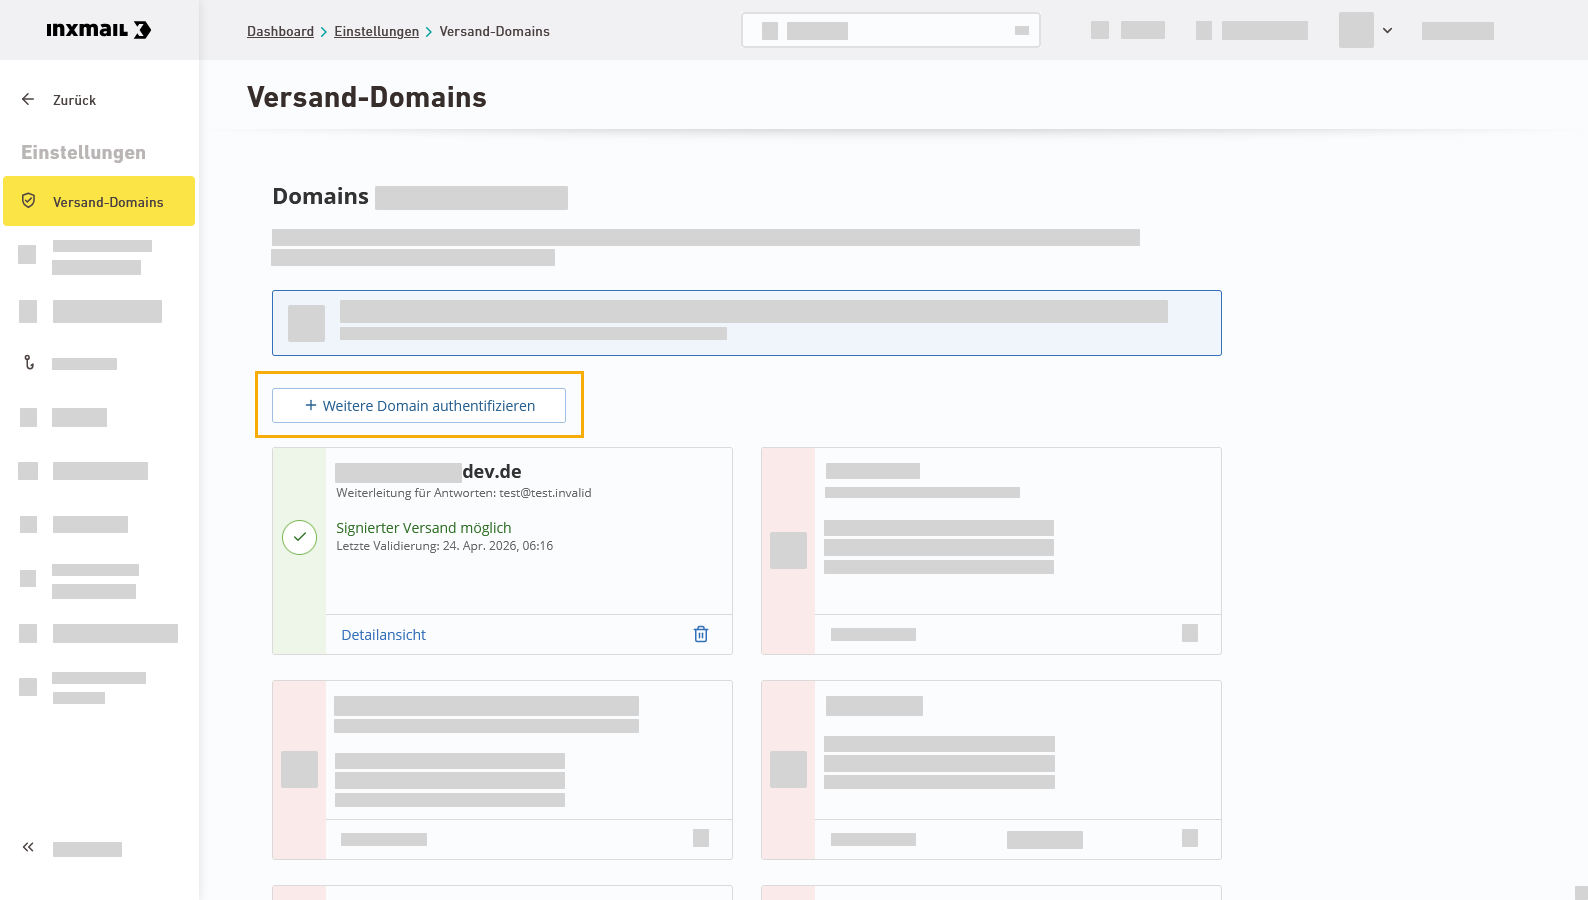
Platform or Newsletters & campaigns: Click .
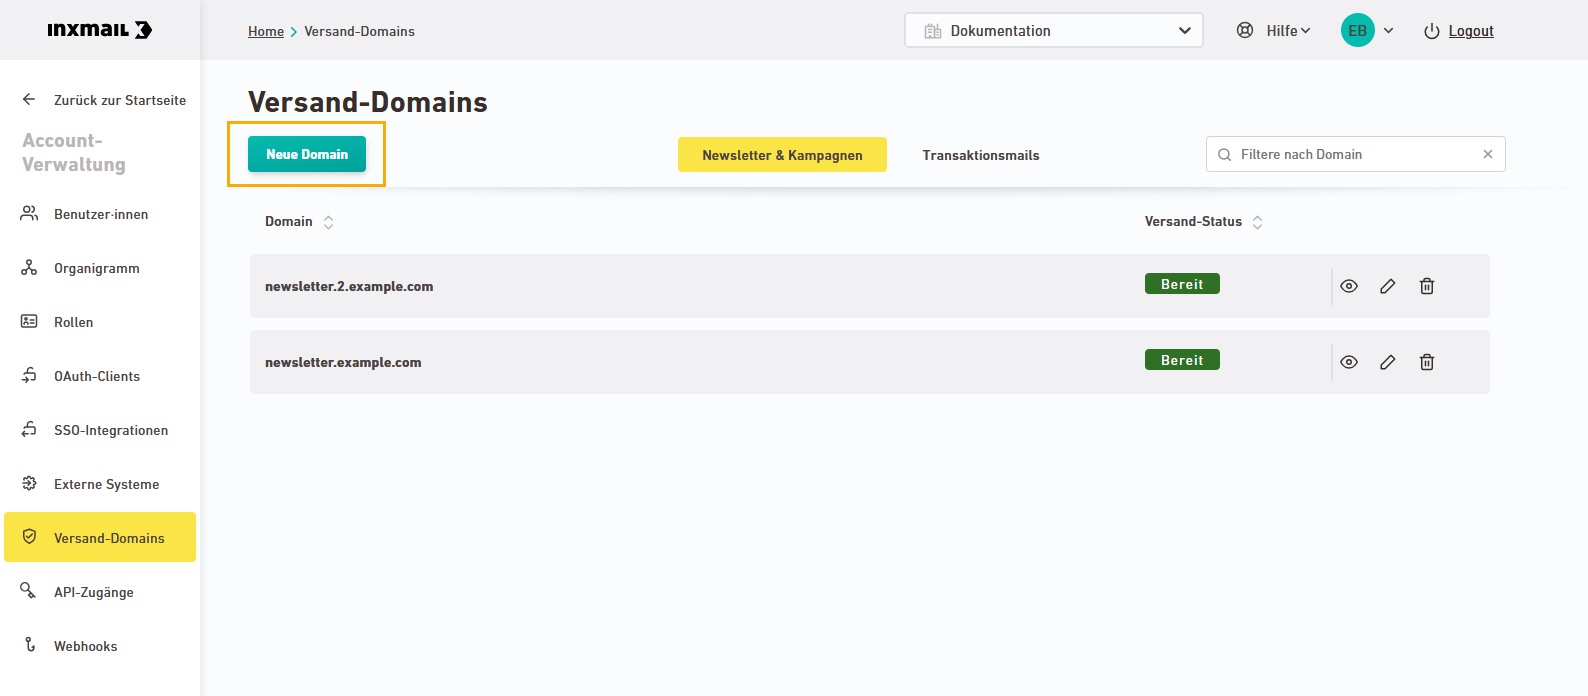
Inxmail Commerce or Inxmail Professional: Click "Authenticate additional domain".
-
Depending on the option, choose the right settings and enter the domain that you want to use for sending.
Subdomain with delegation
Platform: Switch to the "Newsletters & campaigns" or "Transactional mails" tab.
Select "Optimal deliverability" and enable "Delegate domain to Inxmail".
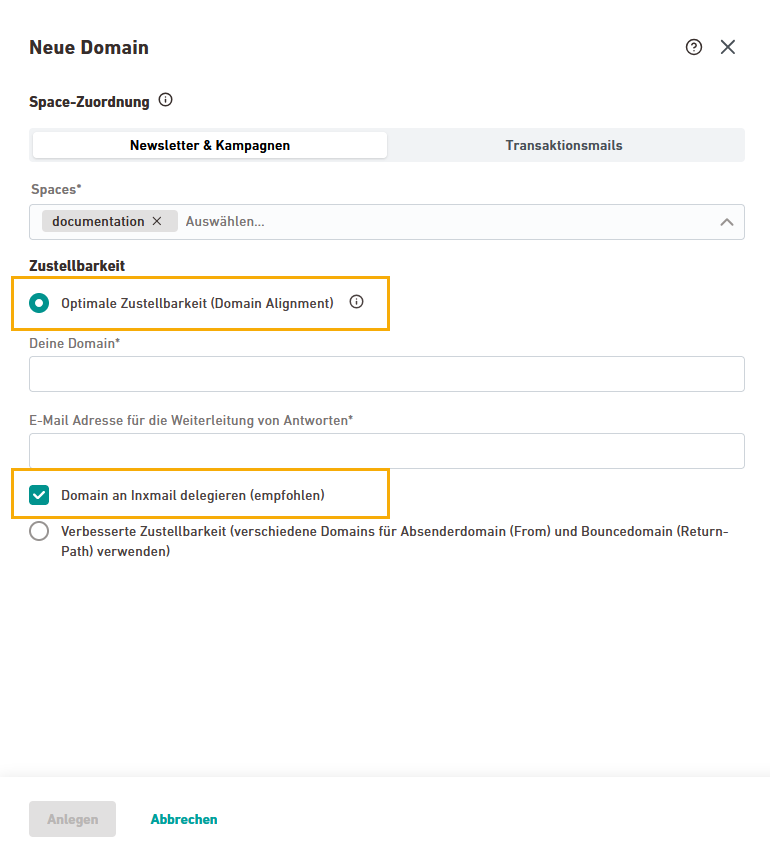
In the "Your domain" field, enter the subdomain that you want to use as your sender domain and bounce domain.
Subdomain via alias
Inxmail Platform: Switch to the "Newsletters & campaigns" or "Transactional mails" tab.
Select "Optimal deliverability" and make sure that "Delegate domain to Inxmail" is not enabled.
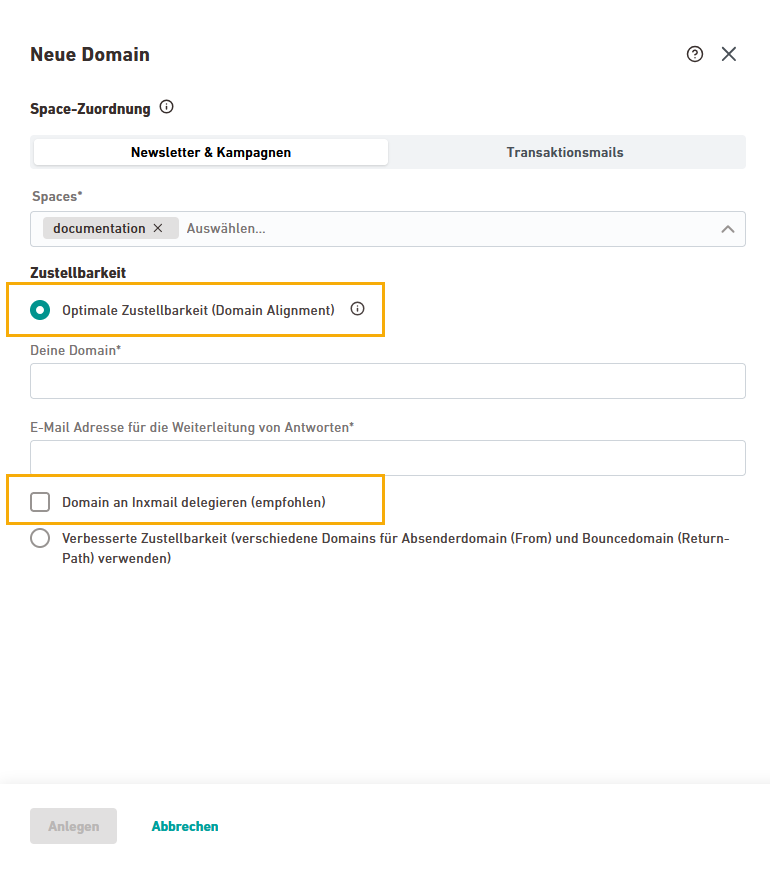
In the "Your domain" field, enter the subdomain that you want to use as your sender domain and bounce domain.
Main domain or subdomain via alias
Select "Improved deliverability".
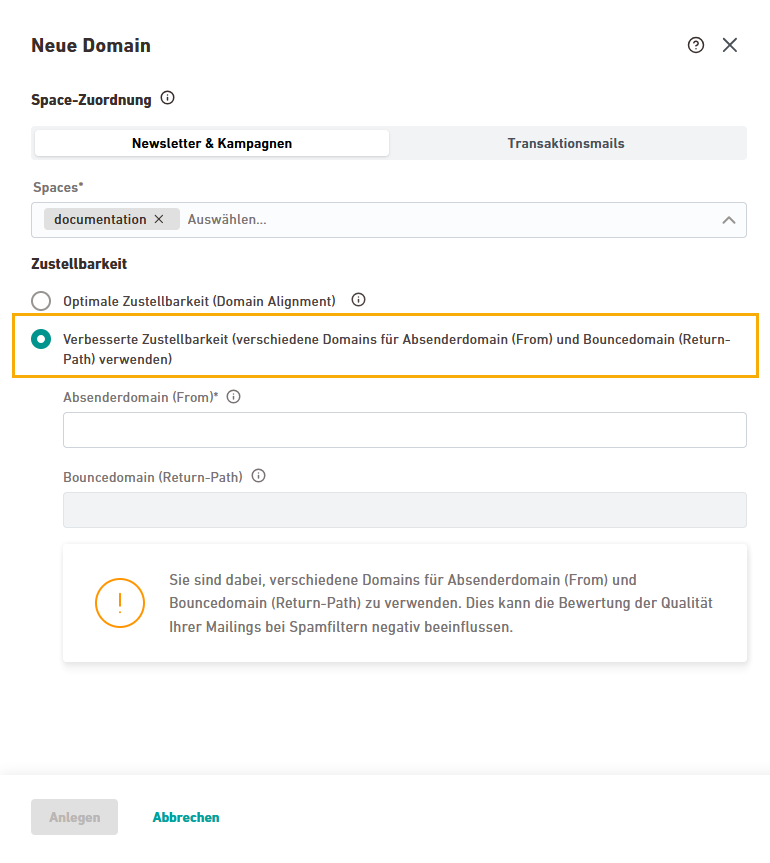
Enter your sender domain and your bounce domain, then click "Authenticate domain".
Find answers to more questions here:
FAQs on domains and subdomains
Which domain can I enter here?
Subdomain with delegation
Create a subdomain that you use exclusively to send emails via Inxmail. For example, if your main domain is example.com, you can create newsletter.example.com as your subdomain.
Subdomain via alias
Create a subdomain that you use exclusively to send emails via Inxmail. For example, if your main domain is example.com, you can create newsletter.example.com as your subdomain.
Main domain or subdomain via alias
Use this scenario only if you want to use your main domain as your sending domain or if you still use the main domain or subdomain for other purposes outside Inxmail.
What is a subdomain?
An internet address (or URL) consists of the following parts:

A subdomain is a domain in which a domain name is placed in front of the organizational domain and separated by a dot.
-
Main domain: example.com
-
Subdomain: subdomain.example.com
How many subdomains can I use?
For technical and performance reasons, you can use up to 50 domains per XPRO tenant, either as a sending domain or as a redirect URL. Get in touch with us if you need more.
If you want to use a very large number of domains or redirect URLs, get in touch with us.
Why should I define a subdomain?
We recommend setting up a subdomain that you use exclusively for sending emails via Inxmail. This helps you avoid unwanted effects on your main domain and your everyday email traffic.
How does the subdomain work together with my sending settings?
The subdomain that you set up in
"Sending domains" only takes effect when you also use it later in your sending settings.In Newsletters & campaigns, use it in your list settings. In Transactional mails, use it in your mailing settings and, if needed, in your source systems.
How can I set up the subdomain with my domain host?
Setup differs for each domain host. Ask your IT team to handle the setup for you and contact your domain host if you need help.
What do I need to keep in mind for "Main domain or subdomain via alias"?
Recommendation: Your main domain or subdomain is already authenticated outside Inxmail with the DMARC policy reject or quarantine. With the DMARC policy none, your domain is not protected.
If you use the "Main domain or subdomain via alias" option, you use the same domain for different sending sources. This can lead to major reputation problems.
-
-
Enter an email address for forwarding replies. This can be a mailbox on your main domain, for example reply@example.com. In the future, all replies to your mailings will be forwarded to this forwarding address.
The forwarding address must not be on the subdomain that you are authenticating right now.
Test your forwarding address: Make sure that forwarding to your forwarding address actually works.
Adjust your spam filter: If you use a spam filter, make sure that the IP addresses used for forwarding are excluded from the filter. Otherwise, the affected emails can cause authentication issues and land in spam.
Find answers to more questions here:
FAQs on reply forwarding
Why do I need to enter a forwarding address?
The catch-all forwarding address collects all replies sent to email addresses on your authenticated sending domain and forwards them to the forwarding address. The forwarding address therefore acts as the default reply-to address for your mailings.
You can define exceptions later if replies to specific email addresses should not be delivered to the catch-all forwarding address.
Why must the forwarding address not be on the subdomain that you are authenticating right now?
The forwarding address can be on your main domain, for example reply@example.com. It can also be on another subdomain. It just must not be on the subdomain that you are authenticating right now.
Because the forwarding address is a catch-all forwarding address, a loop would be created if the forwarding address were on the same subdomain that you are authenticating right now.
In short: The forwarding address must not be on the subdomain that you are authenticating right now so that emails to the forwarding address are delivered instead of being forwarded again.
Does the forwarding address have to exist?
Yes. The forwarding address must point to a real email address and an existing mailbox so that your emails can be delivered.
Where will replies to your mailings arrive in the future?
In the future, replies to your mailings will arrive in the inbox of your forwarding address.
Can I change the forwarding address later?
Yes. You can change the forwarding address while the system is live.
How can I define exceptions?
By default, there is a catch-all forwarding rule. That means all versions of email addresses on your sending domain are forwarded to the forwarding address that you enter here.
If you do not want all emails to go to the forwarding address listed here, you can define exceptions later.
-
Platform or Newsletters & campaigns: Click
Inxmail Commerce or Inxmail Professional: Click "Authenticate domain".
-
BIMI
If you want, you can optionally add your BIMI logo directly with your domain provider on your main domain.
-
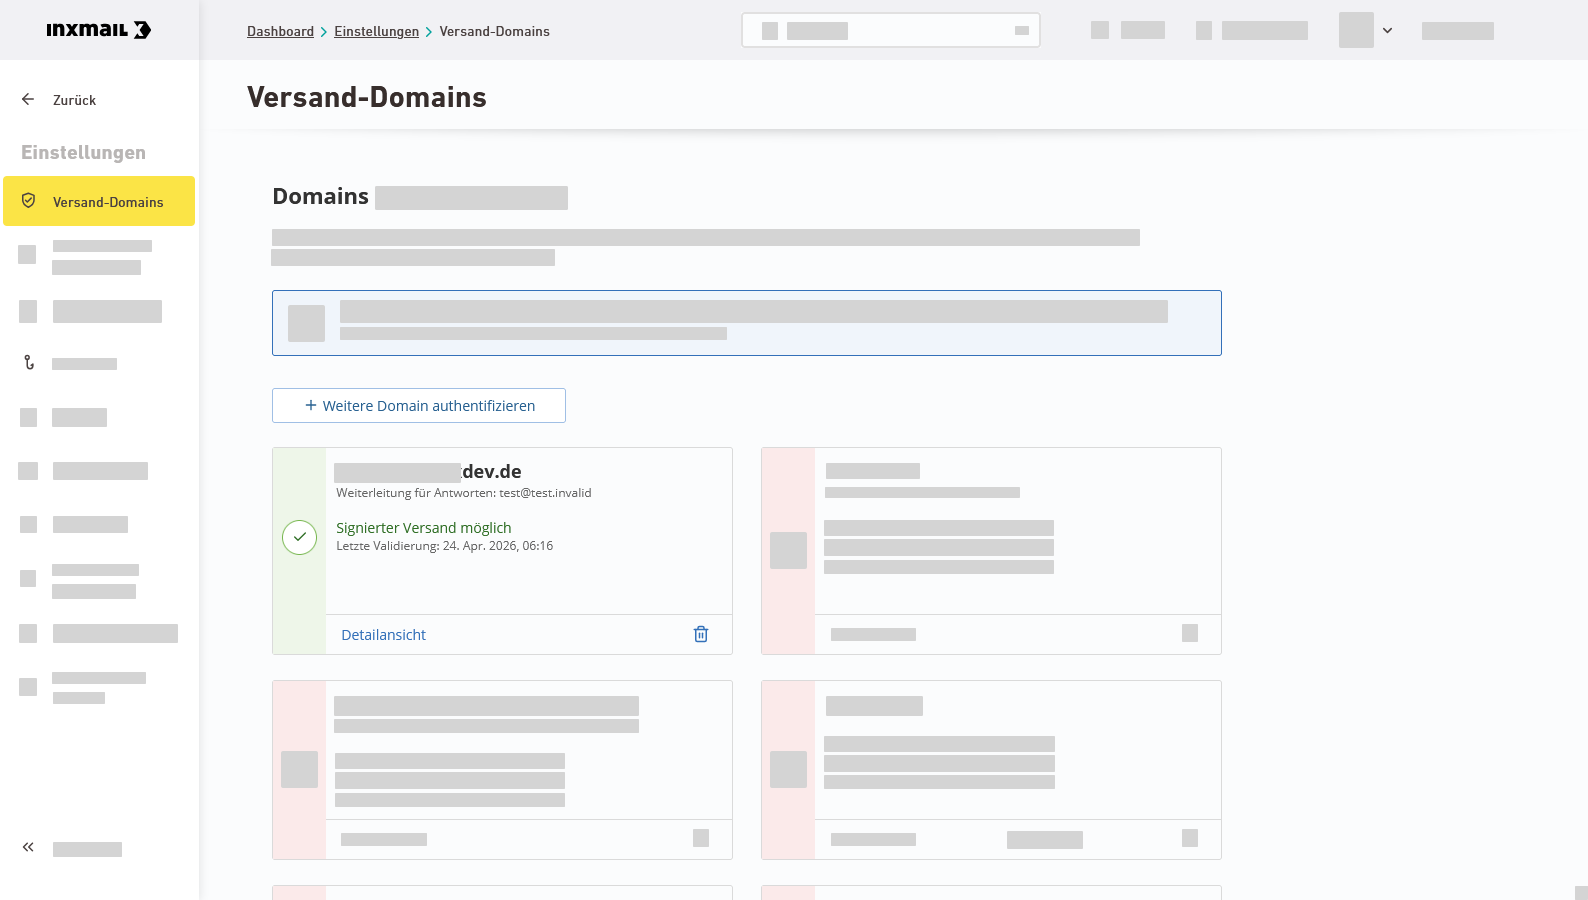
You have stored and authenticated your sending domain in Inxmail.
Next step

