The following instructions explain how to create an Inxmail Professional email campaign in Salesforce.
Step by step
-
Open the Campaigns tab in Salesforce.
This directs you to: Campaigns > Start page
-
Click New in the Last campaign section to add another campaign.
This directs you to: New Campaigns > Select campaign record type
- Select the Inxmail Professional email campaign option in the Select campaign record type drop-down list.
-
Click Next.
This directs you to: Change campaign >New campaign.
-
Enter a campaign name and a sender address in the mandatory fields marked in red.
Note: Assign a unique campaign name in Salesforce. Multiple mailing lists with identical names cannot exist in Inxmail Professional.
-
You can enter additional information in the optional fields.
The Link email with campaign check box under Inxmail Professional Advanced Settings is enabled by default.
- Save your entries.
-
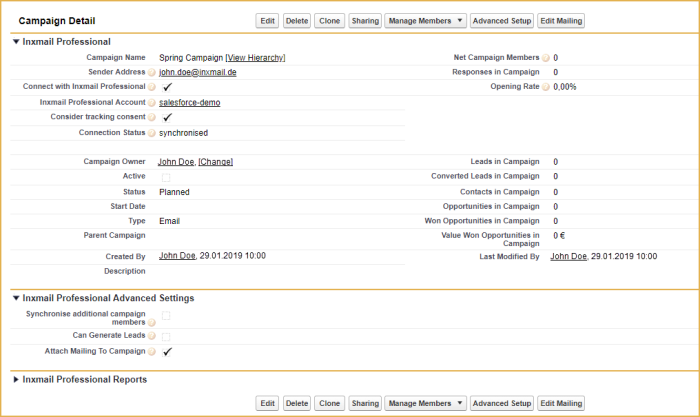
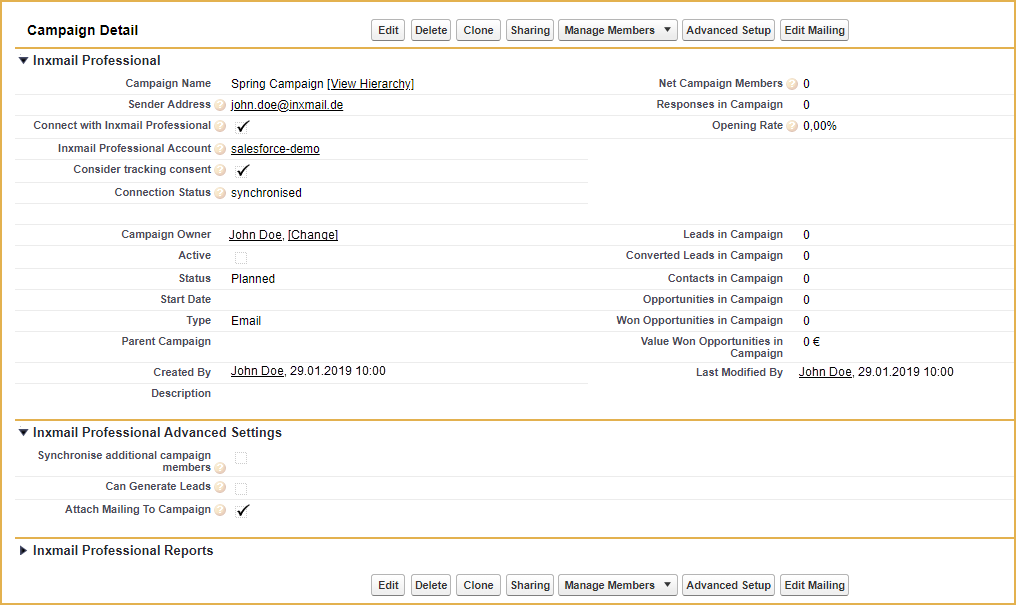
You have created a new campaign.
All of the campaign details are listed in an overview.
Related topics

