Step by step
Open the Options dialog box as follows:
- Open the mailing in the
 Editing workflow step.
 - To open the Link image dialog box for an image inserted as a reference or the Embedding an image dialog box for an image embedded directly, click the Inxmail Professional code for the image. Then click the
 (Edit selection) button.
 -
Click the Options button in the dialog box.
A further dialog box appears.
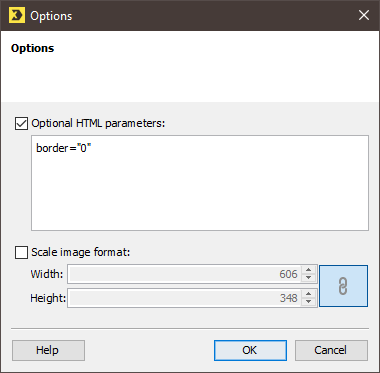
- To add a border to an image, select the Optional HTML parameters check box in the dialog box and then specify the appropriate HTML parameters (for example, border="0" style="border:5px solid #ff3300").
-
To change the displayed size of the image, select the Scale image format check box and then specify the size (for example, width="200" height="200").
The
 button allows you to keep the proportions of the image (that is, keep the ratio of width and height the same to prevent distortion).
The image is scaled only for the mailing. The original image remains unchanged.
- Confirm your entries by clicking OK.
- To apply the settings for the image, confirm the Link image or Embedding an image dialog box by clicking OK.
- The Inxmail Professional code for the inserted link appears in your mailing.
- Save your entries.
- You have specified options for an image. The quick preview (
 (Show/hide quick preview) button) shows you the image.
Related topics
Inxmail Professional:
2 possible use cases
Depending on your contract, you might use Inxmail Professional in different ways:
-
As part of the Inxmail platform: You use newsletters & campaigns as your main tool for creating and sending newsletters. Inxmail Professional only serves as a recipient database and configuration tool in the background.
We are constantly expanding the functionality of “Newsletters & Campaigns”. Check out newsletters & campaigns section to find out if the feature you are looking for might already be available there.
-
Full scope: You use the legacy tool Inxmail Professional as your main tool for creating and sending newsletters.
Did you not find what you were looking for?
-
Send us your feedback.
