Note: You can only create a mailing inside a mailing list. If you are using Inxmail Professional for the first time, you must first Create new lists.
Step by step
You can open the Create new mailing dialog box as follows:
- To open the dialog box from the
 (Cockpit) tab, click the
  New mailing button.
 -
To open the dialog box on the tab of a mailing list, go to the
 Mailings agent > Mailings tab and click the
  (Create new mailing) button.
The Create new mailing dialog box is displayed.
-
If you opened the dialog box from the Cockpit tab, select the mailing type in the Type drop-down list in the dialog box, and in the Associated list drop-down list, select the mailing list in which you want to create your mailing.
If you opened the dialog box from the tab of a mailing list, the Associated list field will not be displayed in the dialog box as the mailing will be automatically created for the current mailing list.
-
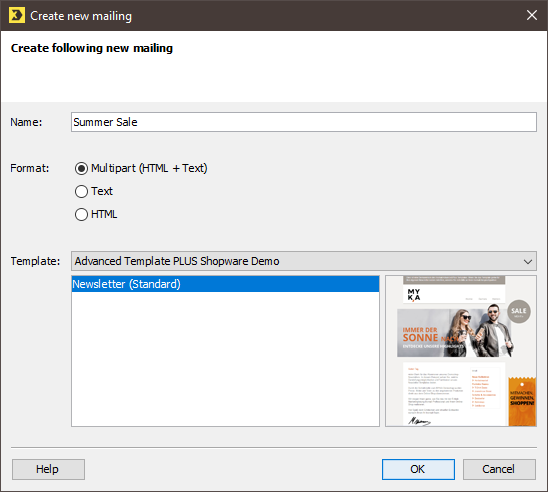
Enter a name for the mailing in the dialog box.
Select a name that will allow you to locate the mailing quickly.
-
Select one of the following formats for the mailing:
If the format is already preselected and the respective fields in the dialog box are greyed out, this means that the format for all mailings of this mailing list is preset (Setting up the properties of mailing lists).
-
Multipart
Mailings in multipart format contain both a plain text version and an HTML version of the prepared mailing. The recipient’s email program can then independently select which of the two versions to display.
-
Text
Mailings in text format can be read by every recipient without any problems and are a preferred format for mailings. However, if you opt for text format, you can only send your images as file attachments.
-
HTML
Mailings in HTML format may contain images, different fonts and colours. You can either save your images on a web server so that the images are loaded from the web server and integrated into your mailing when your mailing is accessed. Or, you can embed your images in your mailing directly, so that your recipients may view the images even when offline.
Note To create mailings in HTML format, you will need to be familiar with the HTML mark-up language. For security reasons, the following HTML elements are not allowed in mailings:
– ActiveX
– Audio
– External style sheets
– Frames and iframes
– Java
– The ‘meta refresh’ element
– Scripts (JavaScript, VBScript, Perl, and so on)
– Tooltips
– Video
Please note that many email programs will not display HTML forms.
- Select one of the following options from the Template drop-down list:
- To create an empty mailing that is not based on a mailing template, select the Do not use a template entry.
- To create a mailing whose layout or contents are predetermined by a user-template created in Inxmail Professional (Setting up a user template (text, HTML, multipart)), select the Use user templates entry. Then select the user template you require in the area below the drop-down list.
- To create a mailing whose layout or contents are predetermined by a newsletter template imported into Inxmail Professional (Importing the template file or template library), select the relevant newsletter template and then select the required design in the section under the drop-down list.
- Confirm your entries in the dialog box by clicking OK.
-
The mailing opens on a new tab where it can be edited.
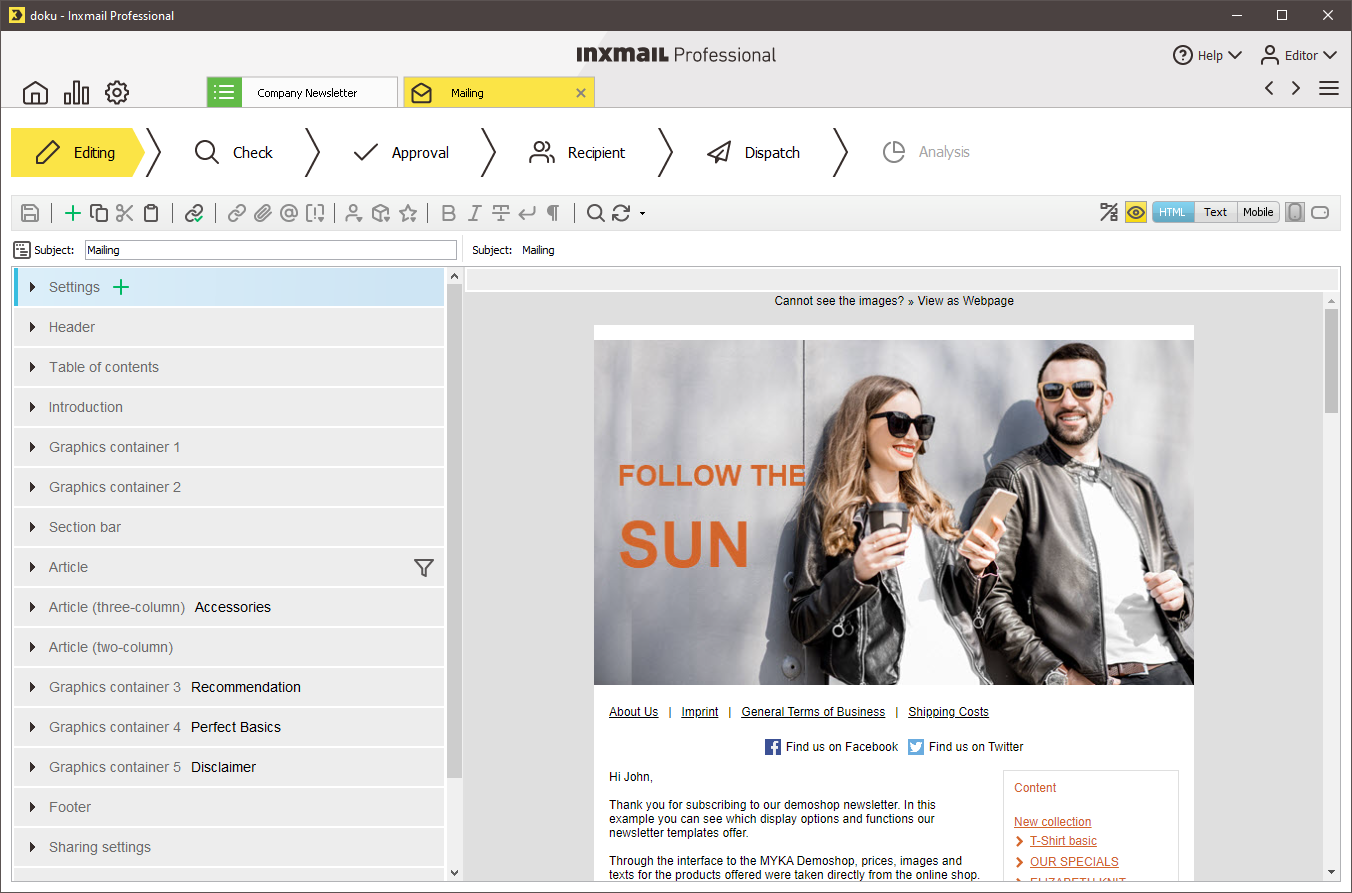
The mailing is also automatically added to the table on the tab of the mailing list >
Mailings agent > Mailings tab.
- You have now created a new mailing.
Inxmail Professional:
2 possible use cases
Depending on your contract, you might use Inxmail Professional in different ways:
-
As part of the Inxmail platform: You use newsletters & campaigns as your main tool for creating and sending newsletters. Inxmail Professional only serves as a recipient database and configuration tool in the background.
We are constantly expanding the functionality of “Newsletters & Campaigns”. Check out newsletters & campaigns section to find out if the feature you are looking for might already be available there.
-
Full scope: You use the legacy tool Inxmail Professional as your main tool for creating and sending newsletters.
Did you not find what you were looking for?
-
Send us your feedback.
