Use target groups to control which of your recipients get to see which content in your mailing. Typical target groups are, for example, gender, place of residence or areas of interest.
Synchronization required: Synchronize your mailing with XPRO to be able to use your target groups in Newsletters & campaigns.
Step by step
-
Sync your mailing.
-
Select the container for which you want to add target groups so that it is highlighted in blue .
-
Select target groups
Click
 "Add target group" in the container settings and select one or more target groups.
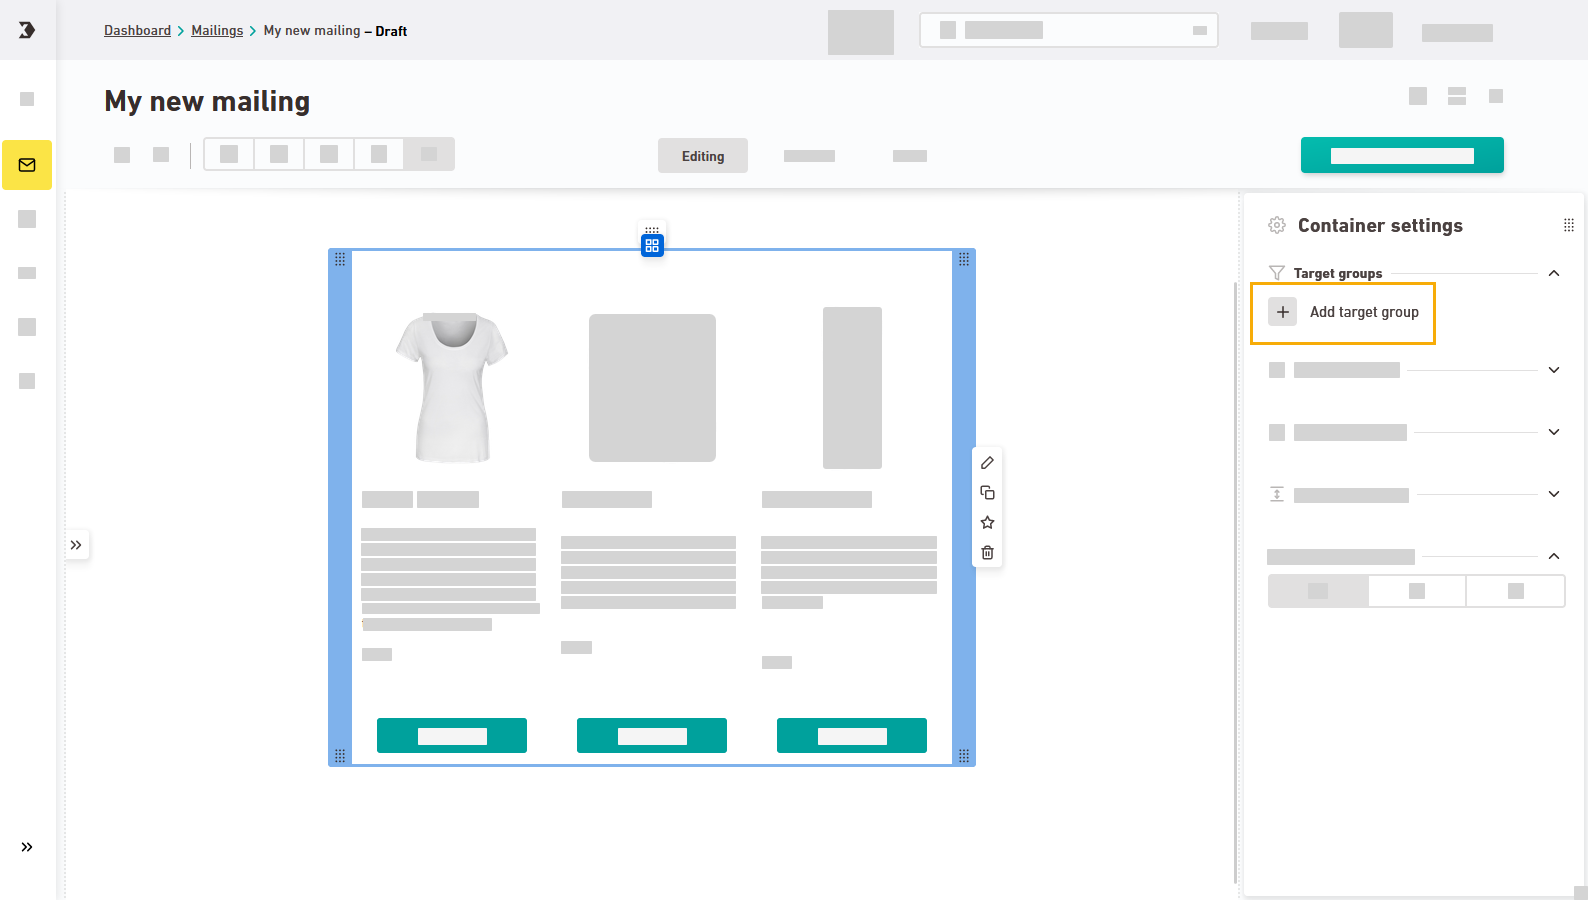
-
Set target group condition
Set your target group condition. Similar to the target groups in Inxmail Professional, you can use the following target group conditions:
-
belongs to each of these target groups
-
belongs to at least one target group
-
does not belong to any of these target groups
-
-
Click
"Add target group" once again and select another target group combination. Add all the target groups you need and give them meaningful names. -
Customize text and images for the different target group combinations. Click through the carousel to view the container variants.

-
If you like, you can define a fallback. All recipients who do not belong to any of the specified target group combinations will see the variant of the container that you have stored as a fallback.
What will happen if one of my recipients belongs to more than one target group combination For recipients to whom several target group combinations apply, several container variants will be displayed, one below the other. (One for each target group they belong to.)
-
Delete target group combinations that you created by mistake by clicking the
 icon.
icon.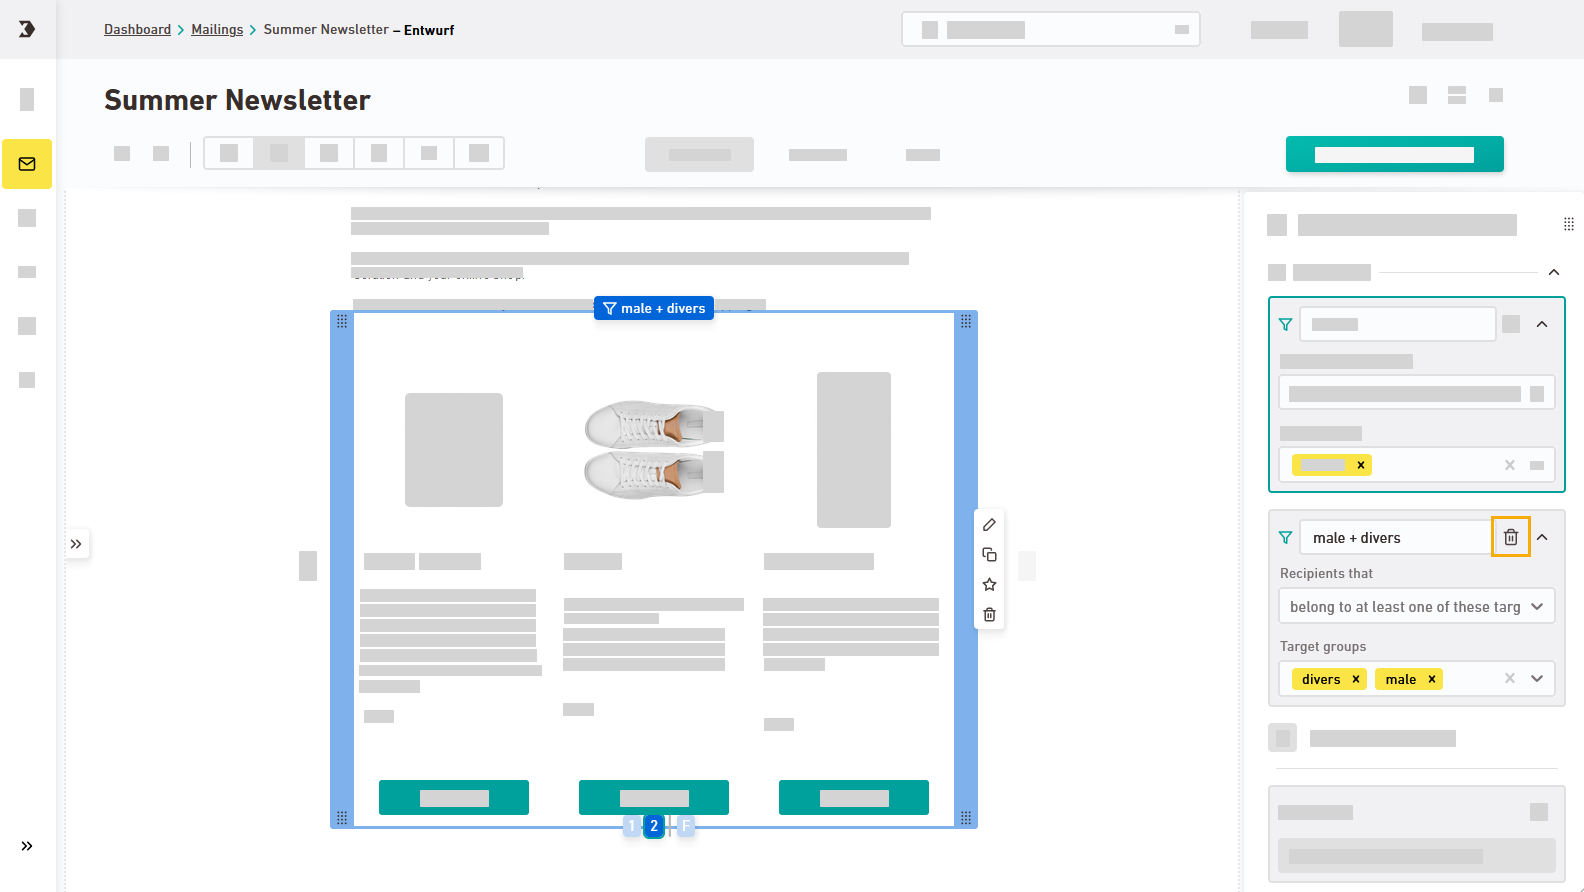
-
You have personalized your container for different target group combinations.

