Step by step
-
Open the
 "Target groups" navigation item.
 -
Click on .
-
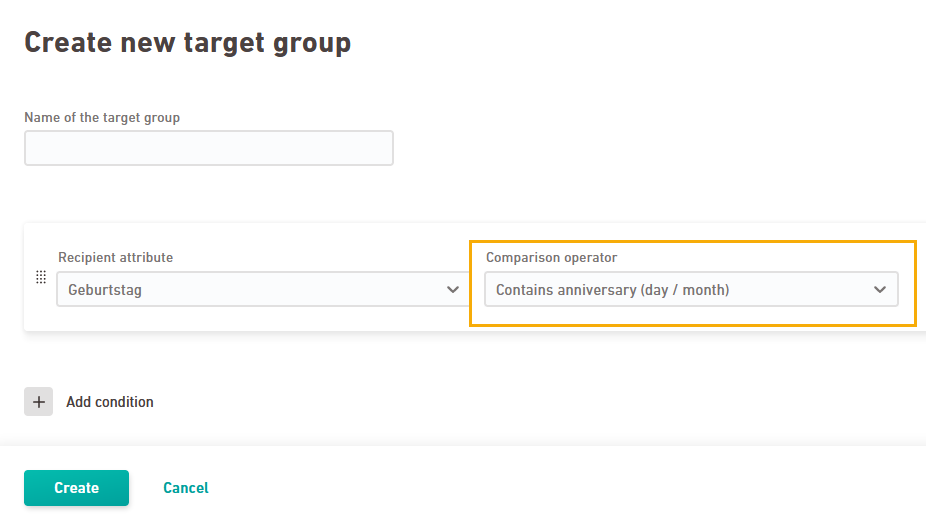
Enter one or more target group conditions. The target group conditions refer to your column values in Inxmail Professional.

-
"Birthday" target group
Use the "contains anniversary (day / month)" operator if you want to commemorate a birthday or other annually recurring event.

 What does this mean?
The target group will work as intended if you have created a "Date" column for your attribute. We will consider day and month of the birthday or anniversary and compare them with the current day.
Don't use the "is equal" operator for birthdays: Do not use the comparison operator "is equal" if you want to celebrate a birthday or an annually recurring event. The "is equal to" operator also considers the year. It is therefore valid only one time and not usable for annually recurring events.
-
Click .
Your target group will be displayed on the overview page. You can now use it in your workflow.

- You have created a new target group.
![]() Work in progress: Some functions for target groups are currently not yet available in XNEW.
Work in progress: Some functions for target groups are currently not yet available in XNEW.
-
For example, you can currently only delete target groups in XPRO.
-
Also, if you want to edit target groups retrospectively, you currently still have to use a workaround in XNEW: You cannot edit target groups directly, so you'll have to duplicate them and only then can you edit the duplicated target group. Then you'll have to set up the duplicated target group in your workflows once again.
We will tackle these issues soon, so you will soon be able to operate more easily.
Next step
- Use your target group in a workflow
