In Step 2: Field mappings, you assign existing default and/or user-defined fields from Salesforce to existing columns in Inxmail Professional. To do so, it is first necessary to create the columns in Inxmail Professional.
Step by step
Proceed as follows to create field linking in Salesforce:
-
In Step 1: Client settings click the To Step 2 button or Step 2: Field mappings in the overview.
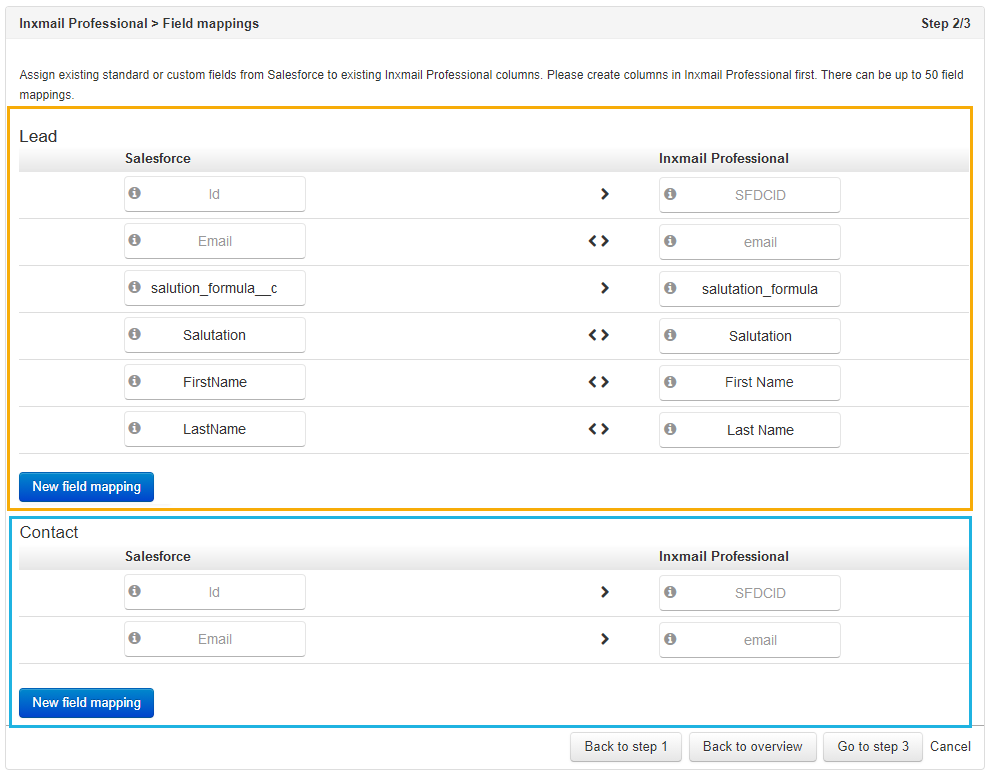
You will be directed to the configuration view for Step 2: Field mappings.
The assignment of existing columns from Salesforce to columns from Inxmail Professional is divided according to leads/contacts.
-
Click New field mapping under Lead or Contact to add a column assignment.
A new row is inserted.
Note: You can create up to 50 field mappings.
-
Select a data type from the drop-down list under Salesforce.
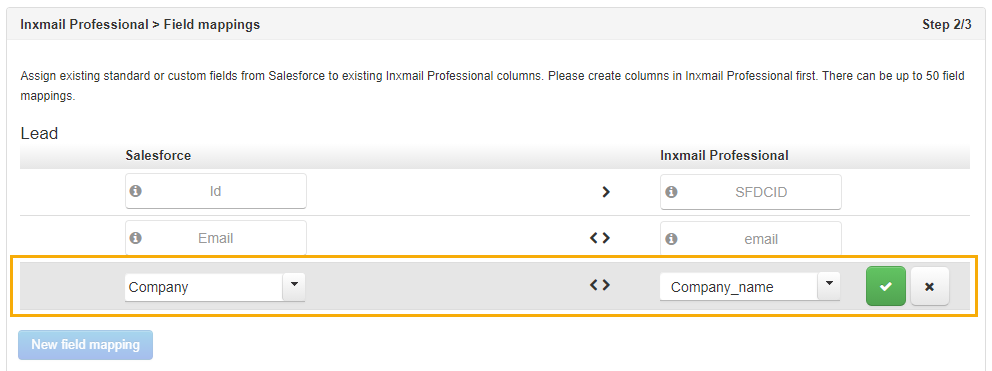
Depending on the data type selected, an additional column must be selected under Salesforce.
The drop-down list under Inxmail Professional will become active as soon as all of the columns from Salesforce have been determined.
- Select a column under Inxmail Professional that corresponds to one or several columns from Salesforce.
-
Confirm the assignment with
 Confirm field link.
You can cancel the assignment with
 Discard field link.
 Edit field link
Special columns: You cannot edit or delete the field mappings for the Inxmail Professional columns "SFDCID" and "email". You need them for the Salesforce integration to work.
Function
Description
Edit field link
Allows you to edit an existing field link.
Click
 Edit field link on the right-hand side of column assignment.
The drop-down lists under Salesforce and Inxmail Professional are active. Change one or multiple data fields, if necessary, and confirm your entries with
Confirm field link.Delete field link
Deletes an existing field link.
Click
 Delete field link on the left-hand side of column assignment. The field link is deleted after you confirm the security question.
- Entries are saved. You have created a new field link.
Additional information
In addition, the following system fields are used for the transfer of data between Salesforce and Inxmail Professional:
|
Field name (Salesforce) |
Object |
Intended use |
|---|---|---|
|
Id |
Contact, lead |
ID of the Salesforce object. Stored in the ‘SFDCID’ column in Inxmail Professional. |
|
inx__recipient_id |
Contact, lead, campaign member |
Recipient ID from Inxmail Professional. |
|
inx__list_id |
Campaign |
List ID from Inxmail Professional |
|
inx__email_is_invalid |
Contact, lead |
Hard bounce information from Inxmail Professional |

