To ensure you obtain a harmonious layout, keep in mind the predefined image sizes in the smart templates. The prescribed image size is given as the Fixed width beneath the Link image or Embed image function.

A resolution of 72 ppi is sufficient for high-quality display of images in your mailings.
Note: Images that you would like to use within your mailing can be first cropped to the correct size in an external image editing tool. To do this, you can use the professional image editing software Adobe Photoshop or the freeware alternative GIMP (http://www.gimp.org). Simple image editing can also be carried out with the onboard tools ‘Paint’ (Windows) and ‘Photos’ (Mac OS X).
Images too small
A warning message appears if your image is smaller than the specified image size.
Do not integrate any images that are too small. Integrating them will produce undesired layout effects.
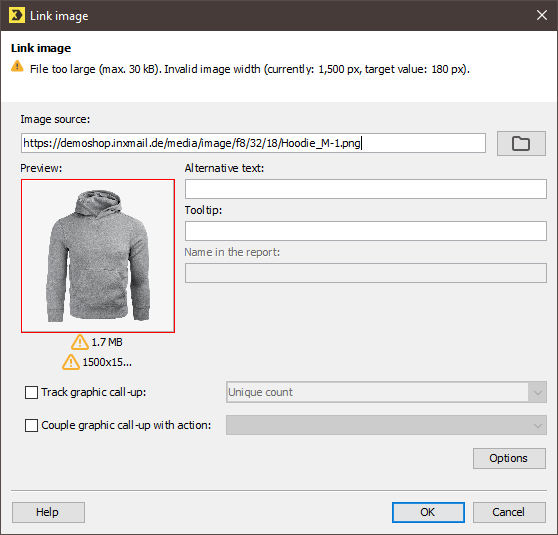
Images too large
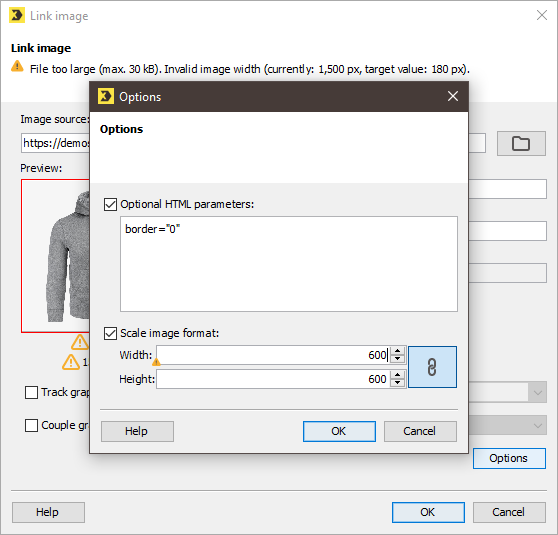
If you attempt to link an image that exceeds the prescribed size limit, a warning dialog box appears. It draws your attention to the incorrect image size.
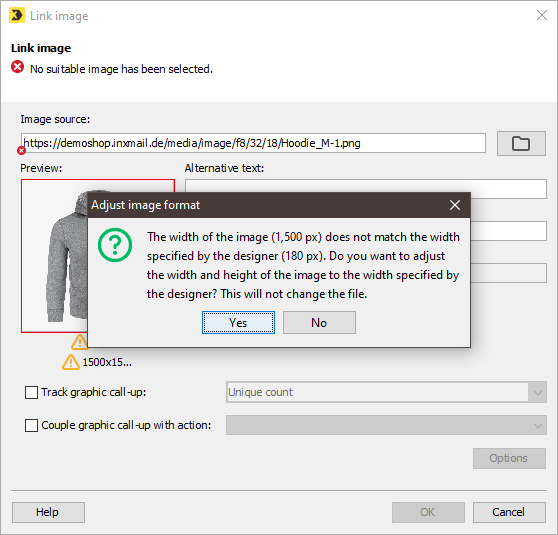
You now have two options:
- Click Yes if you would like Inxmail Professional to automatically scale the image to the correct dimensions. You thereby get an image that will ultimately display correctly without any additional effort on your part. The disadvantage of this option is that the original file remains unchanged, meaning that you work with unnecessarily large image files and therefore longer load times.
- Cancel the dialog box, open the image in an external image editing tool, such as Adobe Photoshop, GIMP, Paint (Windows) or Photos (Mac OS X), and crop the image to the correct dimensions. Then try integrating the image again. This option involves more effort than automatic scaling in Inxmail Professional. The advantage of this option is that you avoid unnecessarily large image files and therefore long load times for recipients.
Important: Do not integrate any images that are too large. Integrating them will produce undesired layout effects.
Layout effects of incorrect image sizes
The integration of images that are too small or too large will result in the shifting, truncation or incorrect display of elements in the layout.
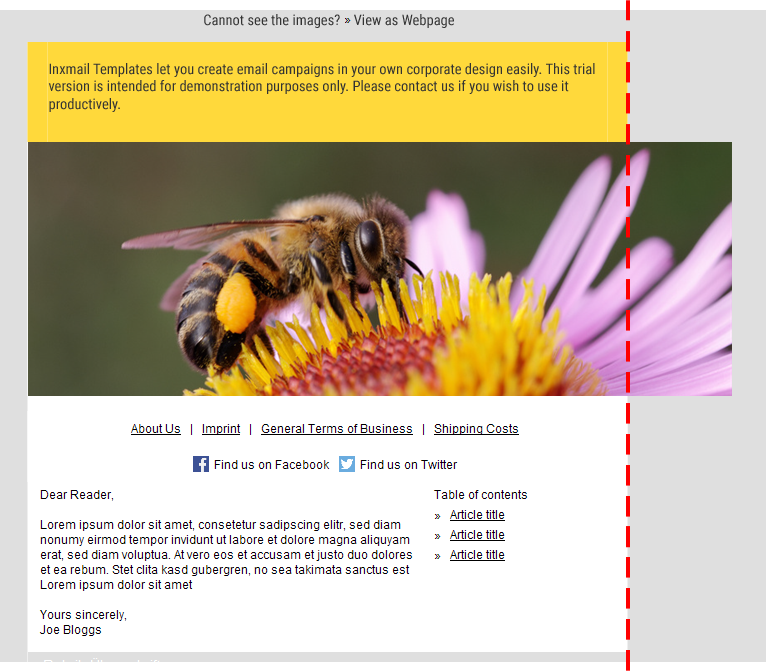
The following graphic shows a banner image that is the correct size and fills the exact amount of space for the banner image:

The following graphic shows a banner image that is too large and therefore spills over the anticipated mailing width of 600 px.
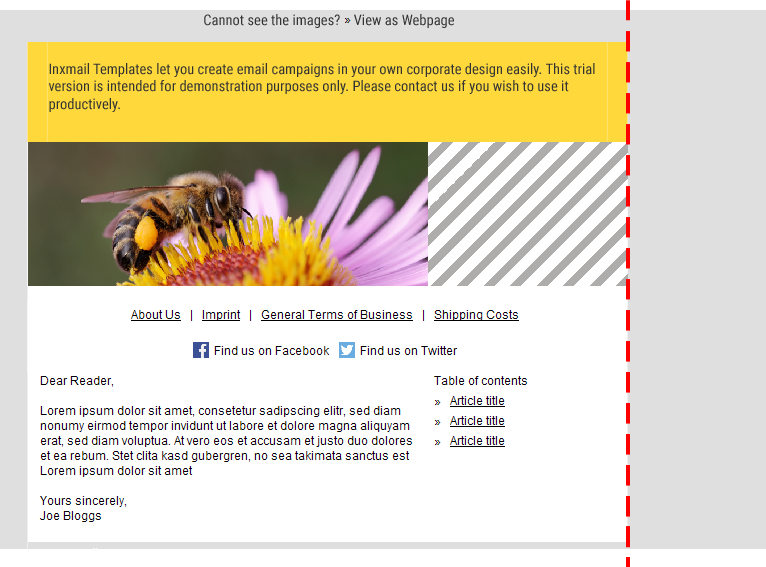
The following graphic shows a banner image that is too small and therefore leaves the grey hatched area unused.
Subsequent scaling of already integrated images
Images that are already integrated can be manually scaled and images that are too large can be subsequently resized to the width specified by the designer.
Step by step
- Click Link image.
-
Click Options.
The Options dialog box is displayed.
- Select the Scale image format check box.
- Enter the desired value either for the Width or for the Height. The other value will adjust automatically insofar as the chaining icon
 is enabled.
- You have subsequently scaled the image size.
Path: Link image >> Options >> Scale image format
Note: The pixel values that you enter should never be greater than the pixel values of the original image. Overscaling an image results in quality losses and a pixelated image display.
Related topics

