Step by step
Open the Send test emails dialog box for example as follows:
- Open the mailing in the
 Check workflow step.
 -
Click Content and then the
 Send test emails button.
A dialog box appears.
Number of test mailing lists You can create a maximum of 50 test mailing lists.
-
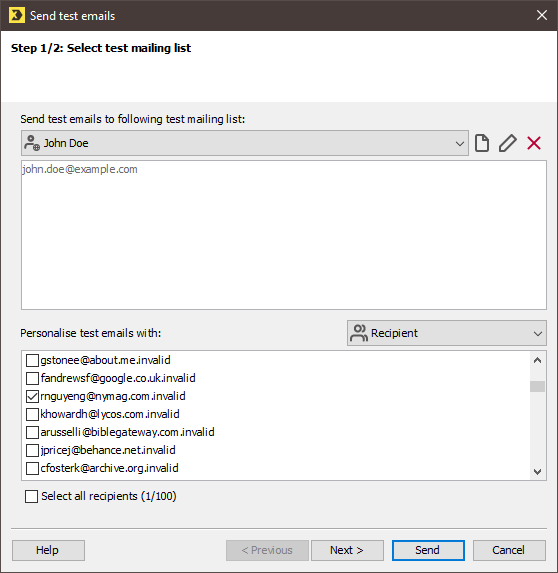
In the drop-down list under Send test emails to following test mailing list:, select the email address or the email mailing list to which the test emails are to be sent.
If you want to send the test email to a (test) email mailing list that is not displayed in the drop-down list, then set up this email mailing list as follows:
 Example of a new mailing list:
- You can create a mailing list to send your test emails to several colleagues. The colleagues can then read through your mailing and look for any errors.
- You can create a mailing list to send your test emails to several email programs. You can then check whether any layout problems arise in your mailing.
-
In the dialog box, click the
 (Create test mailing list) button.
A dialog box appears.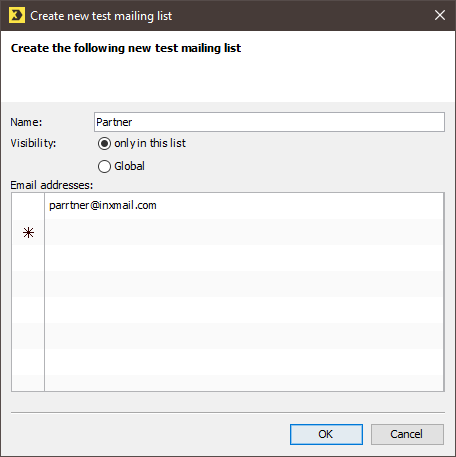
- Enter a name for the new e-mail mailing list
- Select whether you want to create this mailing list for the entire system or just for this list.
- In the Email addresses table, double-click in the rows marked with an asterisk and enter the email address of the new recipient you are creating.
- To enter further recipients, double-click in the next row and enter the data.
- Confirm the dialog box by clicking OK.
- You can select a (test) mailing list that has already been added in the dialog box from the drop-down list.
- You can edit the names and availability of the e-mail mailing list, create new email addresses or edit existing email addresses using the
 (Rename test mailing list and edit email addresses) button.
 - Use the
 (Delete test mailing list) button to delete the mailing list.
 -
To perform the test emails for a test profile, choose Test profile from the drop-down list.
A list of test profiles is displayed.
-
Activate the corresponding test profile under Personalise test emails with.
The test profiles must first be created in order for you to be able to launch your mailing in them.
The first 100 test profiles are always displayed in the dialog box by default.
If you have assigned target groups to your mailing, then only the test profiles that correspond to the target group are displayed.
If you have not yet created a test profile, an error message appears to this effect.
To perform the test emails for recipient files, choose Recipient from the drop-down list.
A list of recipients is displayed.
-
Activate the corresponding recipient profile under Personalise test emails with.
The first 100 recipients are always displayed in the dialog box. If you have assigned target groups to your mailing, then only the recipients that correspond to the target group are displayed.
- In order for the email program to be able to quickly determine that the sent email is a test email (and was created with a certain test profile), you can mark the test email.
-
To do so, click the Next button to access the dialog box with settings for marking.
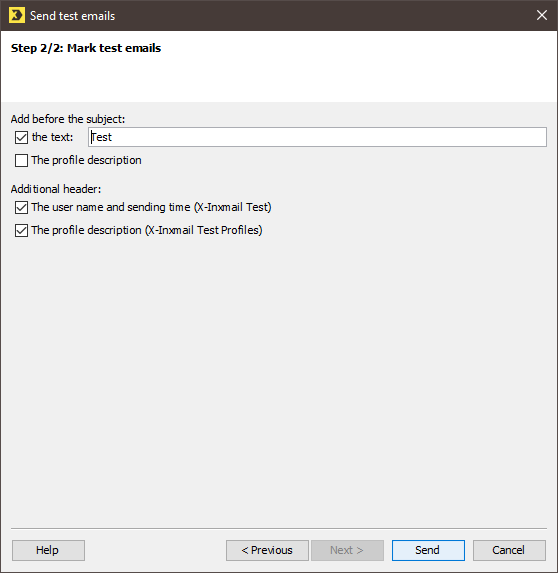
A dialog box appears.
-
Activate the check boxes that are relevant for marking the test email.
By default, Test is entered in the text field. However, you can also select another label as an add-on before the subject, e.g., test mailing.
Note: An entered text is automatically saved when sending a test email for every user and is displayed when the dialog box is next displayed.
-
The selected settings for marking the test email are displayed in the email header.
If you insert an additional word (for example, the word ‘Test’ or the profile description) before the subject, then the subject may be displayed as follows:
- ‘Test: Subject’
- ‘Profile description: Subject’
- ‘Test (profile description): Subject’
- To send the test emails in accordance with your settings, click the Send button.
- You have sent test emails. If you have sent the test emails to your own email address, you can now open and check them in your email program.
Header commands No header commands are triggered when sending a test email, which means that no test emails are sent to CC and BCC recipients included in the header.
Related topics
Inxmail Professional:
2 possible use cases
Depending on your contract, you might use Inxmail Professional in different ways:
-
As part of the Inxmail platform: You use newsletters & campaigns as your main tool for creating and sending newsletters. Inxmail Professional only serves as a recipient database and configuration tool in the background.
We are constantly expanding the functionality of “Newsletters & Campaigns”. Check out newsletters & campaigns section to find out if the feature you are looking for might already be available there.
-
Full scope: You use the legacy tool Inxmail Professional as your main tool for creating and sending newsletters.
Did you not find what you were looking for?
-
Send us your feedback.
