Step by step
Open the Change column type dialog box as follows:
- Open the recipient table.
-
Click in the column whose column type you would like to change.
The row is highlighted in blue and the cell of the column is marked with a dotted border.
-
Click the
 (Configure columns) button and select Change column type.
A dialog box appears.
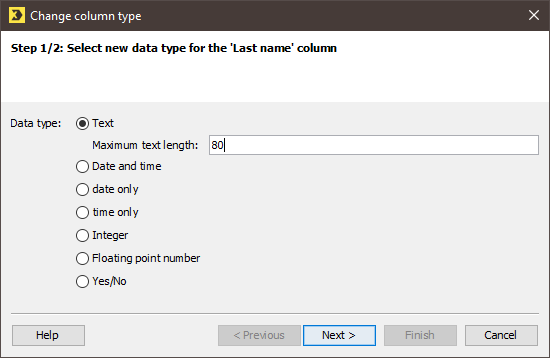
- In the dialog box, select the new column type. If you selected the ‘Text’ column type, enter the maximum allowed text length in the dialog box. The maximum text length should not exceed 255 characters.
- Click Next.
- Depending on which column type you selected, specify the following additional information in the dialog box (where required):
- If you selected the ‘Date and time’, ‘Date only’ or ‘Time only’ column type, select the appropriate format for the date or time from the list. Then click Next.
- If you selected the ‘Floating point number’ column type, select the decimal character (for example, ‘.’ for ‘0.1’) and the 1000s separator (for example, ‘,’ for ‘1,000’) from the drop-down lists. Then click Next.
- If you selected the ‘Yes/No’ column type, specify the comparison word in the dialog box (for example, for the ‘Yes’ column type, specify the comparison word ‘true’). Then click Next.
- In the dialog box, select one of the following options under Column assignment:
-
To leave the original column unchanged and change the column type in a copy of the column, select Keep the original column and save the converted values in the following column:.
In the input field, a name is suggested for the copy that is to be made.
-
To make a backup copy of the original column and change the column type of the original column, select Save a backup copy of the original values in the following column:.
In the input field, a name is suggested for the backup copy that is to be made.
- Confirm your settings by clicking Finish.
- The column type of this column is changed globally and displayed accordingly in all the recipient tables in Inxmail Professional. This procedure may take some time.
Related topics
Inxmail Professional:
2 possible use cases
Depending on your contract, you might use Inxmail Professional in different ways:
-
As part of the Inxmail platform: You use newsletters & campaigns as your main tool for creating and sending newsletters. Inxmail Professional only serves as a recipient database and configuration tool in the background.
We are constantly expanding the functionality of “Newsletters & Campaigns”. Check out newsletters & campaigns section to find out if the feature you are looking for might already be available there.
-
Full scope: You use the legacy tool Inxmail Professional as your main tool for creating and sending newsletters.
Did you not find what you were looking for?
-
Send us your feedback.
