Step by step
Open the Show and hide columns dialog box as follows:
- Open the recipient table.
-
Click the
 (Configure columns) button and select Show/hide columns.
A dialog box appears.
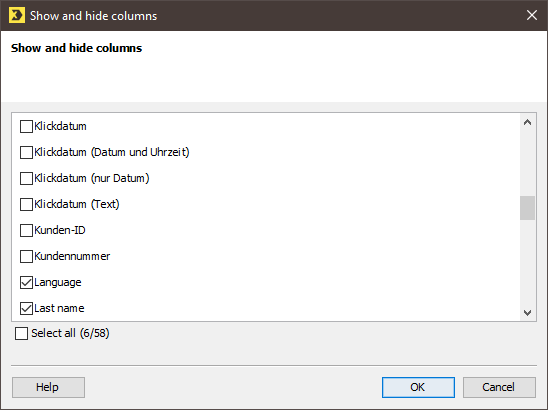
- In the dialog box, enable the columns you want to display in your recipient table.
- Confirm your entries by clicking OK.
- Only the selected columns now appear in the recipient table. The disabled columns are hidden.
Please note the following for the recipient table of a mailing list:
- In the recipient table, you can also show or hide all columns that are available globally in Inxmail Professional.
-
Besides affecting the clarity of the recipient table, the following also applies to hidden columns:
Hidden columns cannot be selected when you later create your personalised mailing content.
- In the
 Test profiles agent or when assigning recipients to mailings, Inxmail Professional displays only the columns that are shown in the
  Recipients agent.
Related topics
Inxmail Professional:
2 possible use cases
Depending on your contract, you might use Inxmail Professional in different ways:
-
As part of the Inxmail platform: You use newsletters & campaigns as your main tool for creating and sending newsletters. Inxmail Professional only serves as a recipient database and configuration tool in the background.
We are constantly expanding the functionality of “Newsletters & Campaigns”. Check out newsletters & campaigns section to find out if the feature you are looking for might already be available there.
-
Full scope: You use the legacy tool Inxmail Professional as your main tool for creating and sending newsletters.
Did you not find what you were looking for?
-
Send us your feedback.
