Note: These instructions refer exclusively to generating and using public and private SSH keys for connecting an sftp server. For information on how to store your public and private key for Import Automation, see: Create public and private key with PUTTYgen (Import Automation)
Step by step
-
Create private and public key in PuTTYgen
Download the PuTTYgen software from https://www.puttygen.com/ and install it according to the manufacturer's instructions.
-
Start PuTTYgen.
Do not mix up: Make sure that you actually open PuTTYgen, not another software such as PuTTY or PuTTYtel.
-
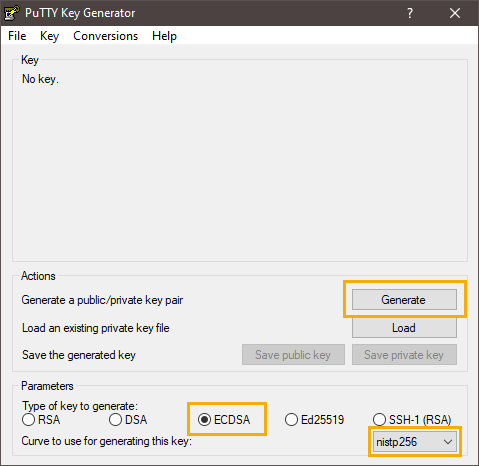
Make sure to enable the ECDSA option and select nistp256 as Curve to use for generating this key.
-
Click Generate.
-
Continue moving the mouse on the free area until the key pair is created.
-
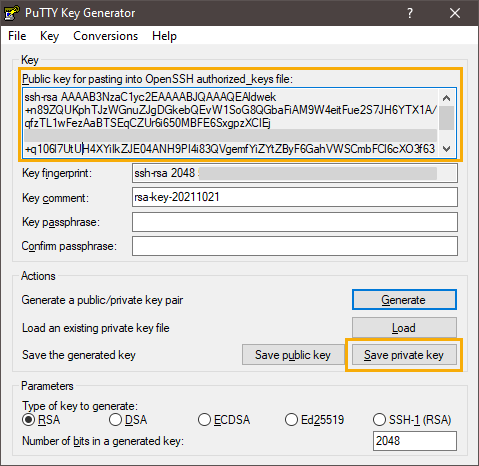
Click Save private key.
-
Store the private key in a secure location.
Always keep your private key a secret: Never pass on your private key - not even to Inxmail employees.
-
Highlight the public key in the upper area of the program window and copy it to the clipboard.
-
Store your public key in the Inxmail Identity Service
Assign a password
If you want to store the public SSH key in the Inxmail Identity Service, you must first assign a password to yourself.
 How can I assign a password to myself?
Step by step
Proceed as follows in order to assign yourself a password for the Inxmail Identity Service:
-
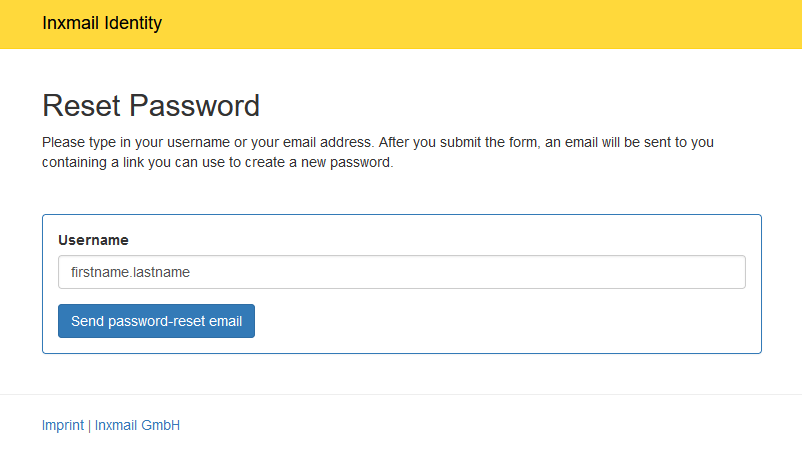
Open the URL https://id.inxmail.com/passwordreset.
-
In the Username field, enter the Inxmail Identity Service user name that you received from Inxmail ( firstname.lastname).
-
As an alternative, you can enter your e-mail address that you are using with Inxmail.
-
Click Send password-reset email.
-
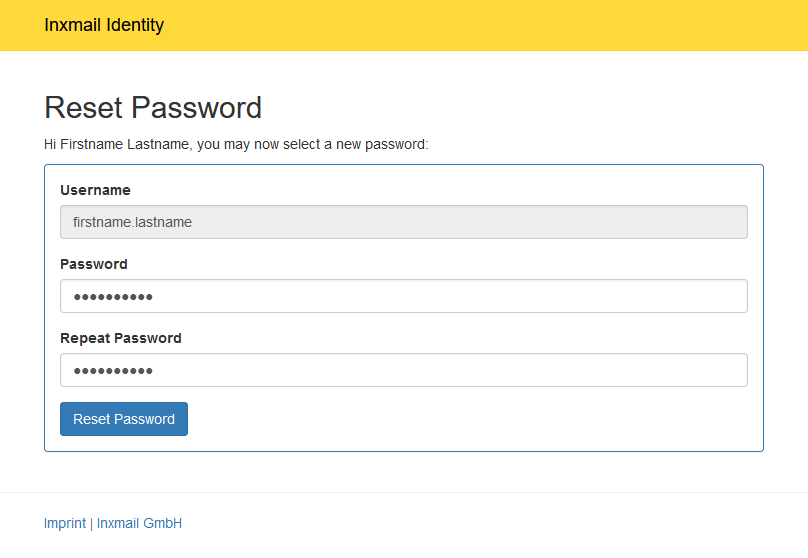
If your user name or e-mail address is stored in the Inxmail Identity Service, you will receive an e-mail with a password reset link.
-
Click on the link in the email and follow the instructions to reset your password.
- You have created your password for the Inxmail Identity Service.
-
-
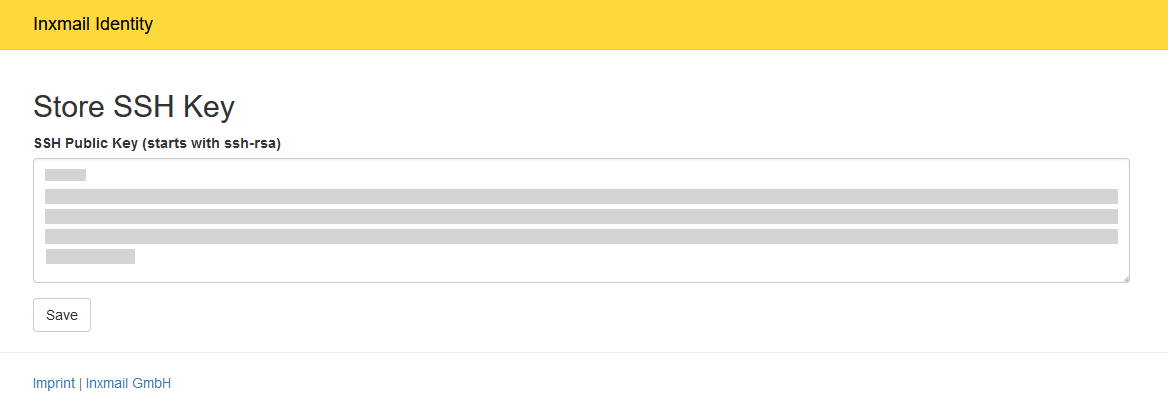
Store public key
Open the URL https://id.inxmail.com/?action=changesshkey.
-
Enter your user name ( firstname.surname) and your Inxmail Identity Service password .
-
Paste the public key from the clipboard into the input field.
-
Click Save.
-
Log in to the sftp server using WinSCP and your public key
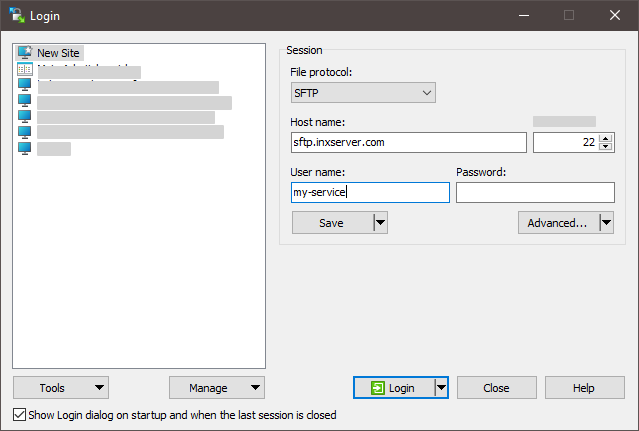
Start WinSCP.
Note: We will explain how to log in to your sftp server using WinSCP as an example. You can also use another sftp client instead of WinSCP.
-
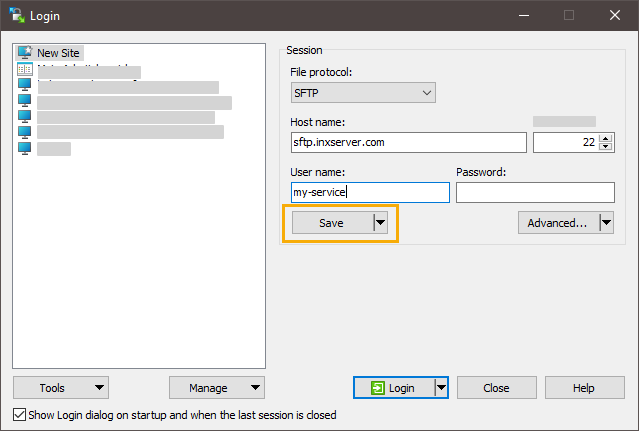
Click New Site.
-
Enter the following data:
Name
Description
File protocol SFTP Host name sftp.inxserver.com Port number 22 User name Enter the user name that you have received from Inxmail for access to your web space. Note that this is not your user name for the Inxmail Identity Service. Password Do not enter a password. Instead, use the Advanced button to enter your private SSH key (see below). -
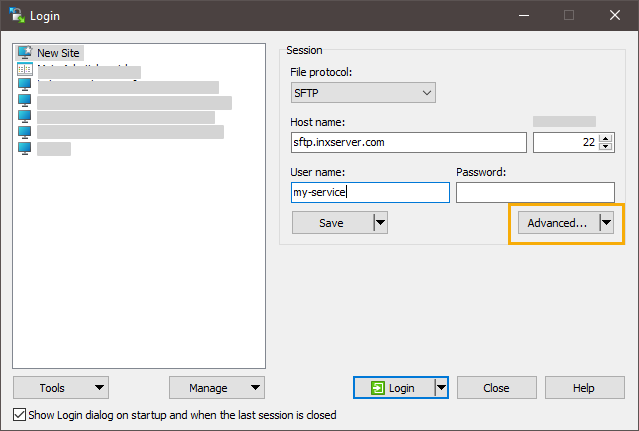
Click the Advanced button.
-
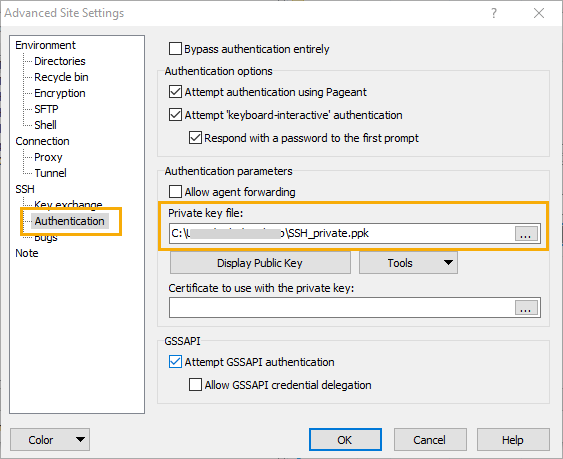
Click "Authentication" under "SSH" in the left-hand section of your program window.
-
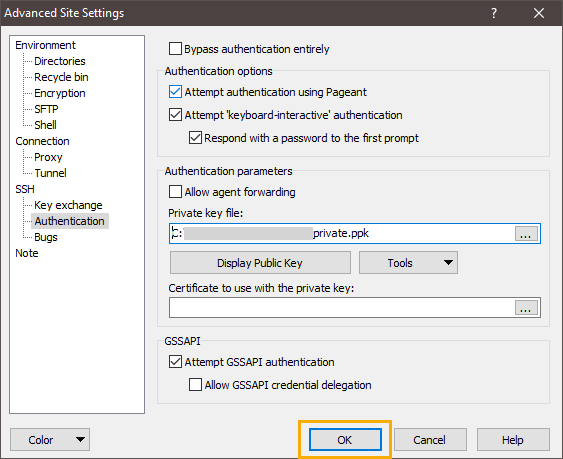
Select the private SSH key that you have previously generated and saved.
-
Confirm your entries by clicking "OK".
-
Click "Save".
-
Enter a name for the newly created site and confirm by clicking "OK".
The newly created site will be displayed on the left-hand section of your program window.
- You have created an SSH key pair (public + private key) with PuTTYgen, stored it in the Inxmail Identity Service and used it to log in to your sftp server.
Next steps
-
You can now upload images and files to your sftp server, using WinSCP or another sftp client.
Inxmail Professional:
2 possible use cases
Depending on your contract, you might use Inxmail Professional in different ways:
-
As part of the Inxmail platform: You use newsletters & campaigns as your main tool for creating and sending newsletters. Inxmail Professional only serves as a recipient database and configuration tool in the background.
We are constantly expanding the functionality of “Newsletters & Campaigns”. Check out newsletters & campaigns section to find out if the feature you are looking for might already be available there.
-
Full scope: You use the legacy tool Inxmail Professional as your main tool for creating and sending newsletters.
Did you not find what you were looking for?
-
Send us your feedback.
