Note: These instructions refer exclusively to generating and using public and private SSH keys for Import Automation.
Step by step
-
Download the PuTTYgen software from https://www.puttygen.com/ and install it according to the manufacturer's instructions.
-
Start PuTTYgen.
Do not mix up: Make sure that you actually open PuTTYgen, not another software such as PuTTY or PuTTYtel.
-
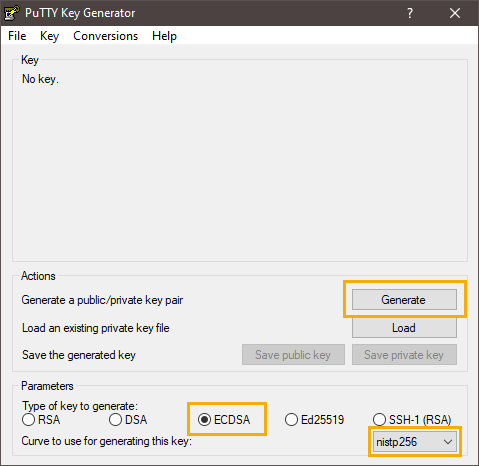
Make sure to enable the ECDSA option and select nistp256 as Curve to use for generating this key.
-
Click Generate.
-
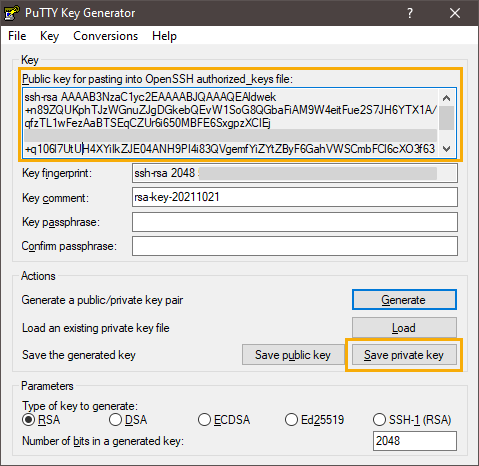
Continue moving the mouse on the free area until the key pair is created.
-
Click Save private key.
-
Store the private key in a secure location.
Always keep your private key secret: In general, private keys must not be passed on for security reasons - not even to Inxmail employees.
-
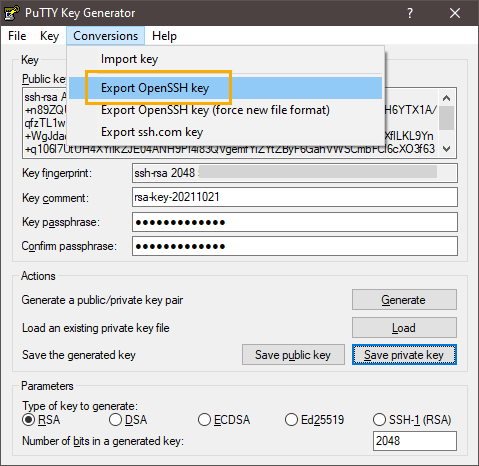
To configure your Import Automation source, you must export the private key as an OpenSSH key.
-
Save the OpenSSH key (without specifying a file extension).
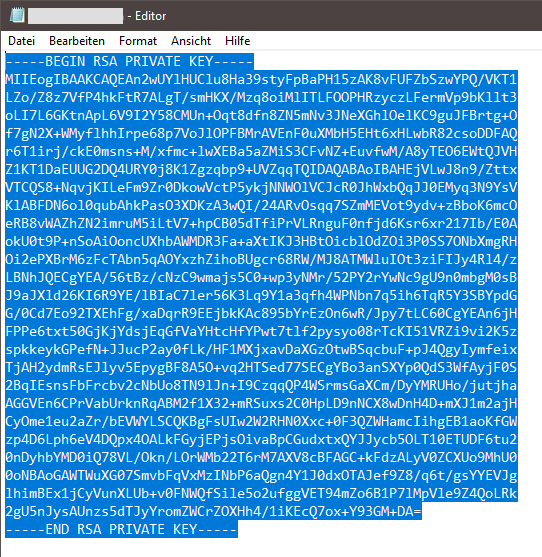
Later, you can open the private key in a text editor, copy it to the clipboard, and use it to configure your Import Automation source.
Note: Copy the complete text - including the first and last line. Do not use the keyboard shortcut Ctrl + A for copying, to make sure that you do not copy spaces.
- You have created an SSH key pair (public + private key) with PuTTYgen.
Next steps
-
Authenticate while configuring your import source with username (e.g. customername.inxshare.com + Private Key.
Inxmail Professional:
2 possible use cases
Depending on your contract, you might use Inxmail Professional in different ways:
-
As part of the Inxmail platform: You use newsletters & campaigns as your main tool for creating and sending newsletters. Inxmail Professional only serves as a recipient database and configuration tool in the background.
We are constantly expanding the functionality of “Newsletters & Campaigns”. Check out newsletters & campaigns section to find out if the feature you are looking for might already be available there.
-
Full scope: You use the legacy tool Inxmail Professional as your main tool for creating and sending newsletters.
Did you not find what you were looking for?
-
Send us your feedback.
