You can start the recipient import into the mailing list in the ![]() Recipients agent. To do so, click the
Recipients agent. To do so, click the ![]() (Import recipients) button on the Subscribed tab.
(Import recipients) button on the Subscribed tab.
-
First enter your import target. You can import the data records to the global recipient list (can be viewed under
 Global settings) or to an already existing standard list.
 -
Specify the import source (Excel, File or Database).
-
Select from your computer the source file to be imported. If the Excel file contains multiple worksheets, you can select the desired sheet. Click Next.
-
In the next step, specify whether the first row of your chosen worksheet contains column names and click Next.
-
In the next step, select the column which contains the tracking permission details. Two procedures are possible here:
Option 1:
No source column with tracking permission available
-
Click Select column. A drop-down list containing the column names of your source file opens.
-
Select: None available.
-
Click Next.
Option 2:
Source column with tracking permission available
-
Click Select column and select the column containing the tracking permission from the selection list.
-
Two further elements appear: Tracking Permission: Define data format and Tracking Permission: Import conflicts.
-
Enter the tracking permission value from the source file that corresponds to the value
 Yes for the Tracking permission target column.
 -
Enable the corresponding option for already present recipient data under Tracking Permission: Import conflicts
-
Click Next.
-
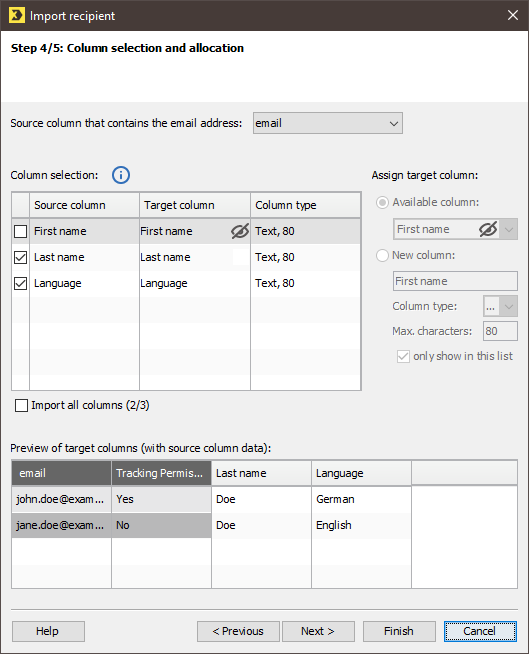
-
The email column is automatically recognised. If this does not happen, select the source column containing the email addresses.
-
You can include individual columns in the import and assign them to existing or new target columns of the recipient data table. When creating new target columns, make sure that the column type corresponds to the column content in the file to be imported. Only columns already created in Inxmail Professional are automatically activated and assigned. Then click Next.
-
Specify what should happen when recipients already exist:
-
Existing column values should be left unchanged.
-
Existing column values should be supplemented.
-
Existing column values should be overwritten, but not with blank import values.
-
Existing column values should be completely overwritten.
-
The subscription date should be updated.
-
-
By default, recipients who have already been unsubscribed from the list are ignored during the import. If you would like to resubscribe recipients through the import, enable the corresponding setting.
-
A further check box allows you to specify that new recipients unknown to the list should not be imported. Only recipients whose email address already exists in the list will then be imported.
-
Now click Finish. The recipient data records are imported.
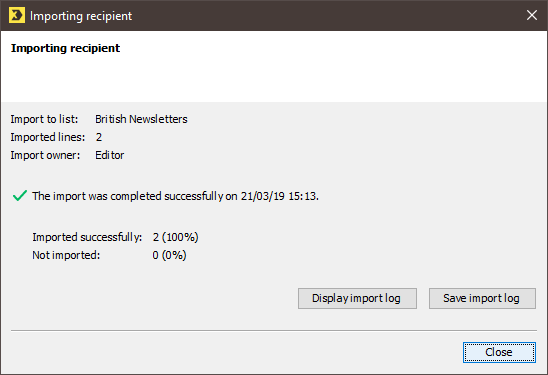
You can now view or save the import log. The import log contains any error messages and shows how many recipients were imported.
On the Subscribed tab in the ![]() Recipients agent, you can see the successfully imported recipients in the recipient list that you selected. Click the
Recipients agent, you can see the successfully imported recipients in the recipient list that you selected. Click the ![]() (Refresh) button if the imported recipients are not immediately displayed.
(Refresh) button if the imported recipients are not immediately displayed.
Related topics
Inxmail Professional:
2 possible use cases
Depending on your contract, you might use Inxmail Professional in different ways:
-
As part of the Inxmail platform: You use newsletters & campaigns as your main tool for creating and sending newsletters. Inxmail Professional only serves as a recipient database and configuration tool in the background.
We are constantly expanding the functionality of “Newsletters & Campaigns”. Check out newsletters & campaigns section to find out if the feature you are looking for might already be available there.
-
Full scope: You use the legacy tool Inxmail Professional as your main tool for creating and sending newsletters.
Did you not find what you were looking for?
-
Send us your feedback.
