You can use the Clicked specific a link? control element to configure a workflow in such a way that recipients who have clicked on a specific link in a mailing pass through another branch of the workflow from those recipients who have not done this.
Prerequisites
Link tracking So that Inxmail Commerce can determine clicks on a link, tracking must be active for the links in the mailing.
![]()
Detailed information can be found in the section Inserting links.
Person-based tracking To be able to use the Clicked a link? control element, or the Clicked specific link? control element either person-based tracking must be activated for your workspace or permission-based tracking must be activated for the particular event. (If necessary, please contact your account administrator to activate person-based or permission-based tracking.)
Detailed information can be found in the section Setting up anonymised or person-based tracking.
Step by step
To use the Clicked specific link? control element in a workflow, proceed as follows:
- In the selection bar, click the event in which you would like to use the Clicked specific link? would like to use the Clicked a link? control element.
The currently active workflow of the event is displayed.
- Click Edit workflow.
You will be directed to the workflow editor.
-
Click the connecting arrow at the place where you would like to insert the Clicked specific link? control element.
Note: The elements Clicked a link? and Clicked specific link? can only be inserted into the workflow after a Wait element.
Only clicks in the period you defined in the Wait element directly in front of the Clicked a link? or Clicked specific link element are evaluated.
The Add item dialog box is displayed.
- Select the Clicked specific link? element type.
-
Select the required link from the drop-down list.
If there are many links in your mailing, you can also use the Find link field to find a specific link.
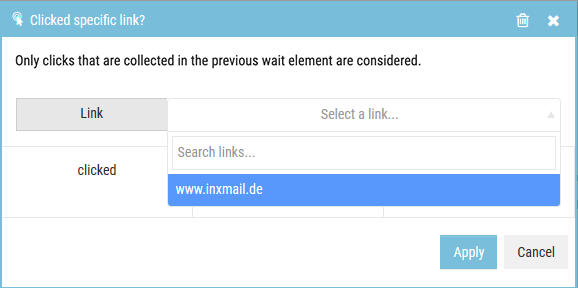
- Click Apply.
-
You return to the workflow editor.
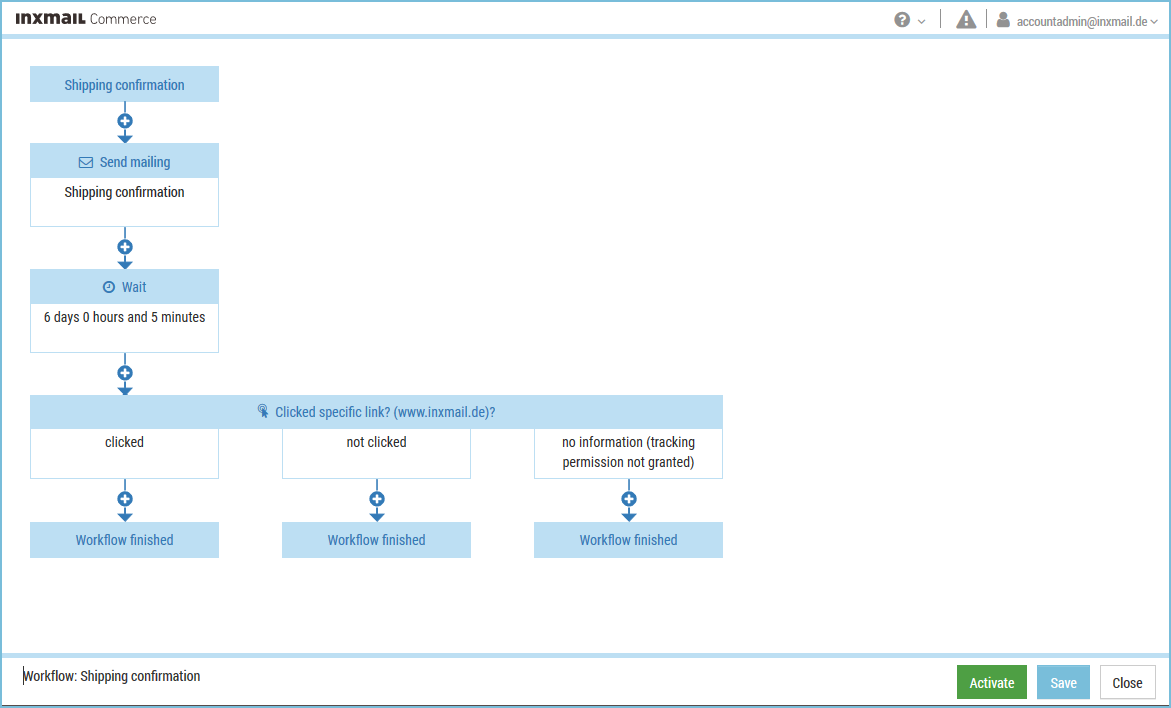
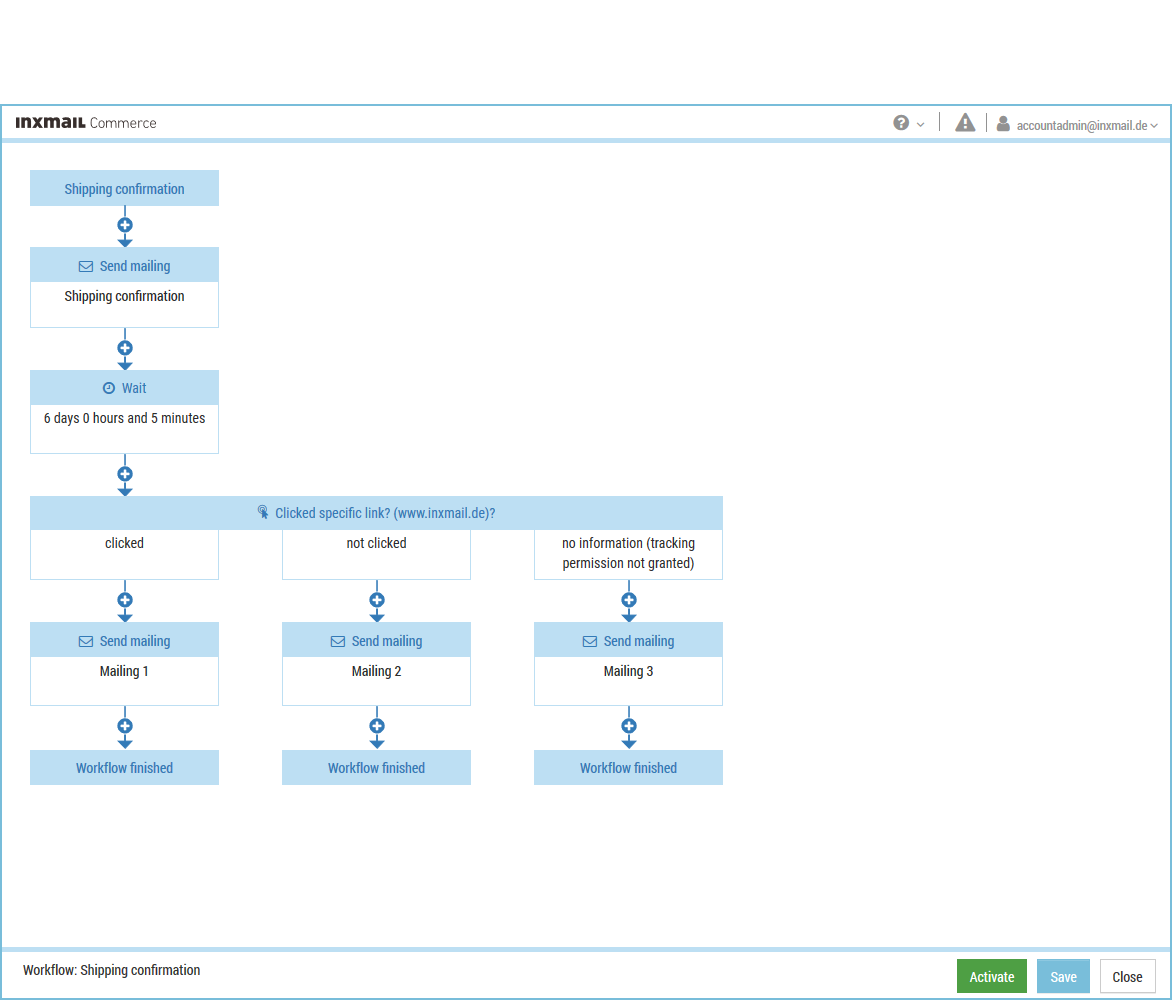
(The screenshot shows the workflow editor for an event where permission-based tracking is activated.)
The control element was inserted into the workflow editor.
The link name is displayed in brackets in the title bar of the control element, for example (www.inxmail.de).

- You have inserted the Clicked specific link? control element into a workflow.
Your next steps
Add the required elements to the individual branches of the workflow. In the screenshot shown below, three different emails are sent.