Outbound messages
In order to ensure technical communication between the user profile in Salesforce and Inxmail Professional Server, it is necessary to specify the Interface User as the user who sends the outbound messages.
Note: The Interface User is the user that was specified in ‘Step 1: App authorisation’ of the Salesforce configuration.
Step by step
Proceed as follows to set up the Interface User as the user for outbound messages:
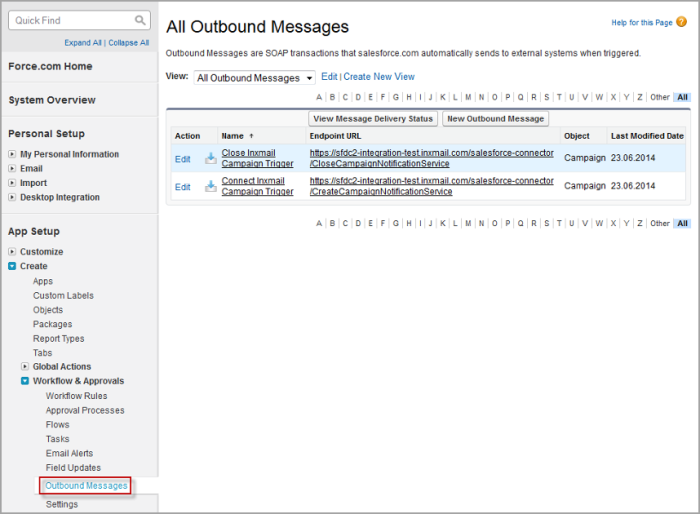
- Go to App setup and select the Outbound Messages menu under Create > Workflow & Approvals.
-
Click Next to skip the Workflow Rules section.
Note: You can select the Do not show this page again check box so that you do not see the page again in the future.
You are directed to the All outbound messages overview, in which two trigger data records are entered.
-
Click Edit beside a data record to see the details of your outbound message.
The Send as user field displays the user used to send the outbound messages.
- Click Lookup send as user (new window) if a user other than the Interface User is entered.
-
Enter an * in the search field and click Go!.
All of the users created and the Interface User are displayed.
- Select the Interface User.
-
The Interface User is automatically entered in the Send as user field.
-
Perform steps 3 to 6 for the second data record.
- You have ensured that the Interface User is entered as the user used to send the outbound messages.
Important: If you have already entered the Interface and the campaign cannot be connected to Inxmail Professional: Check the error messages under Monitor > Outbound messages.

