The Template Editor is the main work area when creating or editing a mailing based on a newsletter template. You are directed to the Template Editor as soon as you have created a mailing or when you open it. You access the first of five workflow steps (![]() Editing workflow step) that need to be completed when creating and sending a mailing.
Editing workflow step) that need to be completed when creating and sending a mailing.
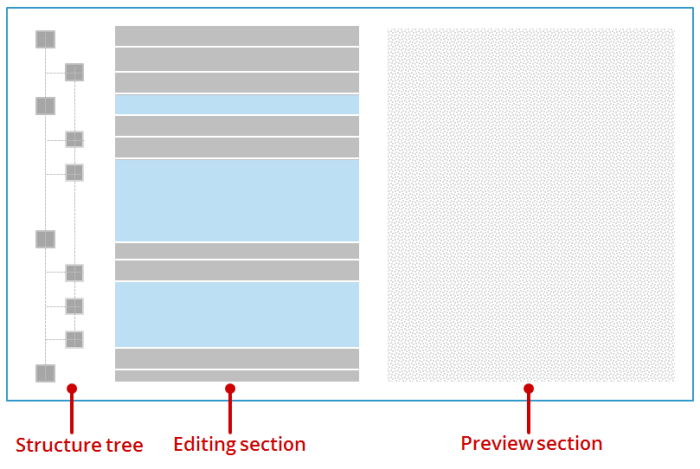
The Template Editor can be subdivided into three main areas: the structure tree, editing area and preview section. Stylised, the Template Editor appears as follows:
The Template Editor also has a toolbar, subject line and further buttons.
The following contains an overview of the functions of the individual areas.
-
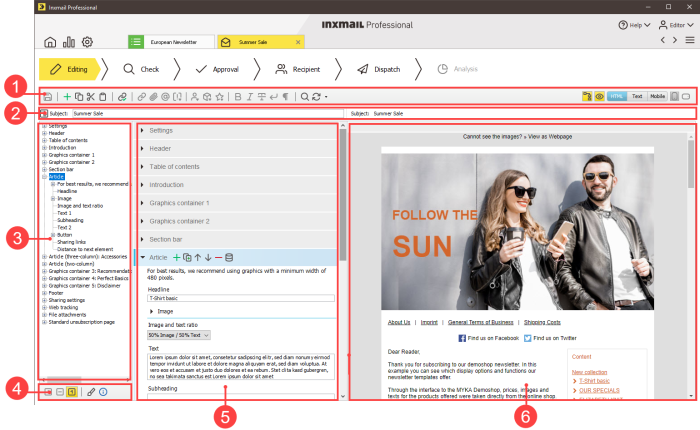
Toolbar (1)
You use the toolbar to edit the content of your mailing (for example, you can insert images, links or symbols).
-
Subject line (2)
You enter the subject of your mailing in the subject line. The mailing name specified beforehand is entered in the subject line by default.
-
Structure tree (3)
In the structure tree, you can select individual elements of the template, as well as open elements (via the
 symbol in front of the element) and close elements (via the
  symbol in front of the element).
Note: If you cannot see the structure tree, click the
 (Show/hide structure tree) button on the toolbar.
 -
Further buttons (4)
Button
Description
 (Expand all elements)
Click this button to expand the structure tree. All elements are opened.
 (Collapse all elements)
Click this button to collapse the structure tree. All elements are closed.
 (Always show only one element expanded)
Click this button if only the main element currently selected should be expanded in the structure tree. All the other elements are automatically collapsed.
 (Change design of the template)
Click this button if you want to change the template design of the current mailing.
-
Editing area (5)
The editing area is your main work area. This is where you enter texts and link images. It is also where you integrate external content into your mailing, if applicable.
Each newsletter template contains predefined template elements that you use to define the content and layout of your mailing. Some of the template elements have already been prefilled with mailing content. At particular places, you can also add or remove elements, as well as move elements.
-
Preview section (6)
The preview section allows you to see an HTML, text or mobile preview of your current mailing.
Note: If you cannot see the preview section, click the
 (Show/hide quick preview) button on the toolbar.
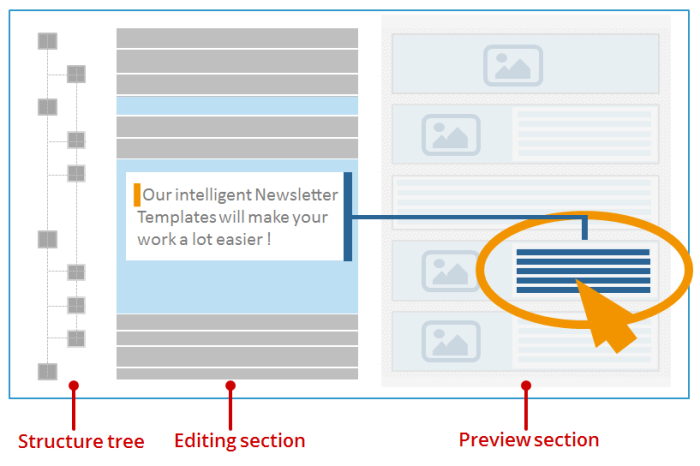
‘Click-to-edit’ – navigating in the editing area
You can navigate from the HTML preview section directly to the corresponding (main) element in the editing area. In the HTML preview section, click the (main) element you would like to edit. Inxmail Professional then positions the cursor at the beginning of the corresponding (main) element in the editing area. At the same time, the (main) element is highlighted in blue and displayed in the visible area of the editing area.
Note: Inxmail Professional can only automatically position the cursor in the editing area for elements that can be edited in the editing area. If, for example, you have inserted a module in the editing area, its content will be displayed in the preview section, but the module content cannot be edited in the editing area. This is only possible in the ![]() Modules agent.
Modules agent.
Similarly, inserted recipient data for personalisation, content from external sources and any components of the newsletter template that have been specially programmed for you cannot be edited.
If you click an element in the HTML preview section that cannot be edited in the editing area, an information message is displayed at the upper edge of the HTML preview section.
Calling up external links in the Template Editor
Press and hold the Ctrl key and click the link, to call up the corresponding target page.
If you click a link without holding the Ctrl key, Inxmail Professional places the cursor in the corresponding element in the editing area (‘Click-to-edit’).


