In order to display an image caption with a link, you must first generate a link in the Text element.
Note: Skip this step if you are familiar with the Inxmail syntax.
You then copy the generated link from the Template Editor and insert it into the optional img_desc HTML parameter.
Step by step
To generate a link in the Text element and then insert it into the optional img_desc HTML parameter, proceed as follows:
- From within the Text element (for example, in the Welcome), click the
 Insert link button in the Template Editor toolbar.
 -
In the Insert link dialog box, select a link type and enter the link address (for example, example.com) and link text (for example, Click here).
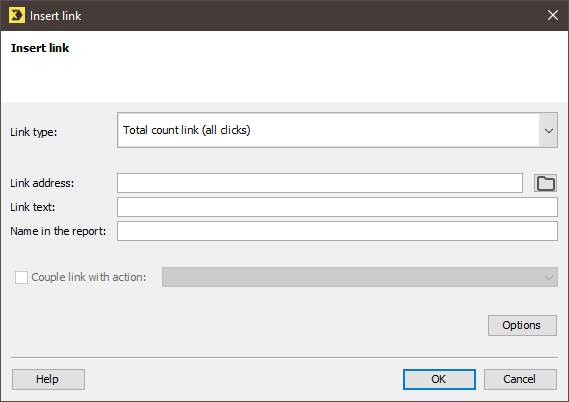
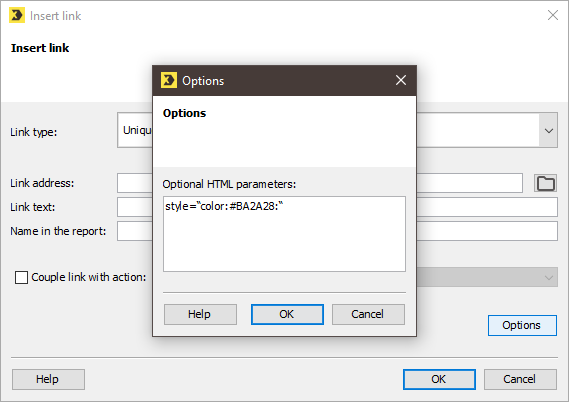
- Click the Optional HTML parameters button if you want to select your choice of text colour for the link.
-
To do this, enter the HTML command style=“color:#COLOUR:“, for example, style=“color:#BA2A28:“, in the Optional HTML parameters field.
-
Confirm your entries by clicking OK.
The link will be inserted into whichever Text element you selected.
-
Now copy the generated link, including the Inxmail syntax, from the Text element
.

Important: You should then delete the link if you do not want it to appear in the text.
- Insert the copied link into the optional img_desc HTML parameter in the usual way.
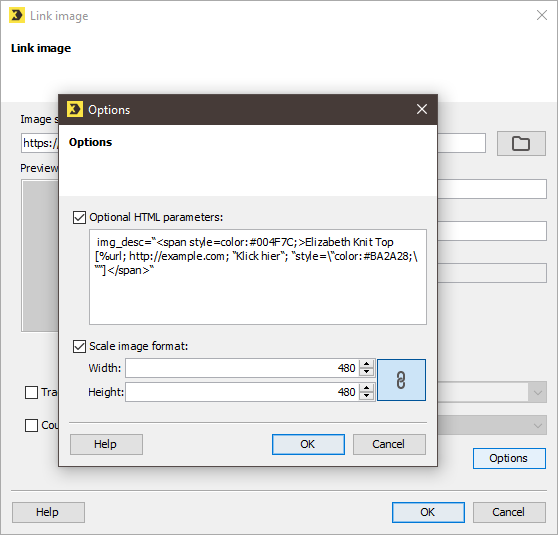
- To do this, open the Image >
 Link image element for which you want to set the image caption.
 - Then click the Options button.
-
Enter the link as follows:
img_desc=“TEXT and [LINK]“, e.g. img_desc=“<span style=color:#004F7C;>Elizabeth Knit Top [%url; http://example.com; “Click here“; “style=\“color:#BA2A28;\““]</span>“
-
Confirm your entries by clicking OK.
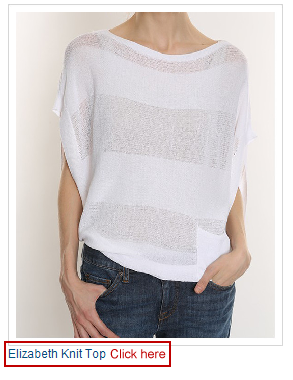
The image now has an image caption with a link. The link text in the caption is red.