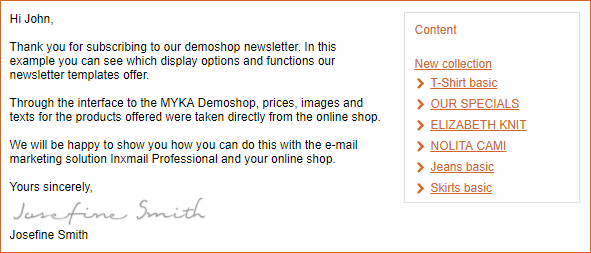
The table of contents provides the reader with a quick overview of the newsletter contents. The reader can also jump directly to an article using links.
In the Advanced Template, you can position the table of contents as desired and make numerous colour and font settings.
Step by step
To create a right-aligned table of contents, proceed as follows:
- Click the Table of contents element in the Template Editor.
- Select the Display table of contents? check box.
-
Use the Table of contents alignment drop-down list to select where you want to position the table of contents.
If you select right or left, the table of contents will be positioned next to the introduction in the mailing. If you select below, the table of contents will be positioned beneath the introduction.
- Enable the Hide categories? check box if there are to be no section headlines displayed in the table of contents.
- Enter a name for the table of contents in the Heading field.
-
Use the
 Add element button to add further elements to the table of contents if necessary.
 Field descriptions for ‘Add element’ dialog box
Element
Description
Colours and fonts
In this element, you set the colours and fonts. You can also link arrow icons as images.
Font settings for text
Here you can select the font, font size and colour, as well as a font style (bold, italic, underline) for the headline.
Font settings for links
Here you can select the font, font size and colour, as well as a font style (bold, italic, underline) for the links in the table of contents.
Article colours
Here you can specify the background colour of the articles, the headline and border, and define the padding.
Arrow icon in front of further links (linked)
Here you can link arrow icons (used as bullet points) as images.
To do this, click the
 Link image button and select an image source.
Hide on mobile devices
Enable the check box if the table of contents should not be displayed on mobile devices.
- Save your entries.
-
You have inserted a table of contents.
Additional information
The table of contents normally comprises the article headlines. The article headlines can however be replaced by short headlines; in other words, the short headline is displayed instead of the headline in the table of contents.
Note: If neither the headline nor the short headline should be visible in the table of contents, leave the Short headline field empty. The entry in the table of contents will be removed.
You can also use subheadlines in articles. The article subheadline is only displayed in the table of contents if no headline exists for the article.

