Step by step
To create a new mailing list, proceed as follows:
-
On the
 (Cockpit) main tab,
  Quick start entry, click the
  New list button.
or
On the
 (Cockpit) main tab,
  List overview entry, click the
  (Create new list) button.
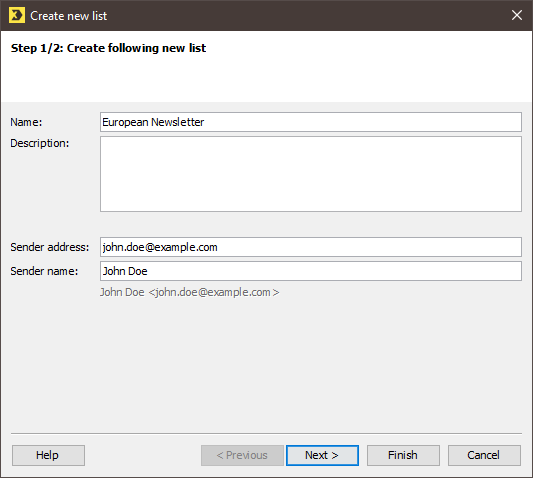
A dialog box appears.
 Field descriptions (‘Create new list’ dialog box)
Name
Description
Name
Enter a name for the mailing list.
Names for various recipient groups, countries or product lines, among others, could be used as the name.
Description
Here, you can enter an internal description for the mailing list. This could include additional information such as detailed information about the recipients or the newsletter campaigns that are usually implemented via this mailing list.
Sender address
Enter the email address that is to be used by default as the sender address for mailings that are sent from this mailing list.
The email address defined here is stored in the advanced properties of the mailing list.
You can change the sender address in the mailing editor for each individual mailing dispatch.
Sender name
Enter the sender name here.
- Specify your settings in the fields.
-
Click Next.
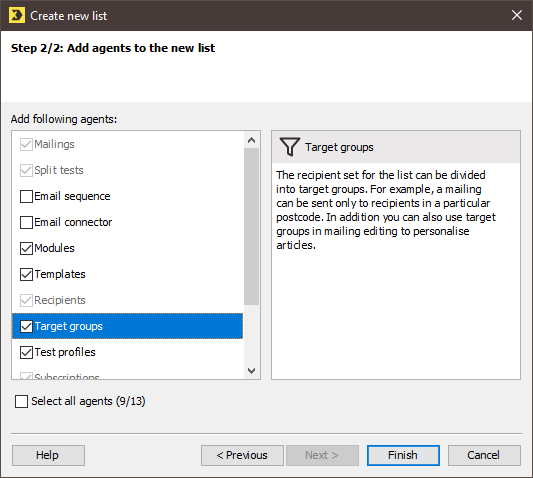
A dialog box appears.
-
In the dialog box, enable the agents that you wish to add to the mailing list.
Description of the agents
- A description of the individual agents can be found on the right-hand side of the dialog box. To see the description, click the name of the agent on the left-hand side of the dialog box.
- When a mailing list is created, the
 Mailings,
  Split tests,
  Recipients,
  Subscriptions and
  Properties agents are always present by default. For this reason, these agents cannot be activated or deactivated in the dialog box.
- You can then add further agents to the mailing list (Adding/deleting additional agents to/from mailing lists).
-
Click Finish.
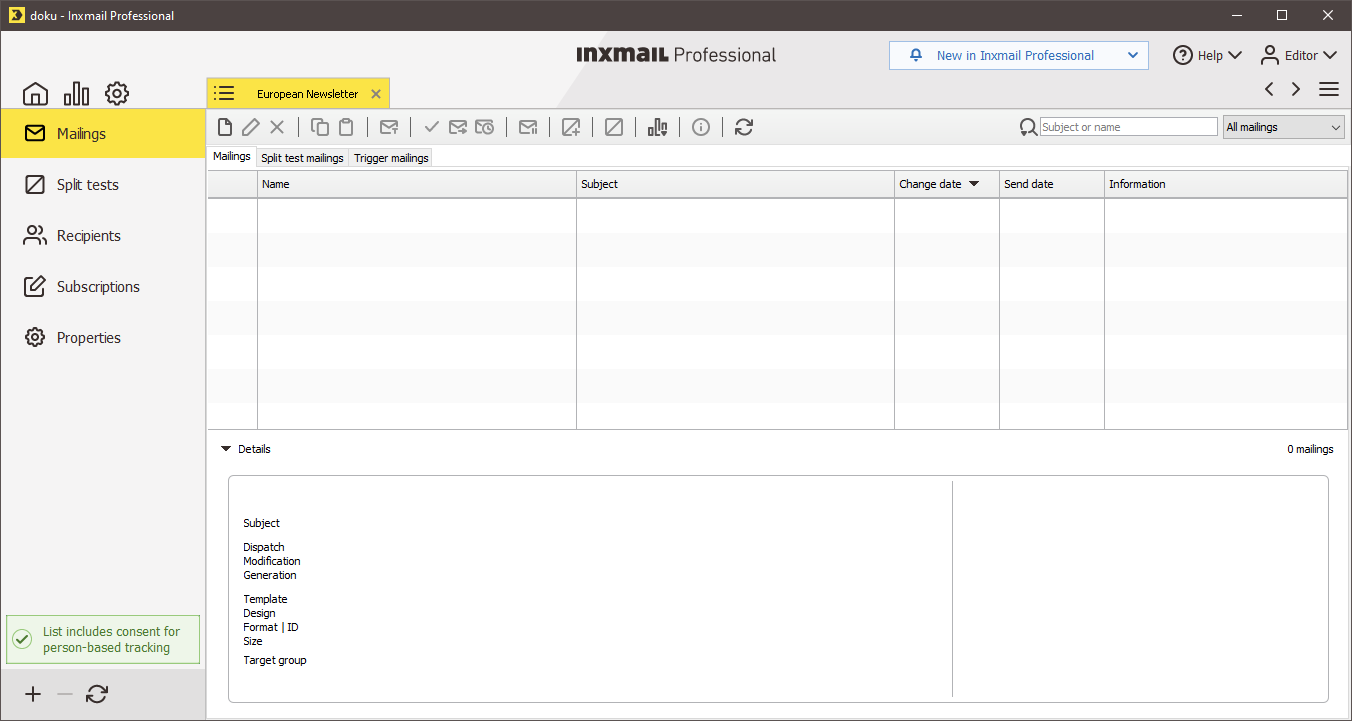
- The newly created mailing list is opened on a tab. It is also added to the list overview.
Inxmail Professional:
2 possible use cases
Depending on your contract, you might use Inxmail Professional in different ways:
-
As part of the Inxmail platform: You use newsletters & campaigns as your main tool for creating and sending newsletters. Inxmail Professional only serves as a recipient database and configuration tool in the background.
We are constantly expanding the functionality of “Newsletters & Campaigns”. Check out newsletters & campaigns section to find out if the feature you are looking for might already be available there.
-
Full scope: You use the legacy tool Inxmail Professional as your main tool for creating and sending newsletters.
Did you not find what you were looking for?
-
Send us your feedback.


