Step by step
To log in to Inxmail Professional using a proxy server, proceed as follows:
- Start Inxmail Professional.
- The first login dialog box is displayed.
- To open the settings section, click Settings.
-
In the Settings section, select the Connect via a proxy server check box and enter the HTTP address and port number of the proxy server in the fields below.
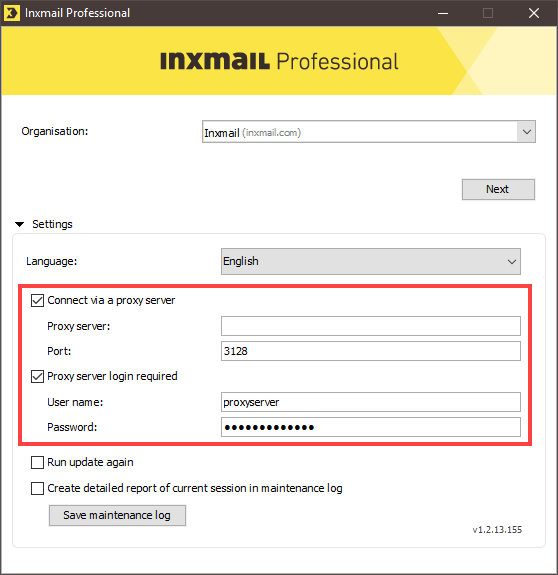
- If you are required to complete an extra login to access the proxy server, select the Proxy server login required check box and enter the user name and password for the proxy server in the fields below.
-
Click Next.
The second login dialog box is displayed.
-
Click Login.
Inxmail Professional starts.
-
You have logged in to Inxmail Professional using a proxy server.
Inxmail Professional saves the proxy server settings on your computer and displays these (irrespective of which client has been selected) in the login dialog box during subsequent logins (from your computer).
Inxmail Professional:
2 possible use cases
Depending on your contract, you might use Inxmail Professional in different ways:
-
As part of the Inxmail platform: You use newsletters & campaigns as your main tool for creating and sending newsletters. Inxmail Professional only serves as a recipient database and configuration tool in the background.
We are constantly expanding the functionality of “Newsletters & Campaigns”. Check out newsletters & campaigns section to find out if the feature you are looking for might already be available there.
-
Full scope: You use the legacy tool Inxmail Professional as your main tool for creating and sending newsletters.
Did you not find what you were looking for?
-
Send us your feedback.
