Note: In the recipient table on the tab of the mailing list > ![]() Recipients agent > Unsubscribed tab, you cannot create any recipient data manually, since the entries there cannot be edited.
Recipients agent > Unsubscribed tab, you cannot create any recipient data manually, since the entries there cannot be edited.
Step by step
- Open the relevant recipient table.
- In the last row of the recipient table (this row is marked with an asterisk), double-click in the ‘email’ column and enter the email address of the new recipient you are creating.
-
To enter further data for this recipient, double-click in the respective column and enter the data.
GDPR When you double-click in the Tracking permission column, a drop-down list is displayed, from which you can select the value
 Yes or
  No for the tracking permission.
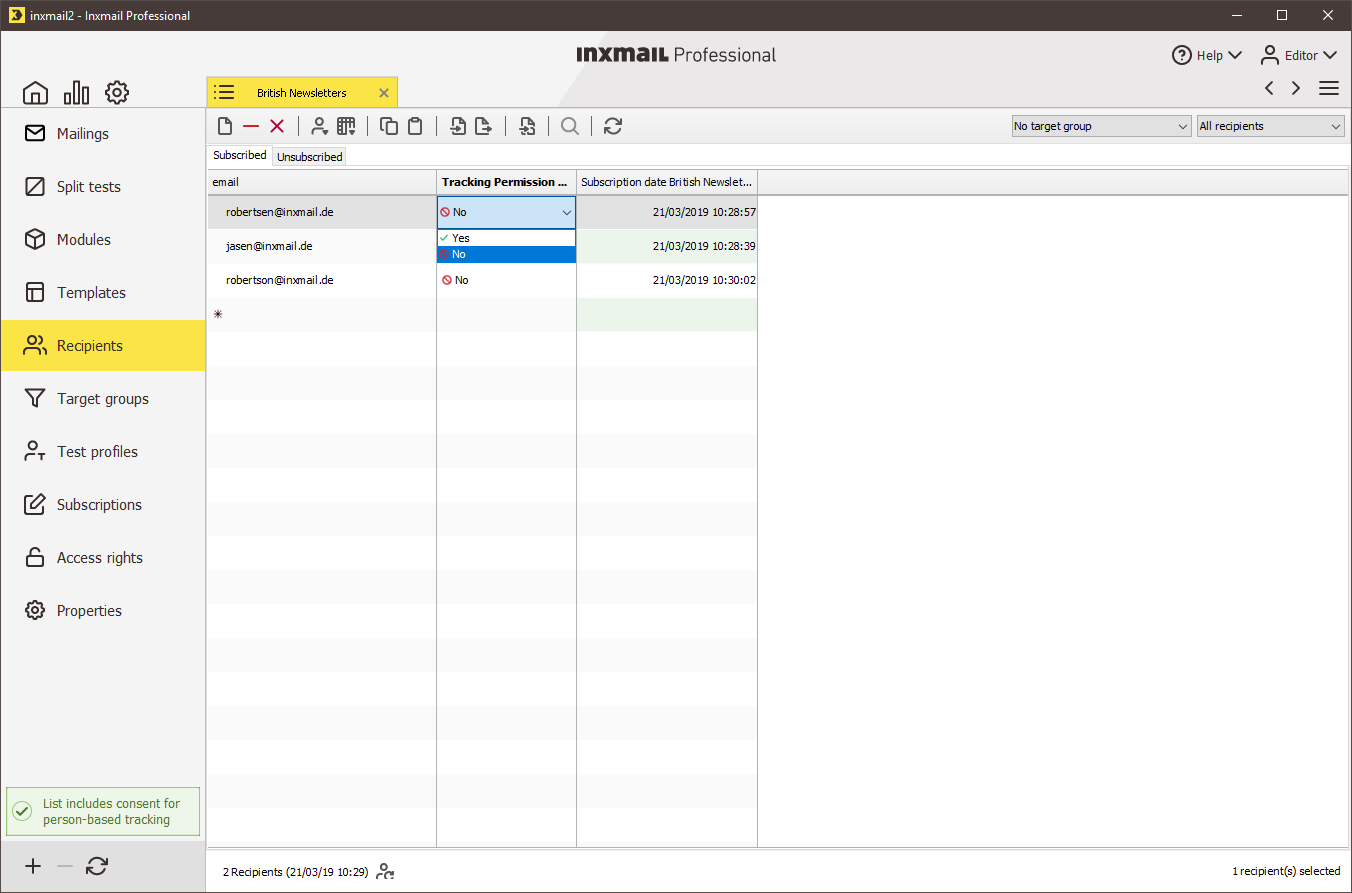
Important: Be aware that you may only set the tracking permission to the value
Yes with the recipient’s explicit consent. You may use person-based tracking for a recipient only if they have granted consent.Note: If you do not specify a value for the Tracking permission column, the default value
No will be set for newly created recipients. No means: You do not have consent to person-based tracking for this recipient and the current list.
-
The new data record is automatically saved. If you created the data in the recipient table of a mailing list, it will be automatically created in the global recipient table and displayed in the current mailing list.
You cannot change recipient data on the tab of the mailing list >
 Recipients agent > Unsubscribed tab.
In all other recipient tables, you can change the recipient data at any time. To do this, double-click in the column and make the change.
Related topics
Inxmail Professional:
2 possible use cases
Depending on your contract, you might use Inxmail Professional in different ways:
-
As part of the Inxmail platform: You use newsletters & campaigns as your main tool for creating and sending newsletters. Inxmail Professional only serves as a recipient database and configuration tool in the background.
We are constantly expanding the functionality of “Newsletters & Campaigns”. Check out newsletters & campaigns section to find out if the feature you are looking for might already be available there.
-
Full scope: You use the legacy tool Inxmail Professional as your main tool for creating and sending newsletters.
Did you not find what you were looking for?
-
Send us your feedback.
