Note: You must have the right to ‘Export and copy recipients’ in order to export recipients.
Step by step
- Open a recipient table.
- In the recipient table, hold down the CTRL key and select the recipients whose data is to be added to the new test profiles (that is, one test profile for each recipient).
- Click the
 (Edit recipient) button and select Create recipient as test profile.
 - Different windows appear, depending on how many recipients you previously selected:
-
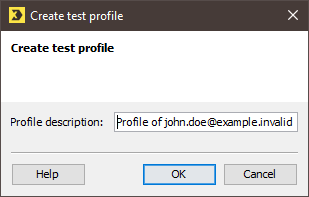
If you only selected one recipient, a dialog box appears.
If required, change the name suggested for the new test profile and click OK to confirm.
-
A message box appears if you selected several recipients.
- Confirm the message by clicking OK.
-
The test profiles are now created.
If you created your test profiles using the recipient table of a mailing list in which the
 Test profiles agent has been added, you can view the new test profiles only in the
  Test profiles agent of the mailing list. Otherwise, you can view the newly added test profiles only on the
  (Global settings) tab >
  Test profiles agent.
Related topics
Inxmail Professional:
2 possible use cases
Depending on your contract, you might use Inxmail Professional in different ways:
-
As part of the Inxmail platform: You use newsletters & campaigns as your main tool for creating and sending newsletters. Inxmail Professional only serves as a recipient database and configuration tool in the background.
We are constantly expanding the functionality of “Newsletters & Campaigns”. Check out newsletters & campaigns section to find out if the feature you are looking for might already be available there.
-
Full scope: You use the legacy tool Inxmail Professional as your main tool for creating and sending newsletters.
Did you not find what you were looking for?
-
Send us your feedback.


