Before you can send an SMS via Inxmail Professional, you must create a mailing of type Text and add the advanced Recipients email header.
Step by step
To create a mailing and send it as an SMS, proceed as follows:
- Open the
 Mailings agent in the mailing list specifically created for your SMS dispatch.
 - On the Mailings tab, click
 Create new mailing.
 - Enter a name for the mailing, for example, Discount campaign.
- Select Text as the mailing format.
-
Confirm your entries by clicking OK.
The mailing is created and opened in the
 Editing workflow step.
 -
By default, the name of the mailing is entered as the subject of the mailing. Therefore, remove the mailing subject, which is ‘Discount campaign’ in our case, and enter the name of the sender instead. This can be the name of the company, for example, Inxmail GmbH.
Note: Using the subject of the mailing as the sender of the SMS may differ depending on the SMS provider and selected configuration.
- Now click
 Add/delete other email headers before the subject of the mailing.
 -
In the drop-down list, select Recipients.
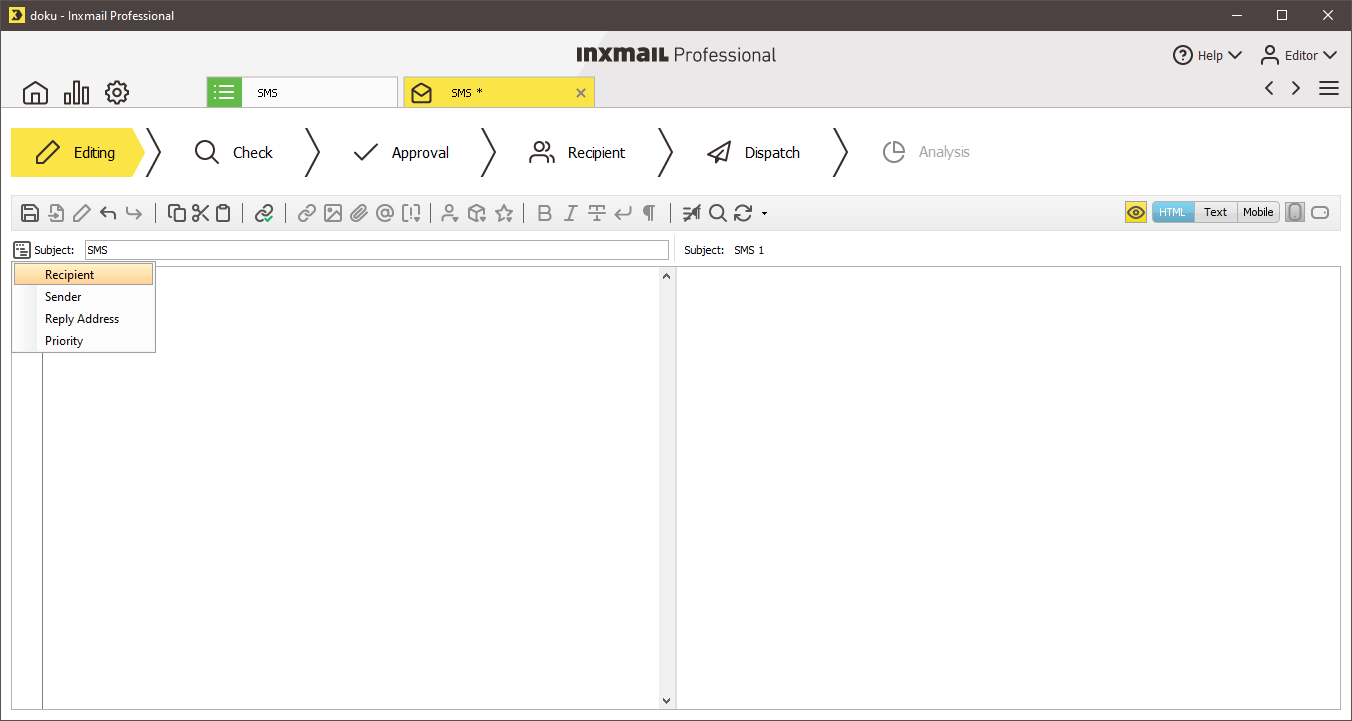
The Recipients email header field is added to the mailing.
Now enter the mobile phone number as personalised text here with the email address of the gateway provider of your SMS provider in the following format: .com
- To do this, click
 Insert recipient data for personalization in the Recipients email header field.
 -
Select the recipient table column that contains the destination phone numbers, for example, Mobile phone numbers in the drop-down list.
The Adapt field content dialog box opens.
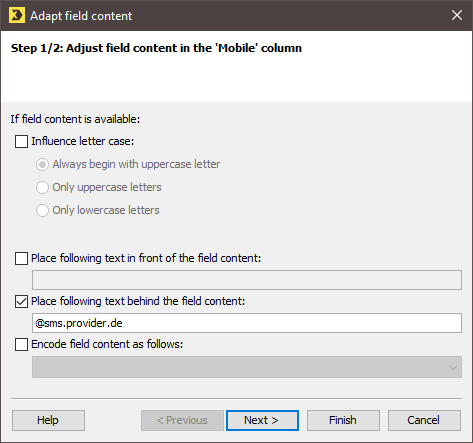
- In Step 1/2: Adjust field content in the ‘Mobile phone numbers’ column, select the Place following text behind the field content check box.
-
In the Place following text behind the field content field, enter the gateway provider of your SMS provider in the following format:
This ensures that the additional information of the gateway provider is added to the destination phone number of your recipients.
- Confirm your entries by clicking Next.
-
In Step 2/2: Adjust field content in the ‘Mobile phone numbers’ column, select the Do not send an email to the recipient check box.
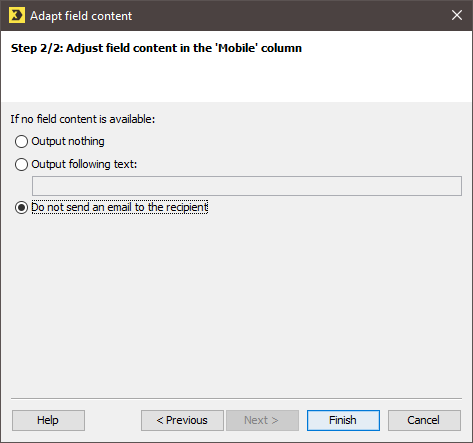
In this case, the recipient will not receive an SMS if a destination phone number has not been defined in the ‘Mobile phone numbers’ recipient table column.
-
Confirm your entries by clicking Finish.
The details are added to the Recipients email header field.
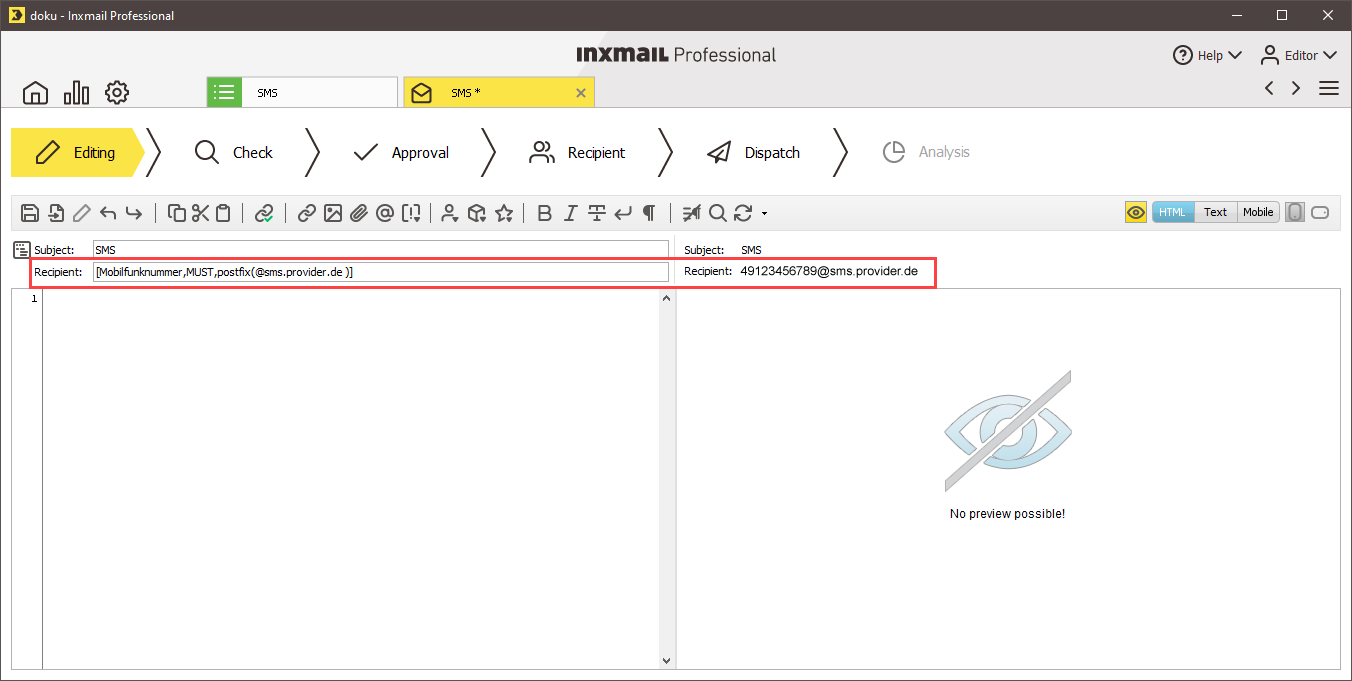
- Compose the message that you want to send to your recipients in the mailing editor.
-
Afterwards, carry out the check and approval in the usual way and then send your mailing.
The mailing will be sent to the provider of your ‘Email to SMS Gateway’ provider and converted into an SMS. Here, the mobile phone number is read from the advanced email header field (for example, 4917612345678) and used as the recipient of the SMS. The name entered in the subject, for example, Inxmail GmbH is used as the sender of the SMS.
- You have created a mailing and sent it to the provider of your Email to SMS Gateway provider. After the mailing has been converted into an SMS, the message is sent to all your recipients.
Inxmail Professional:
2 possible use cases
Depending on your contract, you might use Inxmail Professional in different ways:
-
As part of the Inxmail platform: You use newsletters & campaigns as your main tool for creating and sending newsletters. Inxmail Professional only serves as a recipient database and configuration tool in the background.
We are constantly expanding the functionality of “Newsletters & Campaigns”. Check out newsletters & campaigns section to find out if the feature you are looking for might already be available there.
-
Full scope: You use the legacy tool Inxmail Professional as your main tool for creating and sending newsletters.
Did you not find what you were looking for?
-
Send us your feedback.
