Step by step
To integrate external content into a mailing using Send time content, proceed as follows:
- Open the mailing in the
 Editing workflow step.
 -
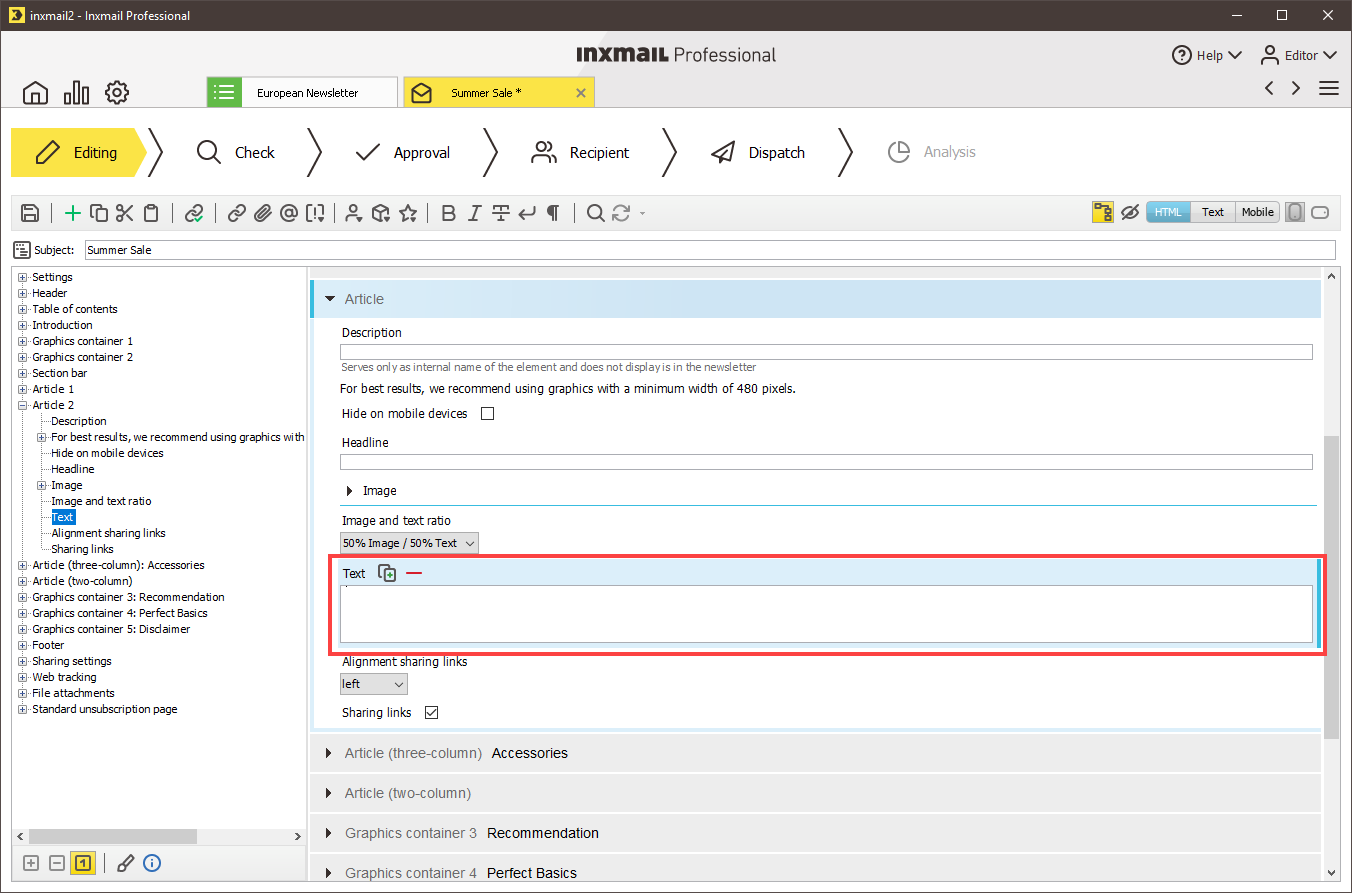
Click the position in the content area of the mailing where you want to integrate the external content.
In a mailing based on an Inxmail Smart Template, this will normally be a text element.
- Click the
 (Insert commands) button.
 -
In the drop-down list, select
 Integrate content.
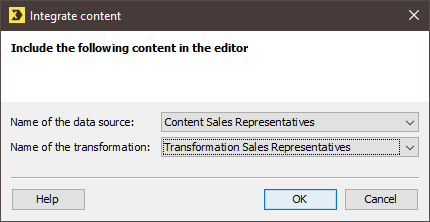
The Integrate content dialog box is displayed.
 Field descriptions for ‘Integrate content’ dialog box
Name
Description
Name of the data source
Select the desired data source.
Name of the transformation
This list box is only enabled if the Insert as text after transformation (XML) option was selected for the data source.
Select the desired transformation. There may be several transformations for a data source.
-
Confirm your entries by clicking OK.
Depending on the data source and transformation, the following commands and parameters are inserted at the corresponding place in the mailing:
-
HTML content
[%content-include("Name of data source")]
-
XML content with transformation
[%content-include("Name of the data source");xslt("Name of the transformation")]
-
XML content with transformation and personalisation
[%content-include("Name of the data source");xslt("Name of the transformation");$parameter=]
The parameter(s) are displayed at the end of the command. You must enter the parameter values manually.
- Save the mailing.
-
You have integrated external content into your mailing using Send time content.
The quick preview (
 (Show/hide quick preview) button) allows you to view the external content.
Inxmail Professional:
2 possible use cases
Depending on your contract, you might use Inxmail Professional in different ways:
-
As part of the Inxmail platform: You use newsletters & campaigns as your main tool for creating and sending newsletters. Inxmail Professional only serves as a recipient database and configuration tool in the background.
We are constantly expanding the functionality of “Newsletters & Campaigns”. Check out newsletters & campaigns section to find out if the feature you are looking for might already be available there.
-
Full scope: You use the legacy tool Inxmail Professional as your main tool for creating and sending newsletters.
Did you not find what you were looking for?
-
Send us your feedback.


