Step by step
-
Click the
 (Global settings) tab >
  Inbox & bounces agent > Bounces tab.
All the bounces received after your mailing has been dispatched appear in the table. The following information is displayed for each bounce:
- Category: Inxmail Professional automatically assigns each bounce to a category (soft and hard bounces, unknown bounces, spam bounces and autoresponder bounces)
- Recipient to whom the mailing was sent
- Sender and subject of the bounce
- Date on which the bounce was received by Inxmail Professional
-
Size of the bounce email
Further information is displayed below the table (for example, header information such as the corresponding list or mailing) when you select a bounce in the table.
-
Click the Filter button to filter the bounces displayed in the table.
The filter section opens.
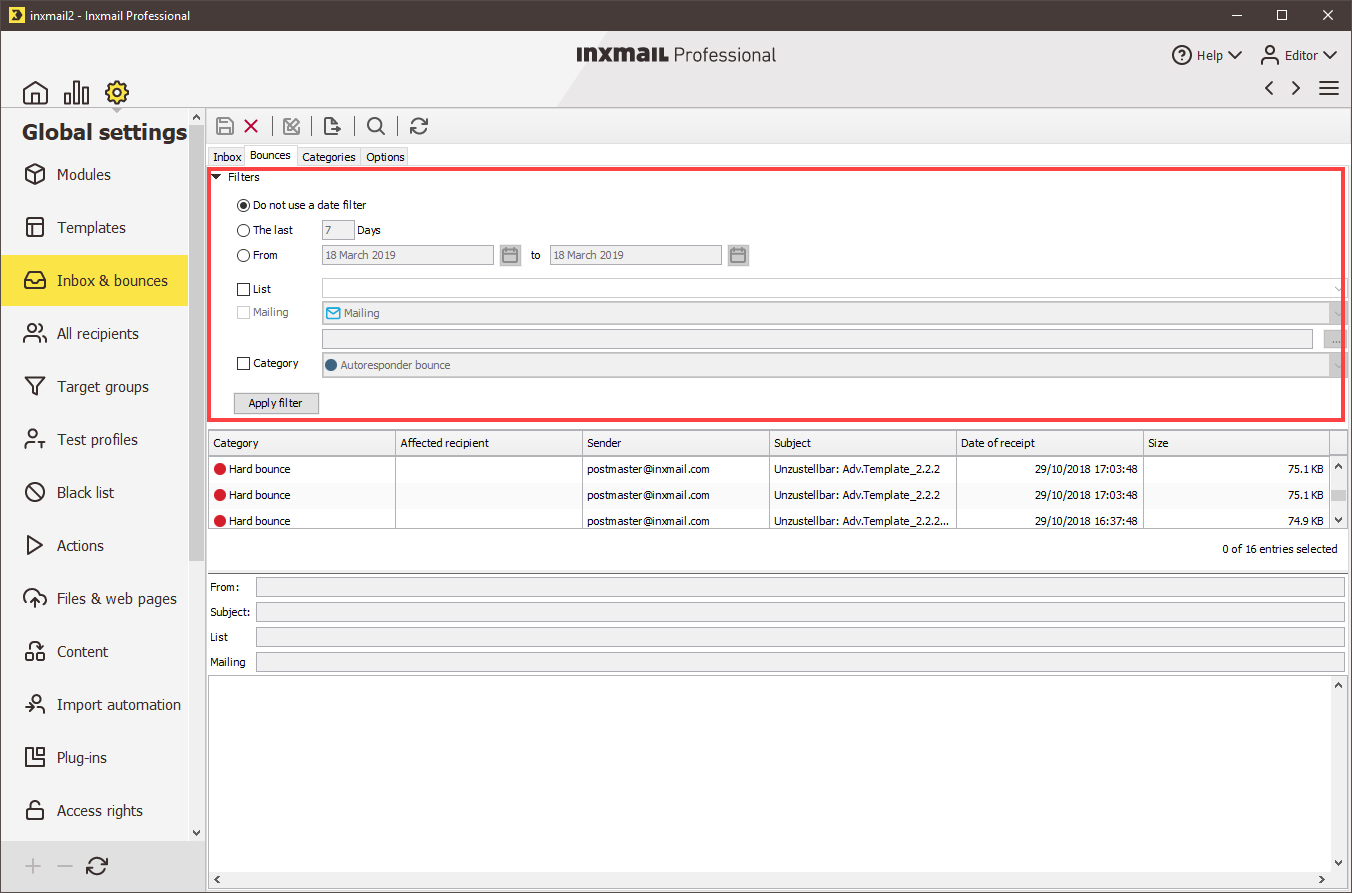
You can set one or more of the following filters:
- Filter bounces by date (the table should only display bounces that occurred in the last ‘X’ days or in a particular time period).
- Filter bounces by category (the table should only display bounces in a particular category, for example, hard bounces).
- Filter bounces by list or mailing (the table should only display bounces that occurred for a specific mailing list or for a particular mailing in the mailing list).
Important: Ensure that you have activated the VERP function so that your bounces can be split up according to your mailing lists. Contact your Inxmail Professional administrator.
- Click Apply filter to apply your filter settings.
- The table now contains only the bounces that match your filter settings.
Inxmail Professional:
2 possible use cases
Depending on your contract, you might use Inxmail Professional in different ways:
-
As part of the Inxmail platform: You use newsletters & campaigns as your main tool for creating and sending newsletters. Inxmail Professional only serves as a recipient database and configuration tool in the background.
We are constantly expanding the functionality of “Newsletters & Campaigns”. Check out newsletters & campaigns section to find out if the feature you are looking for might already be available there.
-
Full scope: You use the legacy tool Inxmail Professional as your main tool for creating and sending newsletters.
Did you not find what you were looking for?
-
Send us your feedback.
