Step by step
Open the Add condition dialog box as follows:
- Open the mailing in the
 Editing workflow step.
 - Click the position in your mailing where you would like to insert the conditional text.
-
Click the
 Insert commands button and select the
  Add condition (if/else) entry.
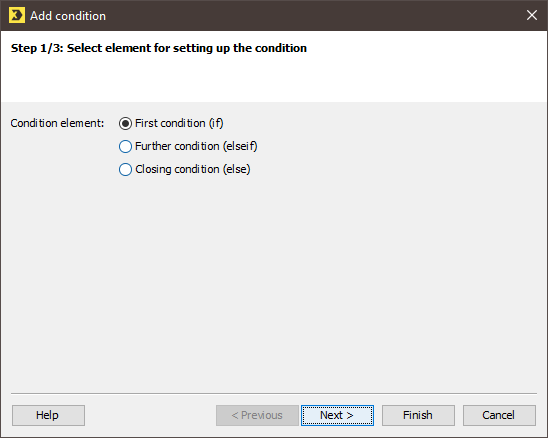
Step 1/3: Select element for setting up the condition of the Add condition dialog is displayed.
-
In the dialog box, select the First condition (if) option.
Note: If you have already added a condition, you can also select the Further condition (elseif) or Closing condition (else) option.
-
Click Next.
You will be directed to Step 2/3: Select type of condition.
-
In the dialog box, select the section to which the new condition is to apply from the Condition for drop-down list:
Entry
Description
Column value
Used to display text only for recipients with a particular entry in a column in the recipients table (for example, if the text in the salutation should be dependent on the value entered in the Gender column of the recipients table)
Recipient reaction
Used to only display text to recipients which have (prior to dispatch of this mailing) carried out a particular action (such as clicking a link).
Note: To use this type of condition, you require the consent of your recipients. This means you can only use this type of condition if the appropriate property rights have been activated in your system (that is, in the Inxmail Professional administration section).
Mailing dispatch
Used to only display text to recipients who have previously received a particular mailing or a certain number of mailings.
Dispatch interruption
Used to only display text to recipients who have not received one or several mailings as a result of a dispatch interruption.
Particular target group
Used to only display text to recipients assigned to a particular target group (Creating target groups).
Free condition expression
Used to create a personalised conditional expression through which text is assigned to recipients.
- Click Next.
- If you selected the Condition on column value option, specify the following additional information in the dialog box:
- In the recipient table, select the column to which the condition is to apply (for example, the Gender column) and click Next to confirm.
- In Step 3/3: Specify comparison value for the condition, specify the relational operator and the comparison value (e.g., specify the ‘equal to’ operator and the value ‘m’ for male to only display the text for male recipients).
- If you selected the Condition on recipient reaction option, specify the following additional information in the dialog box:
- Select the recipient reaction to which the condition is to apply (for example, the Has clicked a particular link (HasClicked, HasClickedContent) option) and click Next to confirm.
- In Step 3/3: Specify reference mailing for the condition, specify the mailing list and the mailing to which the recipient reaction applies.
- If you selected the Condition on mailing sent option, specify the following additional information in the dialog box:
- Select the mailing dispatch to which the condition is to apply (for example, the Was a particular mailing successfully received option) and click Next to confirm.
- In Step 3/3: Specify reference mailing for the condition, specify the mailing list and the mailing to which the mailing dispatch applies.
- If you selected the Dispatch interruption option, specify the following additional information in the dialog box:
- Select the dispatch interruption to which the condition is to apply (for example, the The recipient did not receive a specific mailing due to a dispatch interruption option) and click Next to confirm.
- In Step 3/3: Specify reference mailing for the condition, specify the mailing list and the mailing to which the dispatch interruption applies.
- If you selected the Existing target group option, specify the following additional information in the dialog box:
- Move the target groups to which the condition is to apply to the Selected target groups section.
- In the Recipients: drop-down list, specify whether the recipients (for whom the text is to be displayed) must belong to each, to at least one or to none of these target groups.
- If you selected the Free condition expression option, specify the relevant condition expression in the dialog box under Free condition expression.
- Confirm your settings in the dialog box by clicking Finish.
- Click the mouse pointer between the [%if] and [%endif] commands.
- Then specify what should happen if the condition applies (for example, add the text ‘Dear Ms’, if this text should be displayed in this case).
-
To add further conditions, click at the end of the last condition (for example, behind the text ‘Dear Ms’), and then repeat steps 1 to 7 (above).
To specify a condition that applies if all other conditions do not apply, for example, select the Further condition (elseif) option in step 2.
 Example
Display different images in the mailing content, depending on the sport interests of the recipient:
Copy[%if Column("Sportinterest")="Tennis"]
<img src="[%url; "http://www.company.de/tennis.gif"]"border="0"/>
[%elseif Column("Sportinterest")="Sailing"]
<img src="[%url; "http://www.company.de/sailing.gif"]"border="0"/>
[%else]<img src="[%url; "http://www.company.de/landscape.gif"]"border="0"/>
[%endif] - Save your entries.
-
You have successfully added a condition. The quick preview (
 (Show/hide quick preview) button) shows the conditional text for the recipient currently selected in the
  Check workflow step using the Check content button.
To include a reminder text for recipients whose subscription will expire within 30 days, you can use the ‘DateDiff(#Date1#, #Date2#)’ function (Date functions). This function allows you to calculate the interval between two specified dates. The function subtracts the first date from the second and determines the difference in days.
Insert the following into your mailing:
[%if DateDiff(<SubscriptionEnd>, Date())<30] Renew your subscription. [%endif]In this function, ‘SubscriptionEnd’ stands for the column of the same name in the recipients table. The data type of this column must be ‘Date’. Date() is always the current date. If the result of the function is less than ‘30’, the text ‘Renew your subscription’ will appear.
-
If you want to specially address new subscribers in a monthly mailing to the "test" mailing list, insert the ‘SubscriptionDate("ListName")’ function (Recipient functions). The function will return the subscription date for the specified mailing list.
Insert the following into your mailing:
Copy[%if Month(SubscriptionDate"test"))=Month(Date())] Welcome to your first issue of the newsletter. [%endif]Only recipients who registered in the current month will see the "Welcome to your first issue of the newsletter." text.
-
If you allow recipients to update their recipient profile themselves through profile management (JSP "Profile management" template), you can define that all recipients whose records have not been updated since 20 April 2007 should receive a text block with the following content: "Please update your profile regularly.". This can be achieved using the "LastModificationDate()" function (Recipient functions).
Insert the following into your mailing:
Copy[%if LastModificationDate()< #20.04.2007 0:00:00#] Please update your profile regularly.[%endif]
Related topics
Inxmail Professional:
2 possible use cases
Depending on your contract, you might use Inxmail Professional in different ways:
-
As part of the Inxmail platform: You use newsletters & campaigns as your main tool for creating and sending newsletters. Inxmail Professional only serves as a recipient database and configuration tool in the background.
We are constantly expanding the functionality of “Newsletters & Campaigns”. Check out newsletters & campaigns section to find out if the feature you are looking for might already be available there.
-
Full scope: You use the legacy tool Inxmail Professional as your main tool for creating and sending newsletters.
Did you not find what you were looking for?
-
Send us your feedback.
