Apple Mail Privacy Protection: If your recipients have Apple Mail Privacy Protection enabled, the email client will automatically download all the images contained in your mailing (including tracking pixels) after they receive it. Since openings in email marketing can only be recorded indirectly through the mailing images being downloaded, manual openings cannot be recorded if they are opened at a later date.
As of version 4.8.35, Inxmail Professional counts these automatic image downloads as not being opened in the metrics based on openings.
Conditions can be made contingent upon how a recipient reacts to mailings sent and any links included in these mailings. When creating a condition you can use the inclusion or exclusion method. This means you can choose whether the condition is based on whether or not a reaction was triggered. You can also fine-tune conditions by restricting reaction in terms of time and/or to specific lists.
The following options are available in terms of recipient reactions to mailings:
|
Conditions for mailings |
|
|---|---|
|
Recipient – has not |
opened a specific mailing. |
|
opened a particular mailing (particular sending period). |
|
|
opened any mailing from a particular list (particular sending period). |
|
The following options are available in terms of recipient reactions to links:
|
Conditions for links |
|
|---|---|
|
Recipient – has not |
clicked any link in a specific mailing. |
|
clicked a specific link in a specific mailing. |
|
|
clicked any link in a particular mailing (particular sending period). |
|
|
clicked a link in a mailing from a particular list (particular sending period). |
|
Step by step
- Open the relevant target group in the
 Editing workflow step.
 -
Click the
 (Add condition) button.
The Add condition dialog box is displayed.
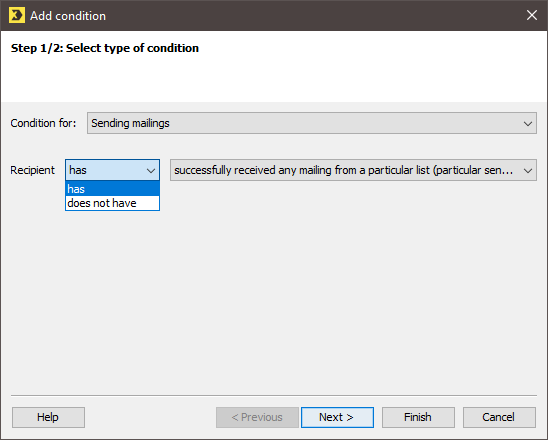
- Select Recipient reaction from the Condition for drop-down list.
- Select the relevant recipient reaction, for example, clicked any link in a particular mailing (particular sending period) in the dialog box.
-
Click the Next button.
A dialog box appears.
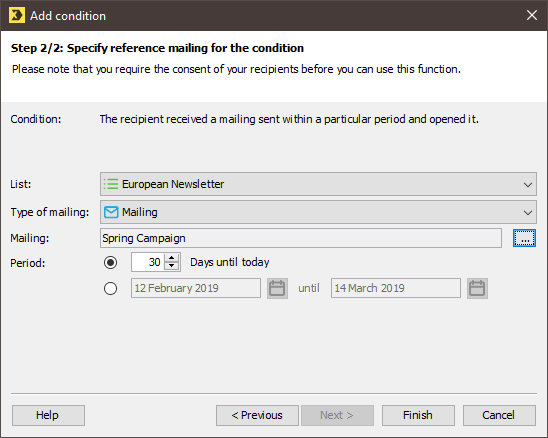
Note: The fields displayed in the dialog box depend on the recipient reaction previously selected. For example, if you have selected a time-related recipient reaction, the Period field with the relevant options will be displayed.
- Enter the relevant information.
- Confirm your settings in the dialog box by clicking Finish.
- Save your entries.
- You have now added a condition to your target group.
Inxmail Professional:
2 possible use cases
Depending on your contract, you might use Inxmail Professional in different ways:
-
As part of the Inxmail platform: You use newsletters & campaigns as your main tool for creating and sending newsletters. Inxmail Professional only serves as a recipient database and configuration tool in the background.
We are constantly expanding the functionality of “Newsletters & Campaigns”. Check out newsletters & campaigns section to find out if the feature you are looking for might already be available there.
-
Full scope: You use the legacy tool Inxmail Professional as your main tool for creating and sending newsletters.
Did you not find what you were looking for?
-
Send us your feedback.
