To ensure a new user can log into Inxmail Commerce, the user must first be created by an Account administrator. Only email addresses can be used as users.
After the user has been set up, the user automatically receives an email with their login details. These include, among other things, a one-time password that must be changed by the user when they log in for the first time. The email also includes a link to the workspace to which the user has access.
Note: The user will be prompted to change their password the first time they log into Inxmail Commerce. After changing the password, the user will have to log in again.
Prerequisites
You have the Account administrator user role.
Step by step
To create a new user, proceed as follows:
- Select the menu item in the navigation bar.
The functional areas for which you can specify settings are displayed in the selection bar.
Note: The selection of functional areas displayed will depend on your user role.
- Click User management.
You will be directed to the User management page.
- Click + New user.
You will be directed to the Create new user page.

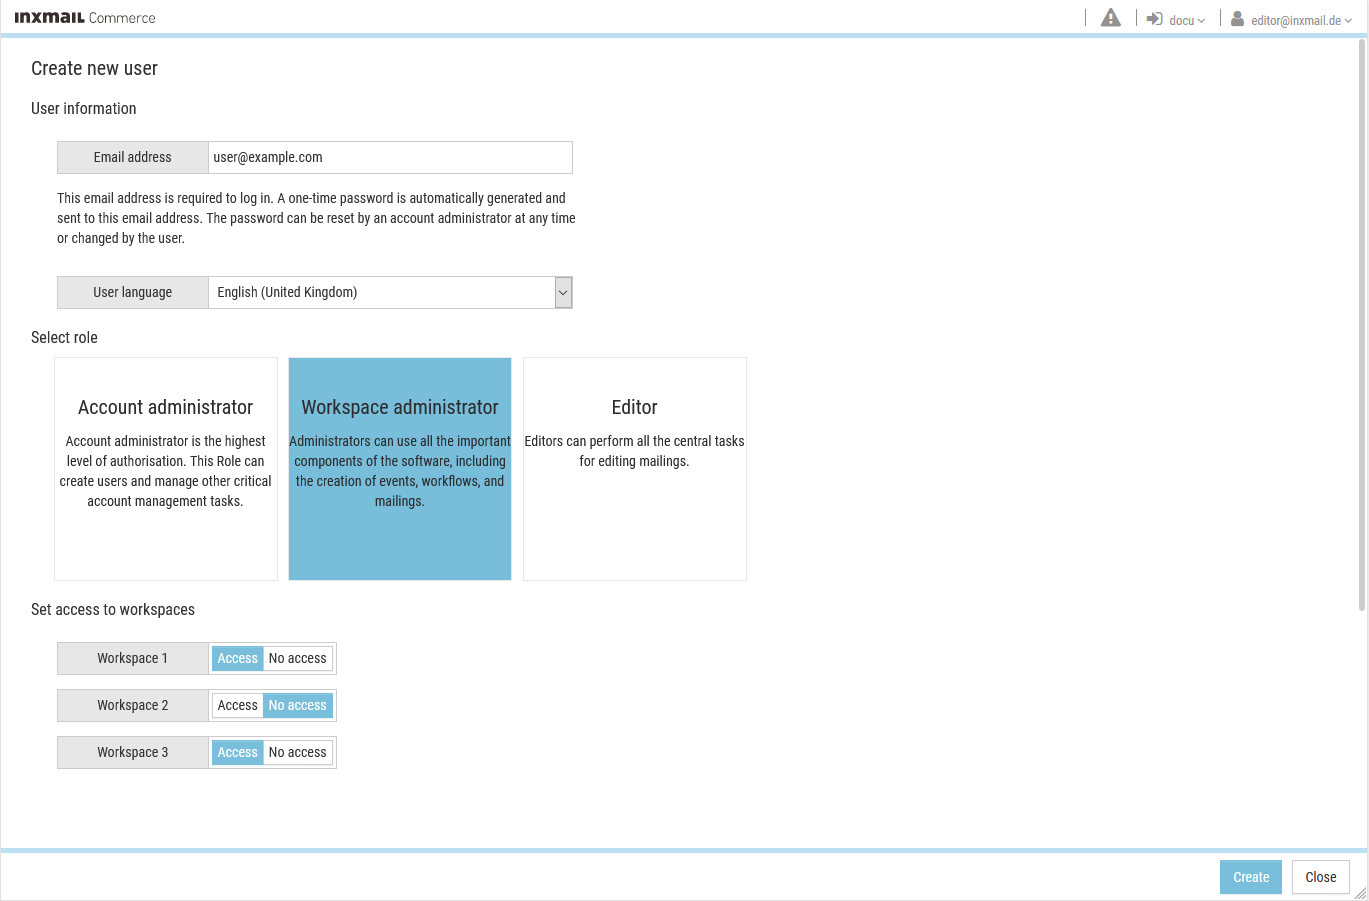
 ‘Create new user’
Section
Description
User information
Email address
Enter the user’s email address. After the user has been created, an email with the login details is sent to this email address.
Note: In Inxmail Commerce, only email addresses can be used as users or for logging in.
User language
You use the user language to set the language of the user interface and the country-specific date and number formats.
The user language can be changed at any time later by the user themselves or by the Account administrator.
(See section Setting your user language.)
Select role
Select the Account administrator, Workspace administrator or Editor role by clicking the corresponding tile.
(Detailed information on the individual user roles can be found in the section Overview – user roles and user rights.)
Define access to workspace
Select the workspace(s) to which the user is to have access.
- Click Create.
This takes you back to the User management page.
The new user is displayed in the table of users.
- You have now created a new user.
The user automatically receives an email with their login details.

